How to Configure OAuth for Exploratory Collaboration Server to Connect to Google Sheets, Analytics, and BigQuery
This Note explains how to configure Exploratory Collaboration Server, so that you can connect to Google Sheets, Google Analytics, and Google BigQuery, with the same experience as with exploratory.io
With this configuration, you will be able to do the following things.
- Import data from Google Sheets, Google Analytics, and Google BigQuery into Exploratory Desktop connected to your Collaboration Server.
- Schedule refreshing of imported data from Google Sheets, Google Analytics, and Google BigQuery on your Collaboration Server.
- On Dashboards hosted on your Collaboration Server, dynamically query data from BigQuery by changing values of Parameters embedded in the SQL.
Prerequisites
The prerequisites to connect to Google Sheets, Google Analytics, and Google BigQuery with your Collaboration Server are as follows.
- Your ownership of the domain to use is verified by Google.
- Users use Google Apps account to access Google Sheets, Google Analytics, and/or Google BigQuery.
- The Collaboration Server has a host name.
- The Collaboration Server is set up with SSL (HTTPS).
- The version of Collaboration Server must be 5.5.4 or above.
- The version of Exploratory Desktop must be 5.5.4 or above.
Steps for Configuration
There are 3 steps in this configuration.
- Configure SSL (If it is not done yet.)
- Register your Collaboration Server to Google
- Configure Collaboration Server
The following sections explains each step.
1. Configure SSL (HTTPS)
Configure SSL (HTTPS) for the Collaboration Server following instructions in this Note, if it has not done yet.
2. Register your Collaboration Server to Google
To make your Collaboration Server work with Google's services, you need to register your Collaboration Server as an App at Google APIs.
Verify your ownership of the domain with Google
Verify your ownership of the domain with Google, from this page of Google, if it has not been done yet.
It is necessary that the ownership of domain you use is verified by Google, to make use of Google's services through OAuth.
For example, if you are to host Collaboration Server at collabserver.yourcompany.com, the ownership of the domain yourcompany.com must be verified by Google.
Open Google APIs Admin Page
Open the admin page of Google APIs from this link. Login with your Google Apps account.
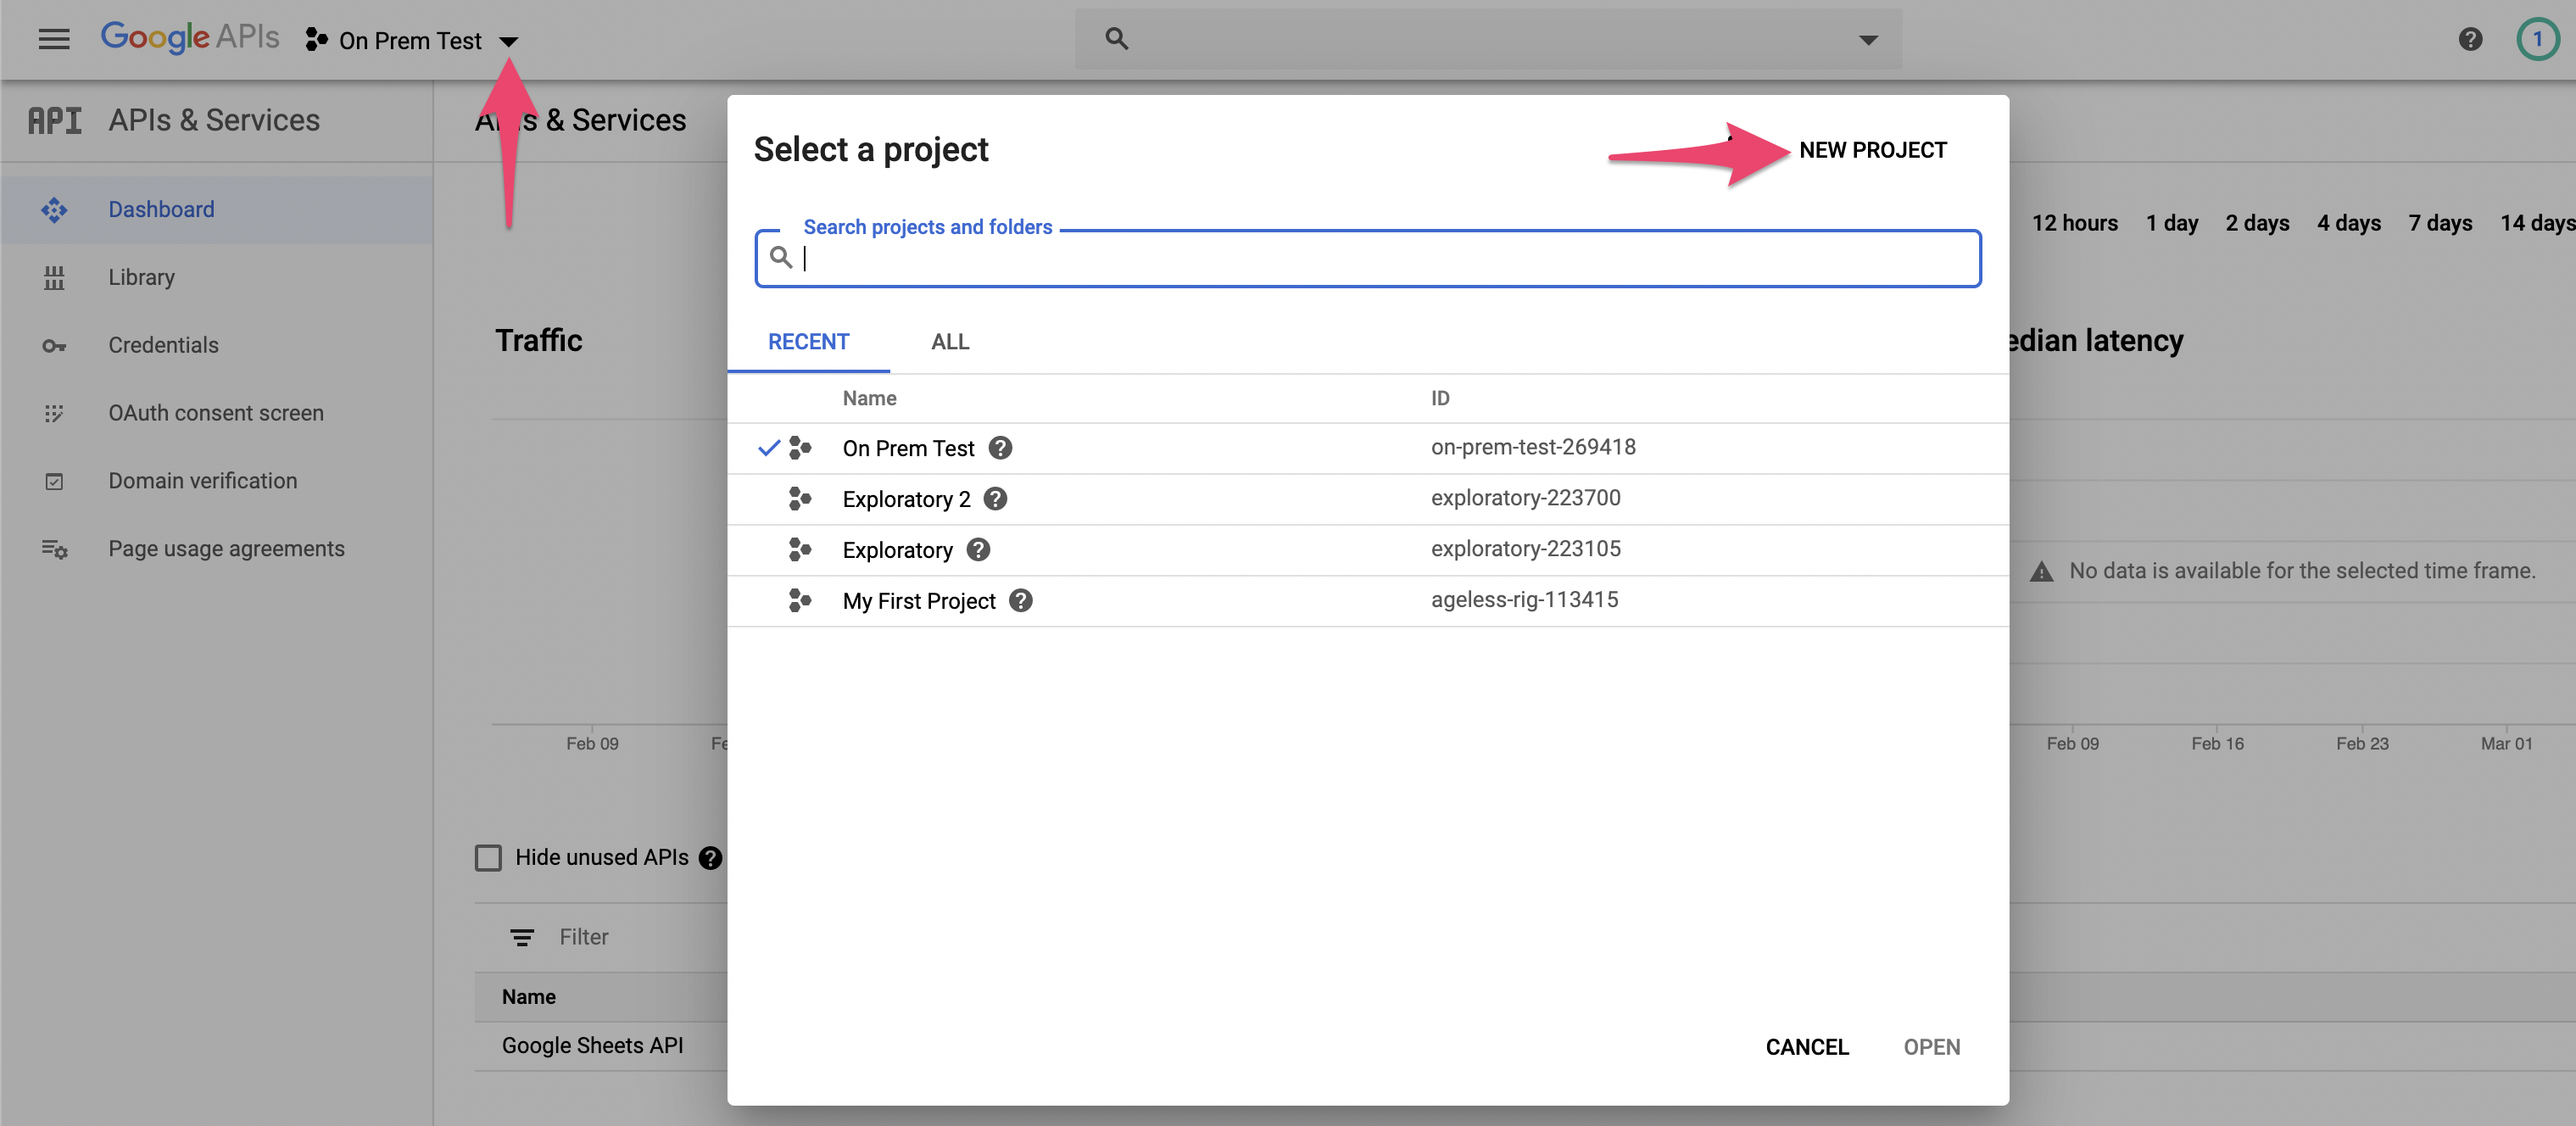
Create a Google APIs Project
As shown in the screenshot below, click the NEW PROJECT link on the project list dialog to create a new project.
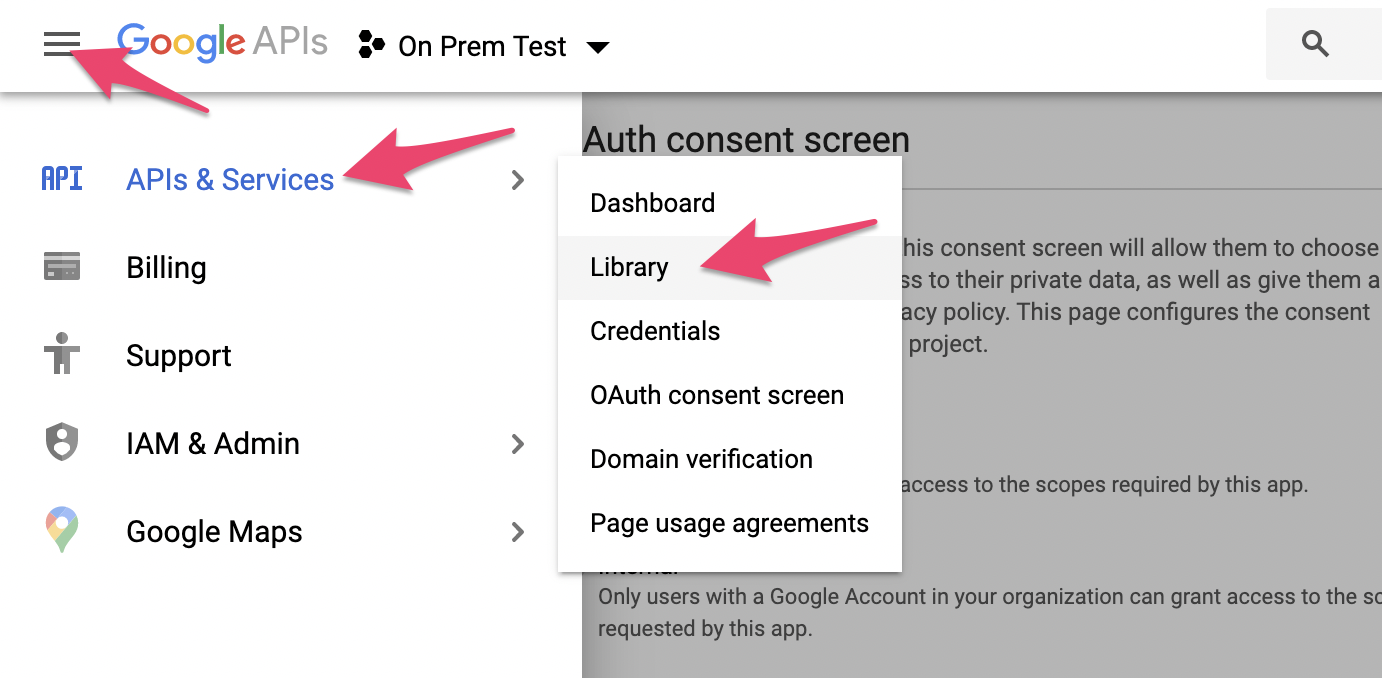
Enable Necessary Libraries
Follow the menu like the screenshot below to open the Library page.
Search for the following libraries at the Library page, and click Enable button at the page for each Library.
- Google Sheets API
- Google Drive API
- BigQuery API
- Following 4 libraries for Google Analytics
- Google Analytics API
- Google Analytics Admin API
- Google Analytics Data API
- Analytics Reporting API
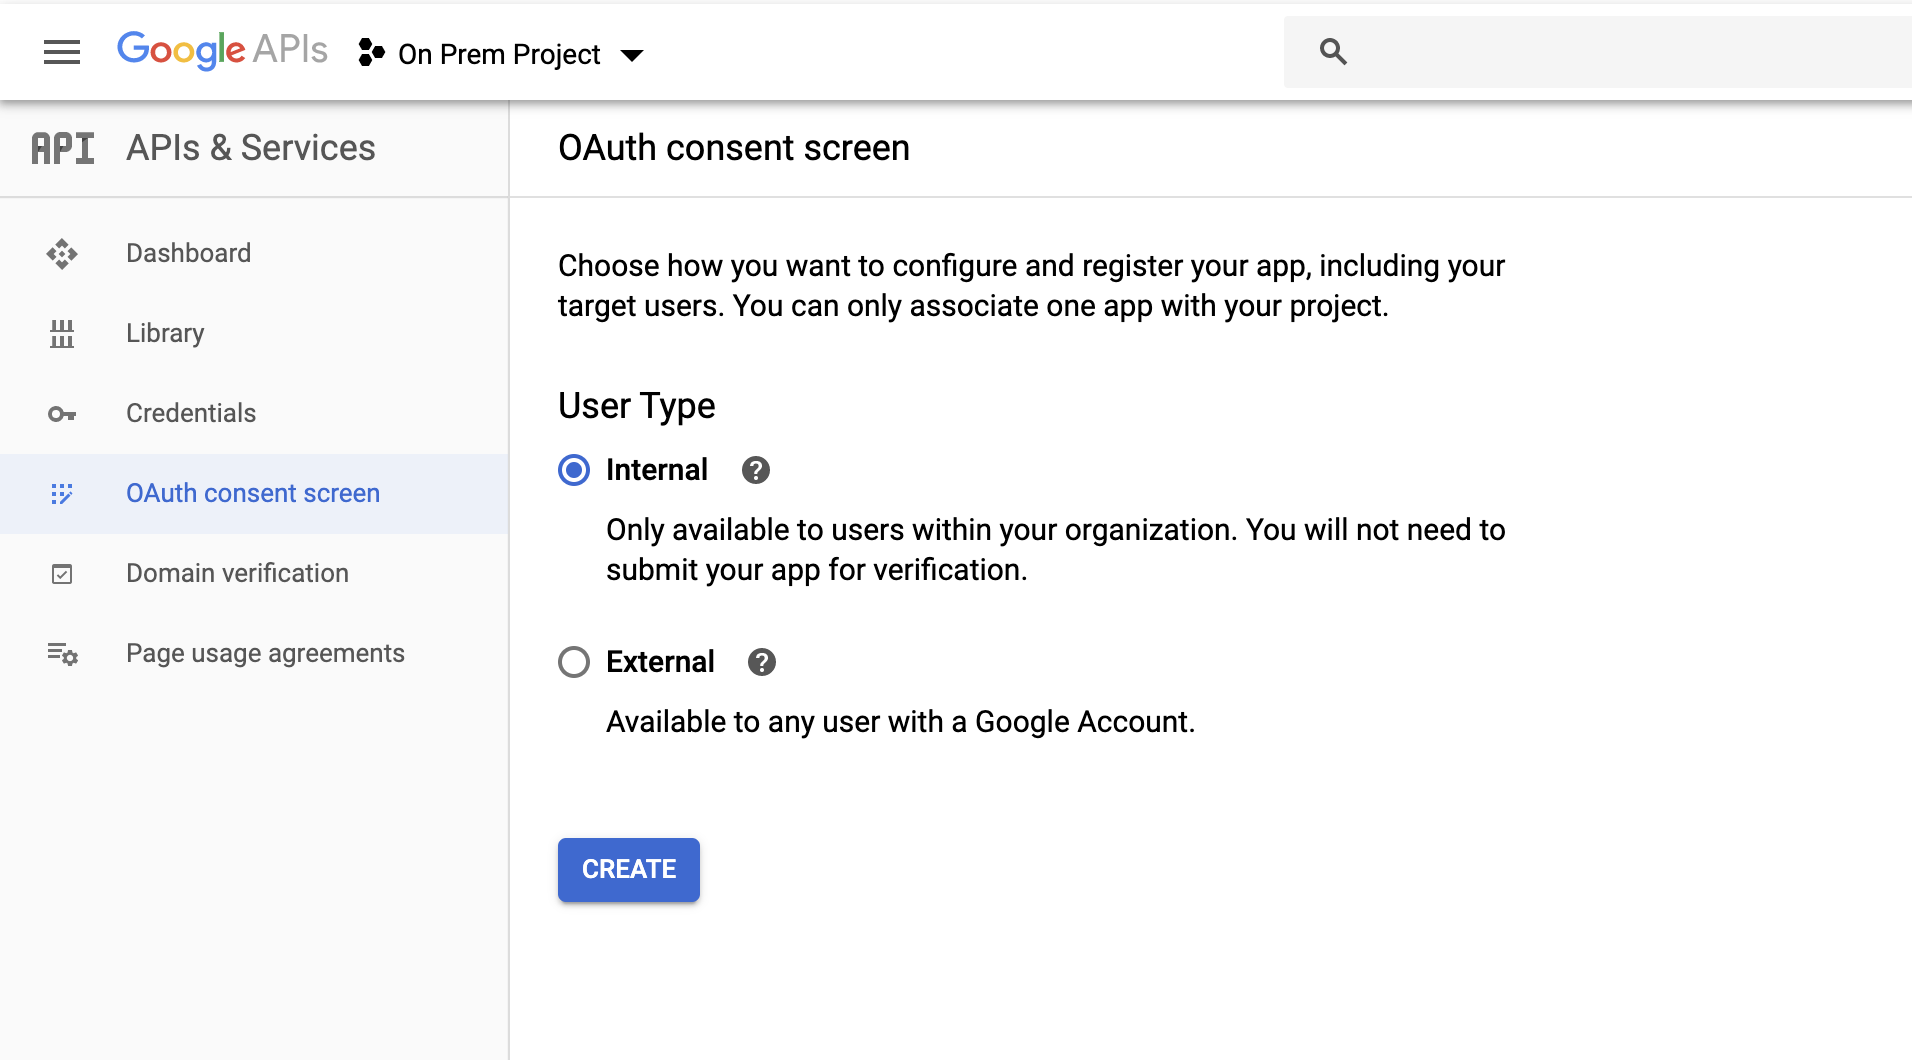
Set Up OAuth Consent Screen
Set up the OAuth consent screen that will be displayed to the users. Follow the menu like the screenshot below.

Select User Type
Select "Internal" for the User Type. This means that the users will be limited to the users of Google Apps with the domain. With our ongoing example, this means the only the users with emails like joe@yourcompany.com created by Google Apps can use your Collaboration Server to connect to Google's services.
If you select External, the users will not be limited, but you will need to wait for Google's approval to be able to use the necessary APIs. To avoid such inconveniences, we will move on with Internal User Type.
Click the Create button, and a form for the setup for the OAuth Consent Screen shows up.
Set The Name of The App
Set the name of the App. This name is the one that will be displayed to the users of your Collaboration Server.

Select The Scopes (Privileges) to Ask for
In the same screen, click the Add Scope button.
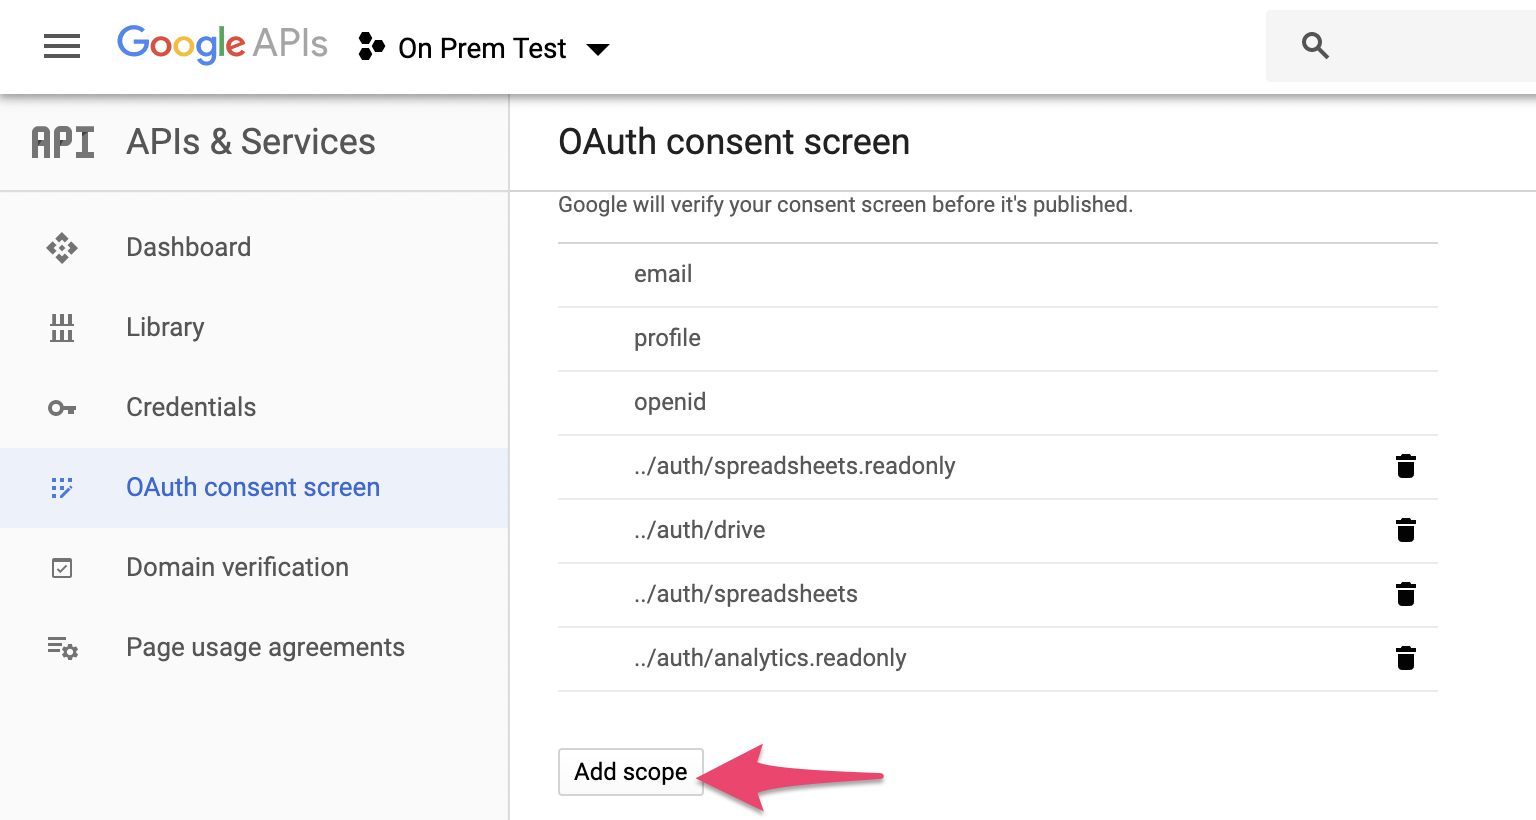
In the dialog that comes up, select the following scopes.
- /auth/spreadsheets.readonly
- /auth/drive
- /auth/spreadsheets
- /auth/analytics.readonly
- /auth/bigquery
- /auth/cloud-platform
- /auth/devstorage.read_write
If the options for those scopes are not there, double-check that the necessary Libraries are enabled in the previous step. Setting up SSL for your Collaboration Server is necessary to be able to use those scopes,
Set The Authorized Domain
On the same screen, in the Authorized domains field, type in the domain to use. This domain's ownership must be already verified by Google. Note that you need to press enter key to add the domain to the list after typing in.

Set The URLs for The Links on The Consent Screen
The following fields on the same screen are for the links shown on the consent screen.

You can freely set those URLs, but let's set the top page of your Collaboration Server here.(e.g. https://collabserver.yourcompany.com )
- Application Homepage link
- Application Privacy Policy link
- Application Terms of Service link
Now, click the Save button to save the settings.
Create OAuth Client ID
Create an OAuth Client ID to use for the Collaboration Server. This is an ID with a password (secret) registered to Google for your Collaboration Server. Follow the menu like the screenshot below to move to the Credentials setup screen.
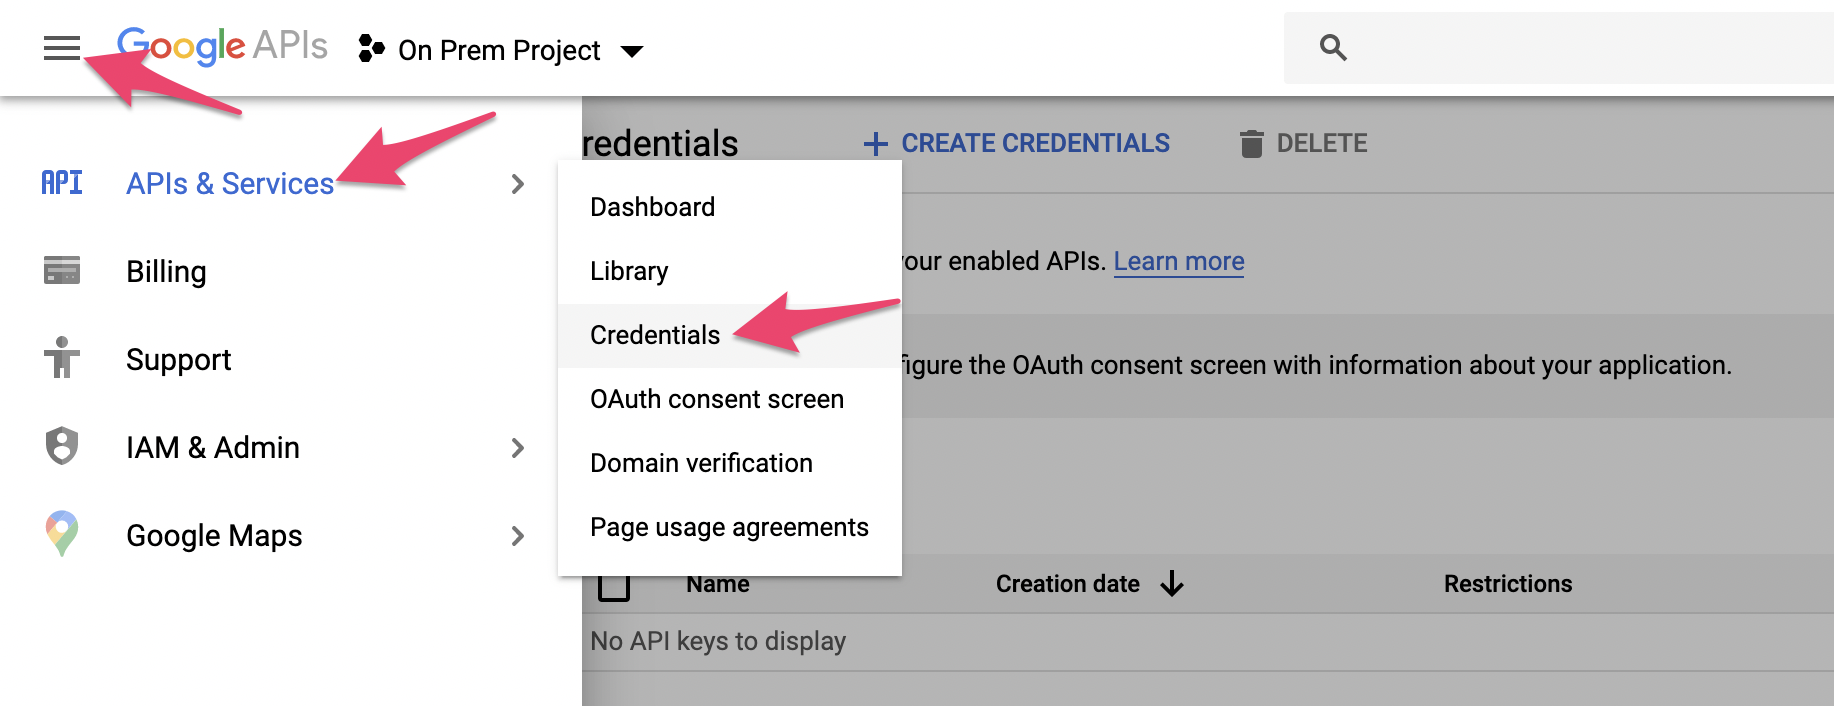
From there, click CREATE CREDENTIALS link to open the menu, and select OAuth Client ID menu item.
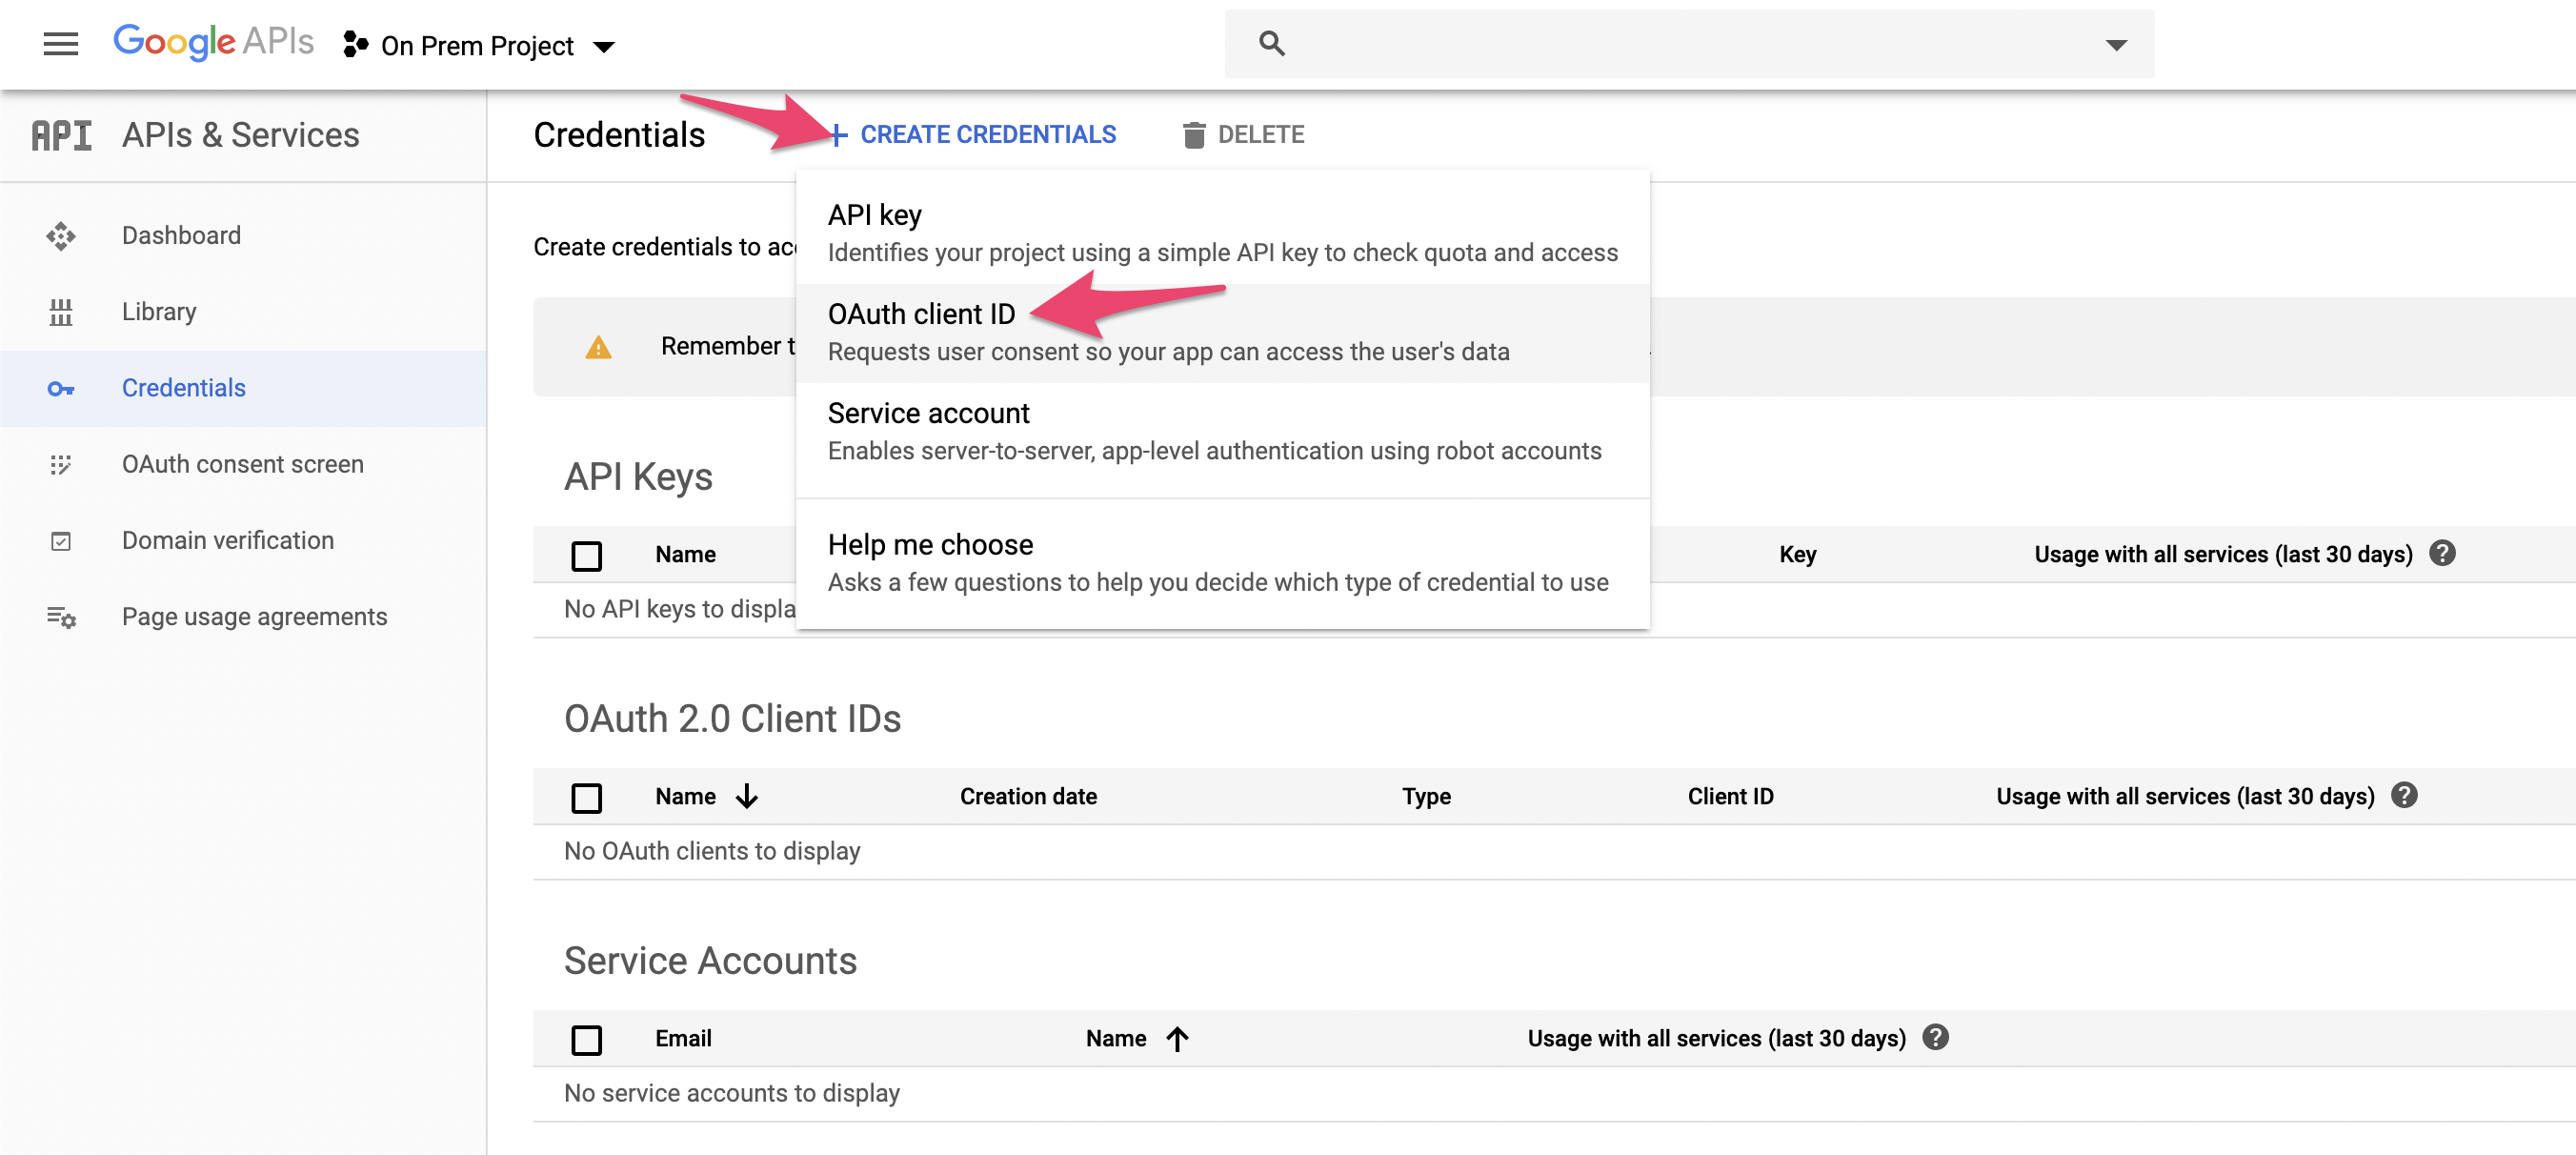
Choose "Web Application" as the Application type.
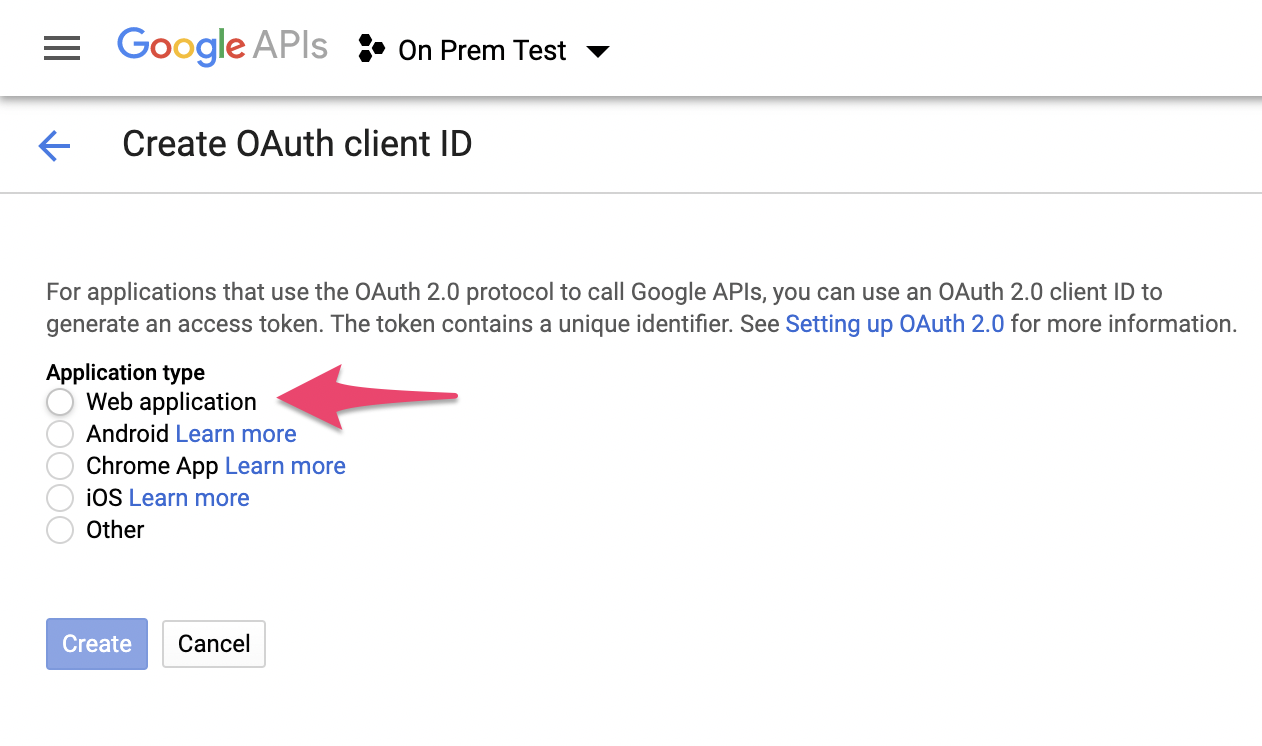
A form will be displayed like the screenshot below.
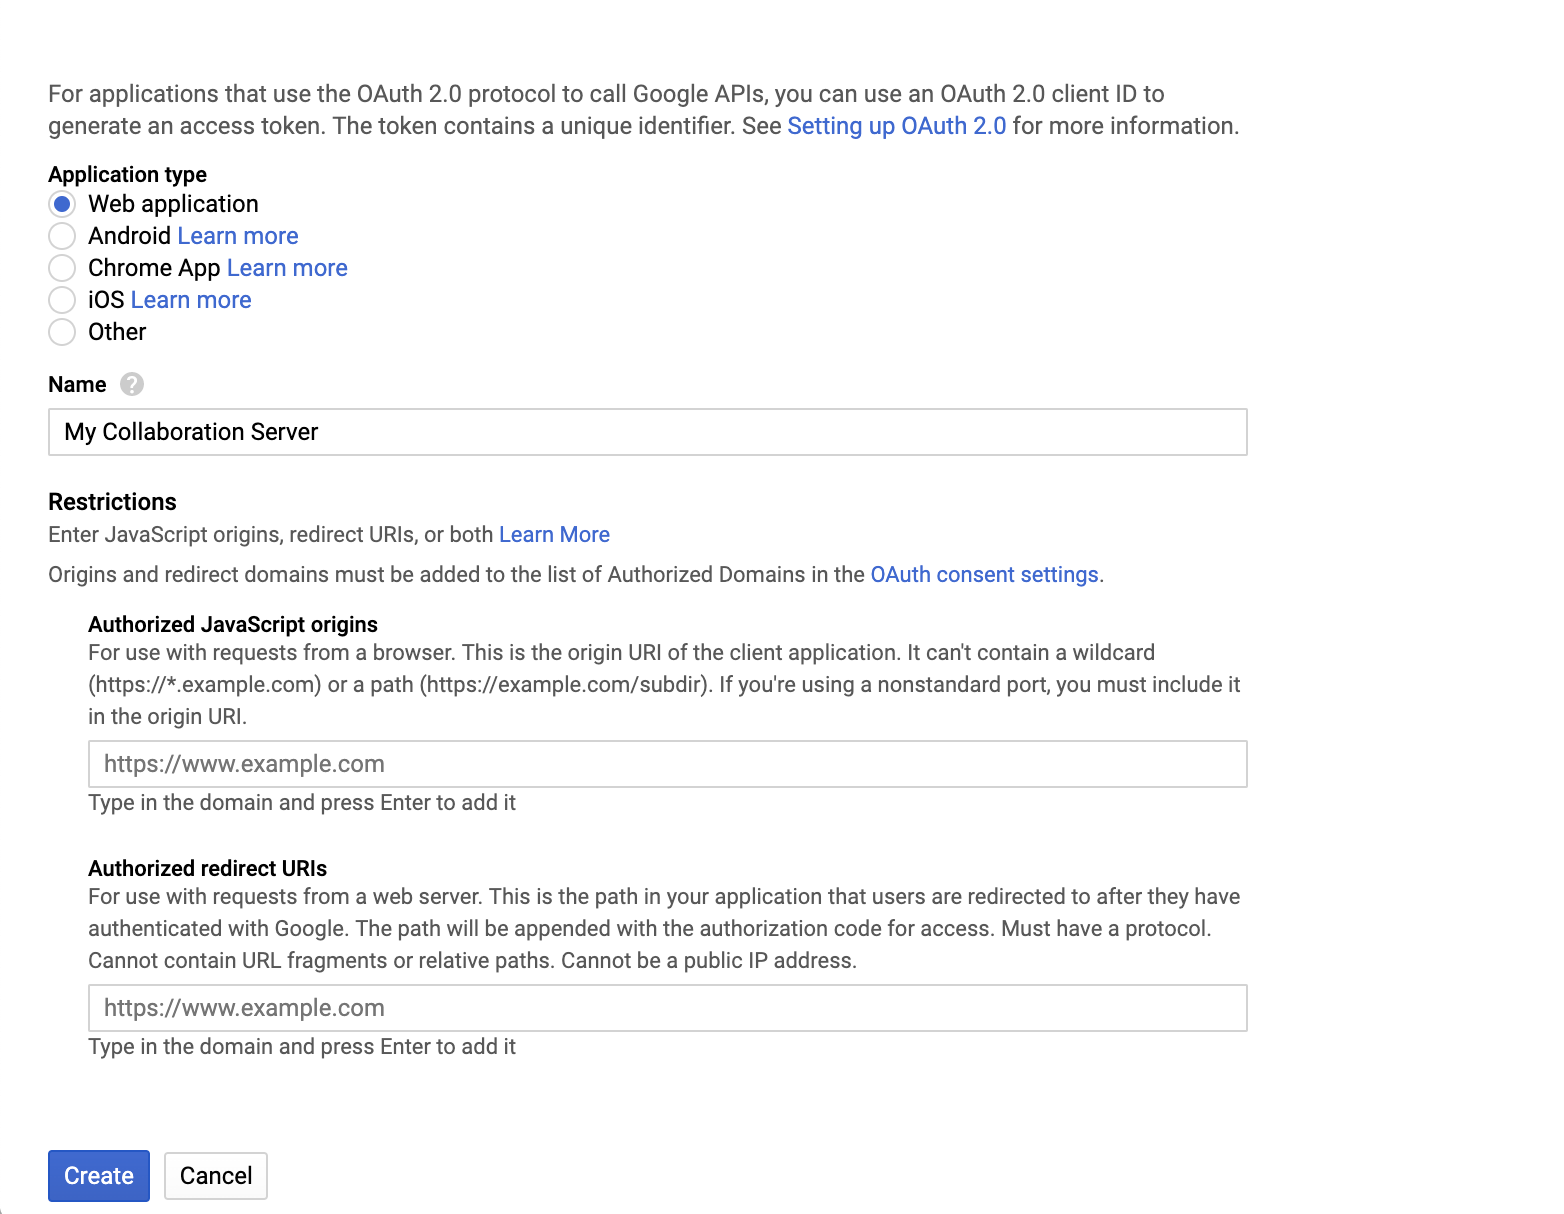
In the form, type in the following 3 configuration.
- Name - The display name for the OAuth Client ID. (Any name you'd like to name this OAuth Client ID. This name is used only within the admin screens of Google APIs, and will not be shown to the users.)
- Authorized JavaScript origins - Set the URL of the Collatoration Server. Example:https://collabserver.yourcompany.com
- Authorized redirect URIs - Set the URL of the Collatoration Server with the path
/oauthcallbackappended. Example: https://collabserver.yourcompany.com/oauthcallback
Click the Create button, and OAuth Client ID will be created and displayed like the following screenshot. 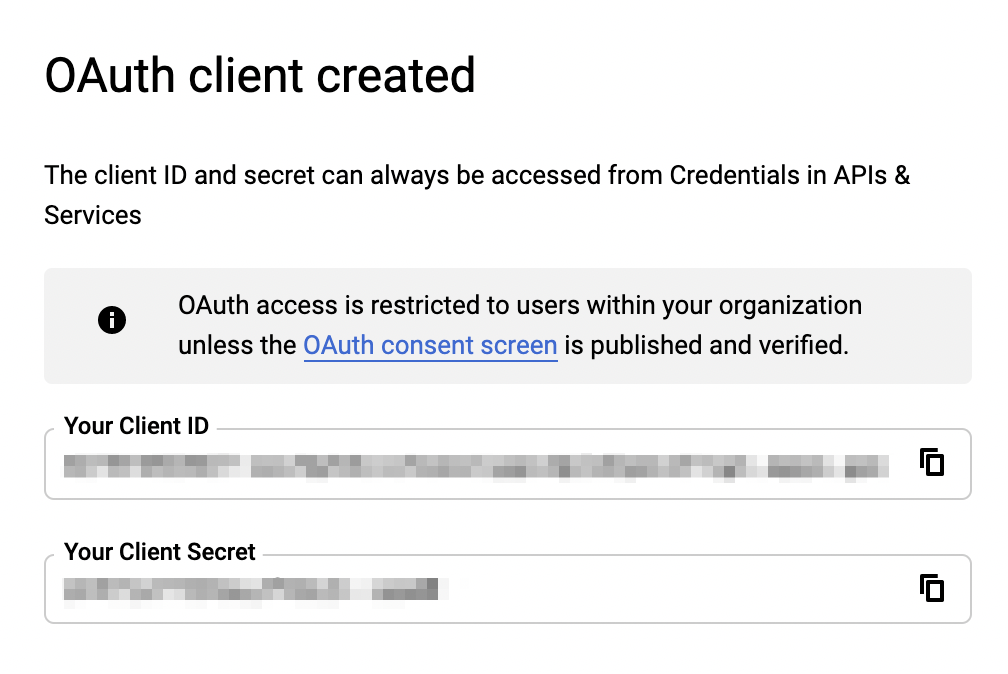
We will need the following 2 strings later to configure Collaboration Server, which are displayed here.
- Client ID
- Client Secret
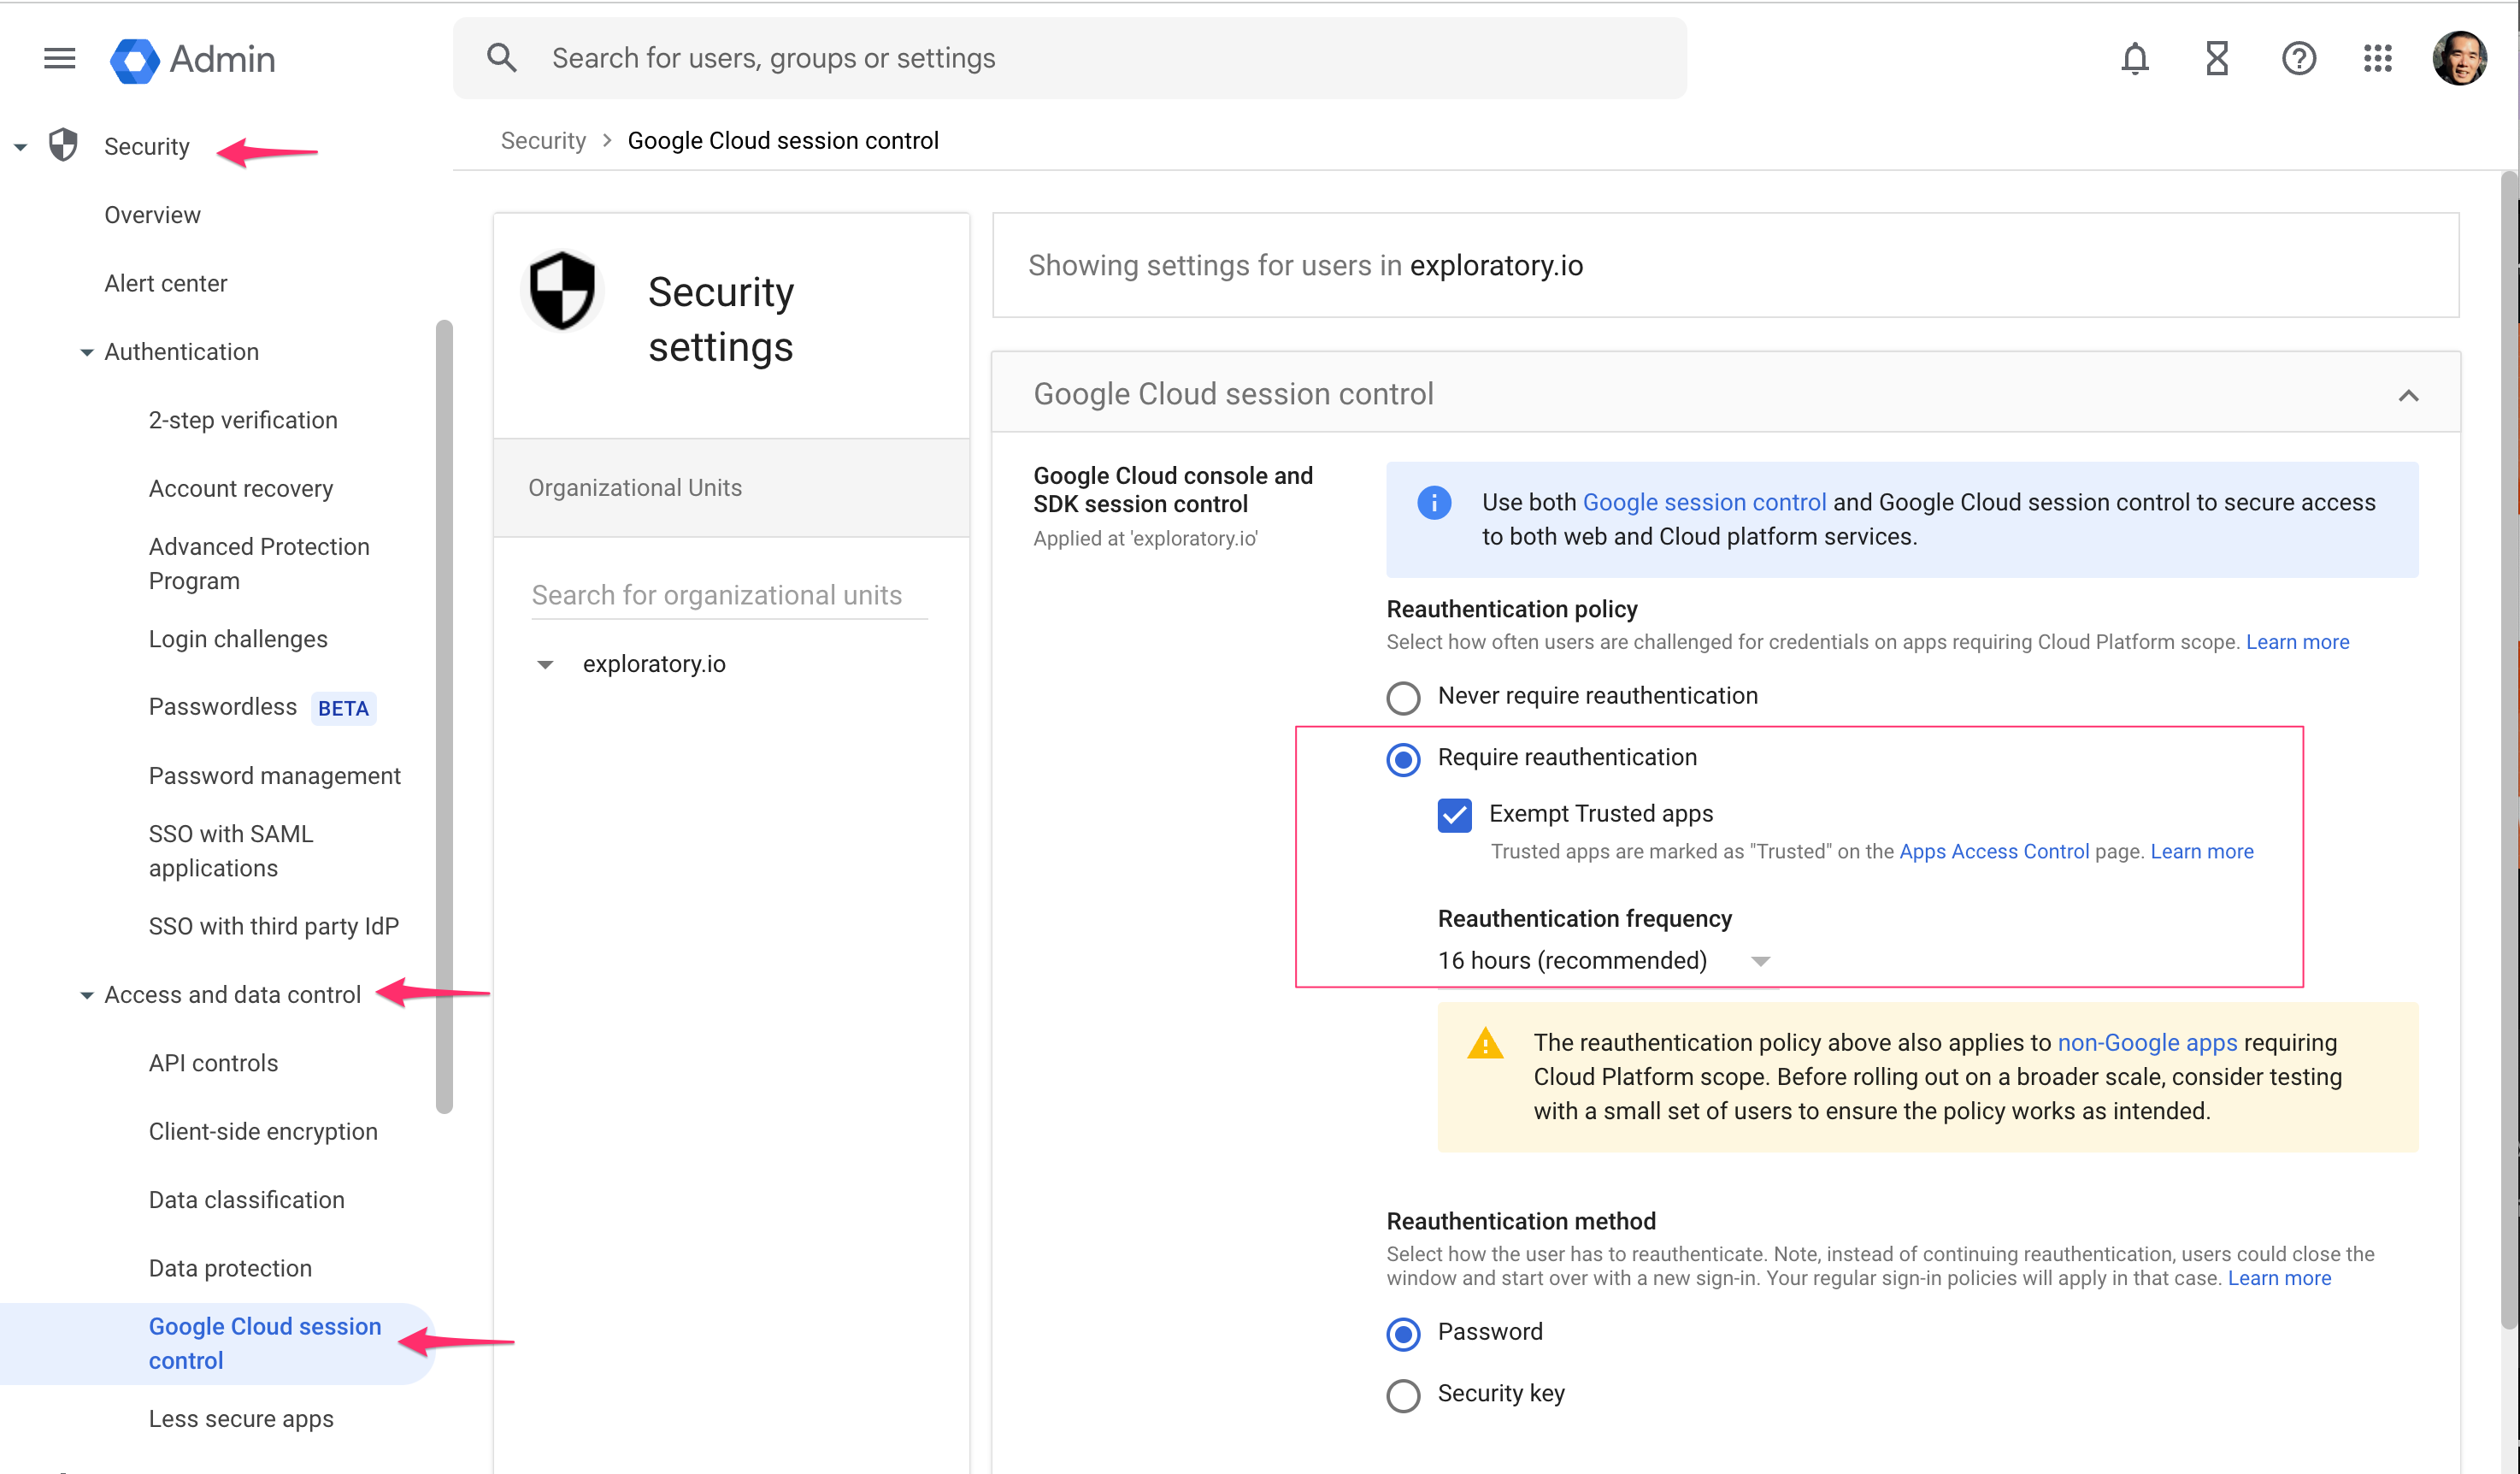
Manage the duration of Google OAuth token sessions
To effectively manage the duration of your Google OAuth token sessions, follow these steps:
- Navigate to the Google Admin Console.
- Select "Security" -> "Access and Data Control" -> "Google Cloud Session Control."
- If you need your users to re-authenticate, choose the "Require Reauthentication" radio button and adjust the re-authentication frequency according to your company policy.
- Alternatively, if you wish to exclude your Exploratory Server from re-authentication, mark the "Exempt Trusted Apps" checkbox. Add your Exploratory Server to the list of Trusted Apps to ensure seamless operation.
3. Configure Collaboration Server
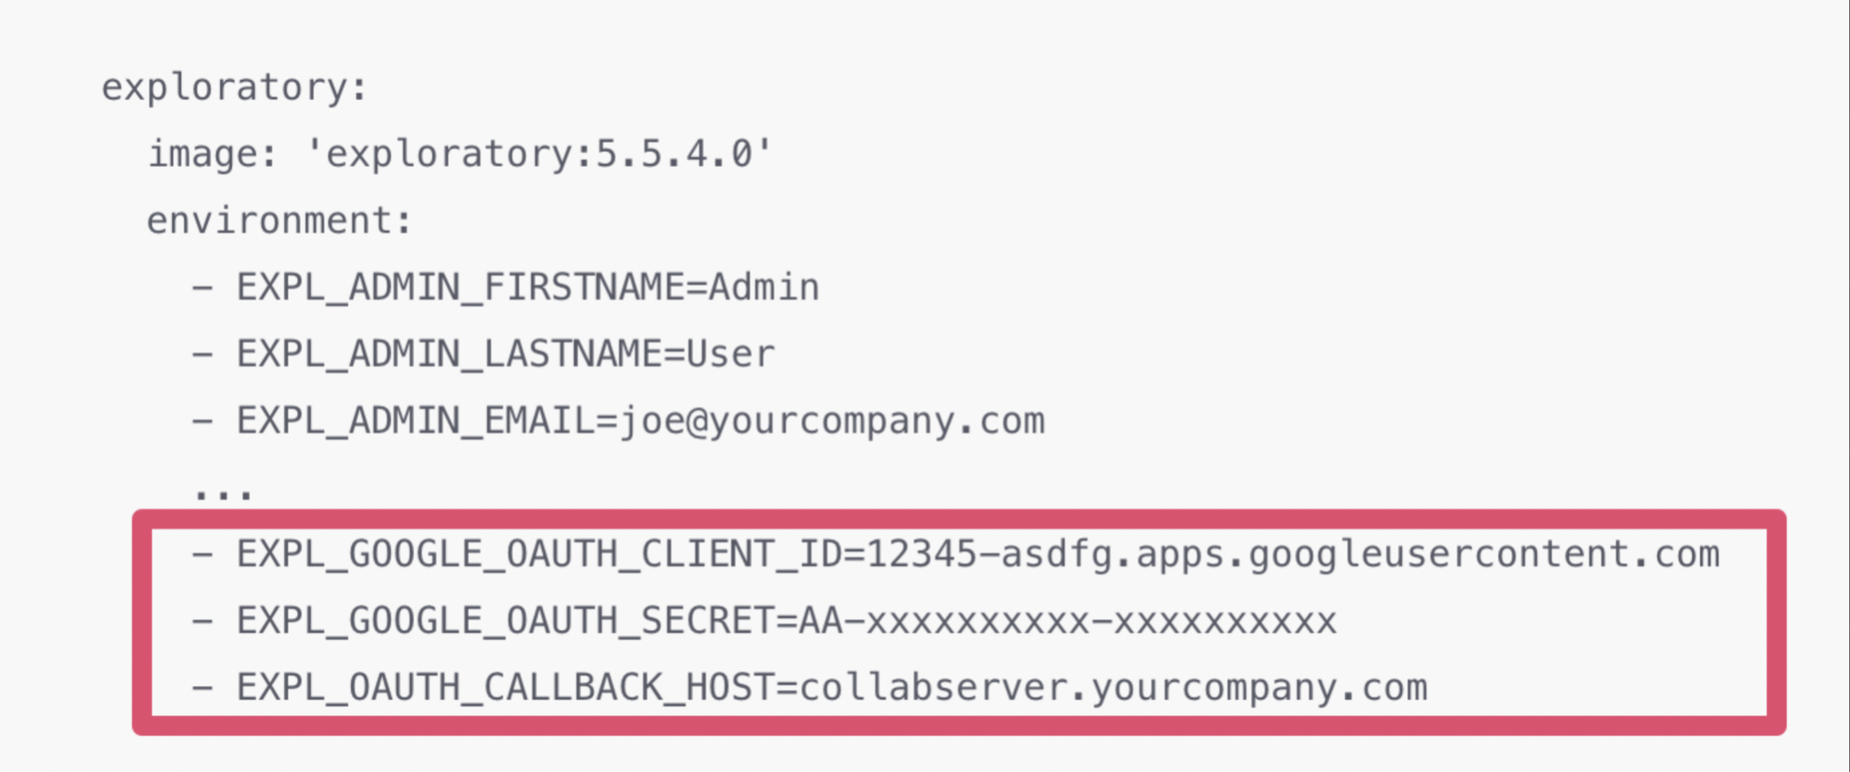
Locate docker-compose.yml file under the "exploratory" directory created by uncompressing the distribution file of Exploratory Collaboration Server.
In the docker-compose.yml file, add the following 3 items under the "environment" item list under the "exploratory" container configuration, as in the example screenshot.
- EXPL_GOOGLE_OAUTH_CLIENT_ID - The OAuth Client ID we just obtained.
- EXPL_GOOGLE_OAUTH_SECRET - The Client Secret we just obtained.
- EXPL_OAUTH_CALLBACK_HOST - The host name to be used for the Collaboration Server.
Example:
Now, restart Collaboration Server, and you can start accessing Google Sheets, Google Analytics, and Google BigQuery from the Exploratory Desktop connected to your Collaboration Server.