How to Dynamically Change URL-Based Images Using Parameters
Exploratory features a Parameter function that allows you to dynamically change the content displayed in dashboards and notes.
This parameter function can be used not only for filtering but also in various scenarios such as within calculation formulas or SQL queries. It is also possible to use it to dynamically change URL-based images.
Enabling dynamic image display allows you, for example, to set up a global sales dashboard where national flags are automatically displayed according to the country being viewed. This not only improves the visibility of the dashboard but is also highly effective from a design perspective.
In this note, we will introduce how to dynamically change images in a dashboard’s text panel using parameters.
Three Approaches
We will introduce the following three approaches:
- Specifying the URL directly: The simplest method, where you enter the entire URL directly into the parameter.
- Selecting a category corresponding to a URL: This method involves selecting a URL contained in the data via a parameter.
- Dynamically replacing part of a URL with a parameter: This is effective when the URL structure is regular and only a specific part of the string changes.
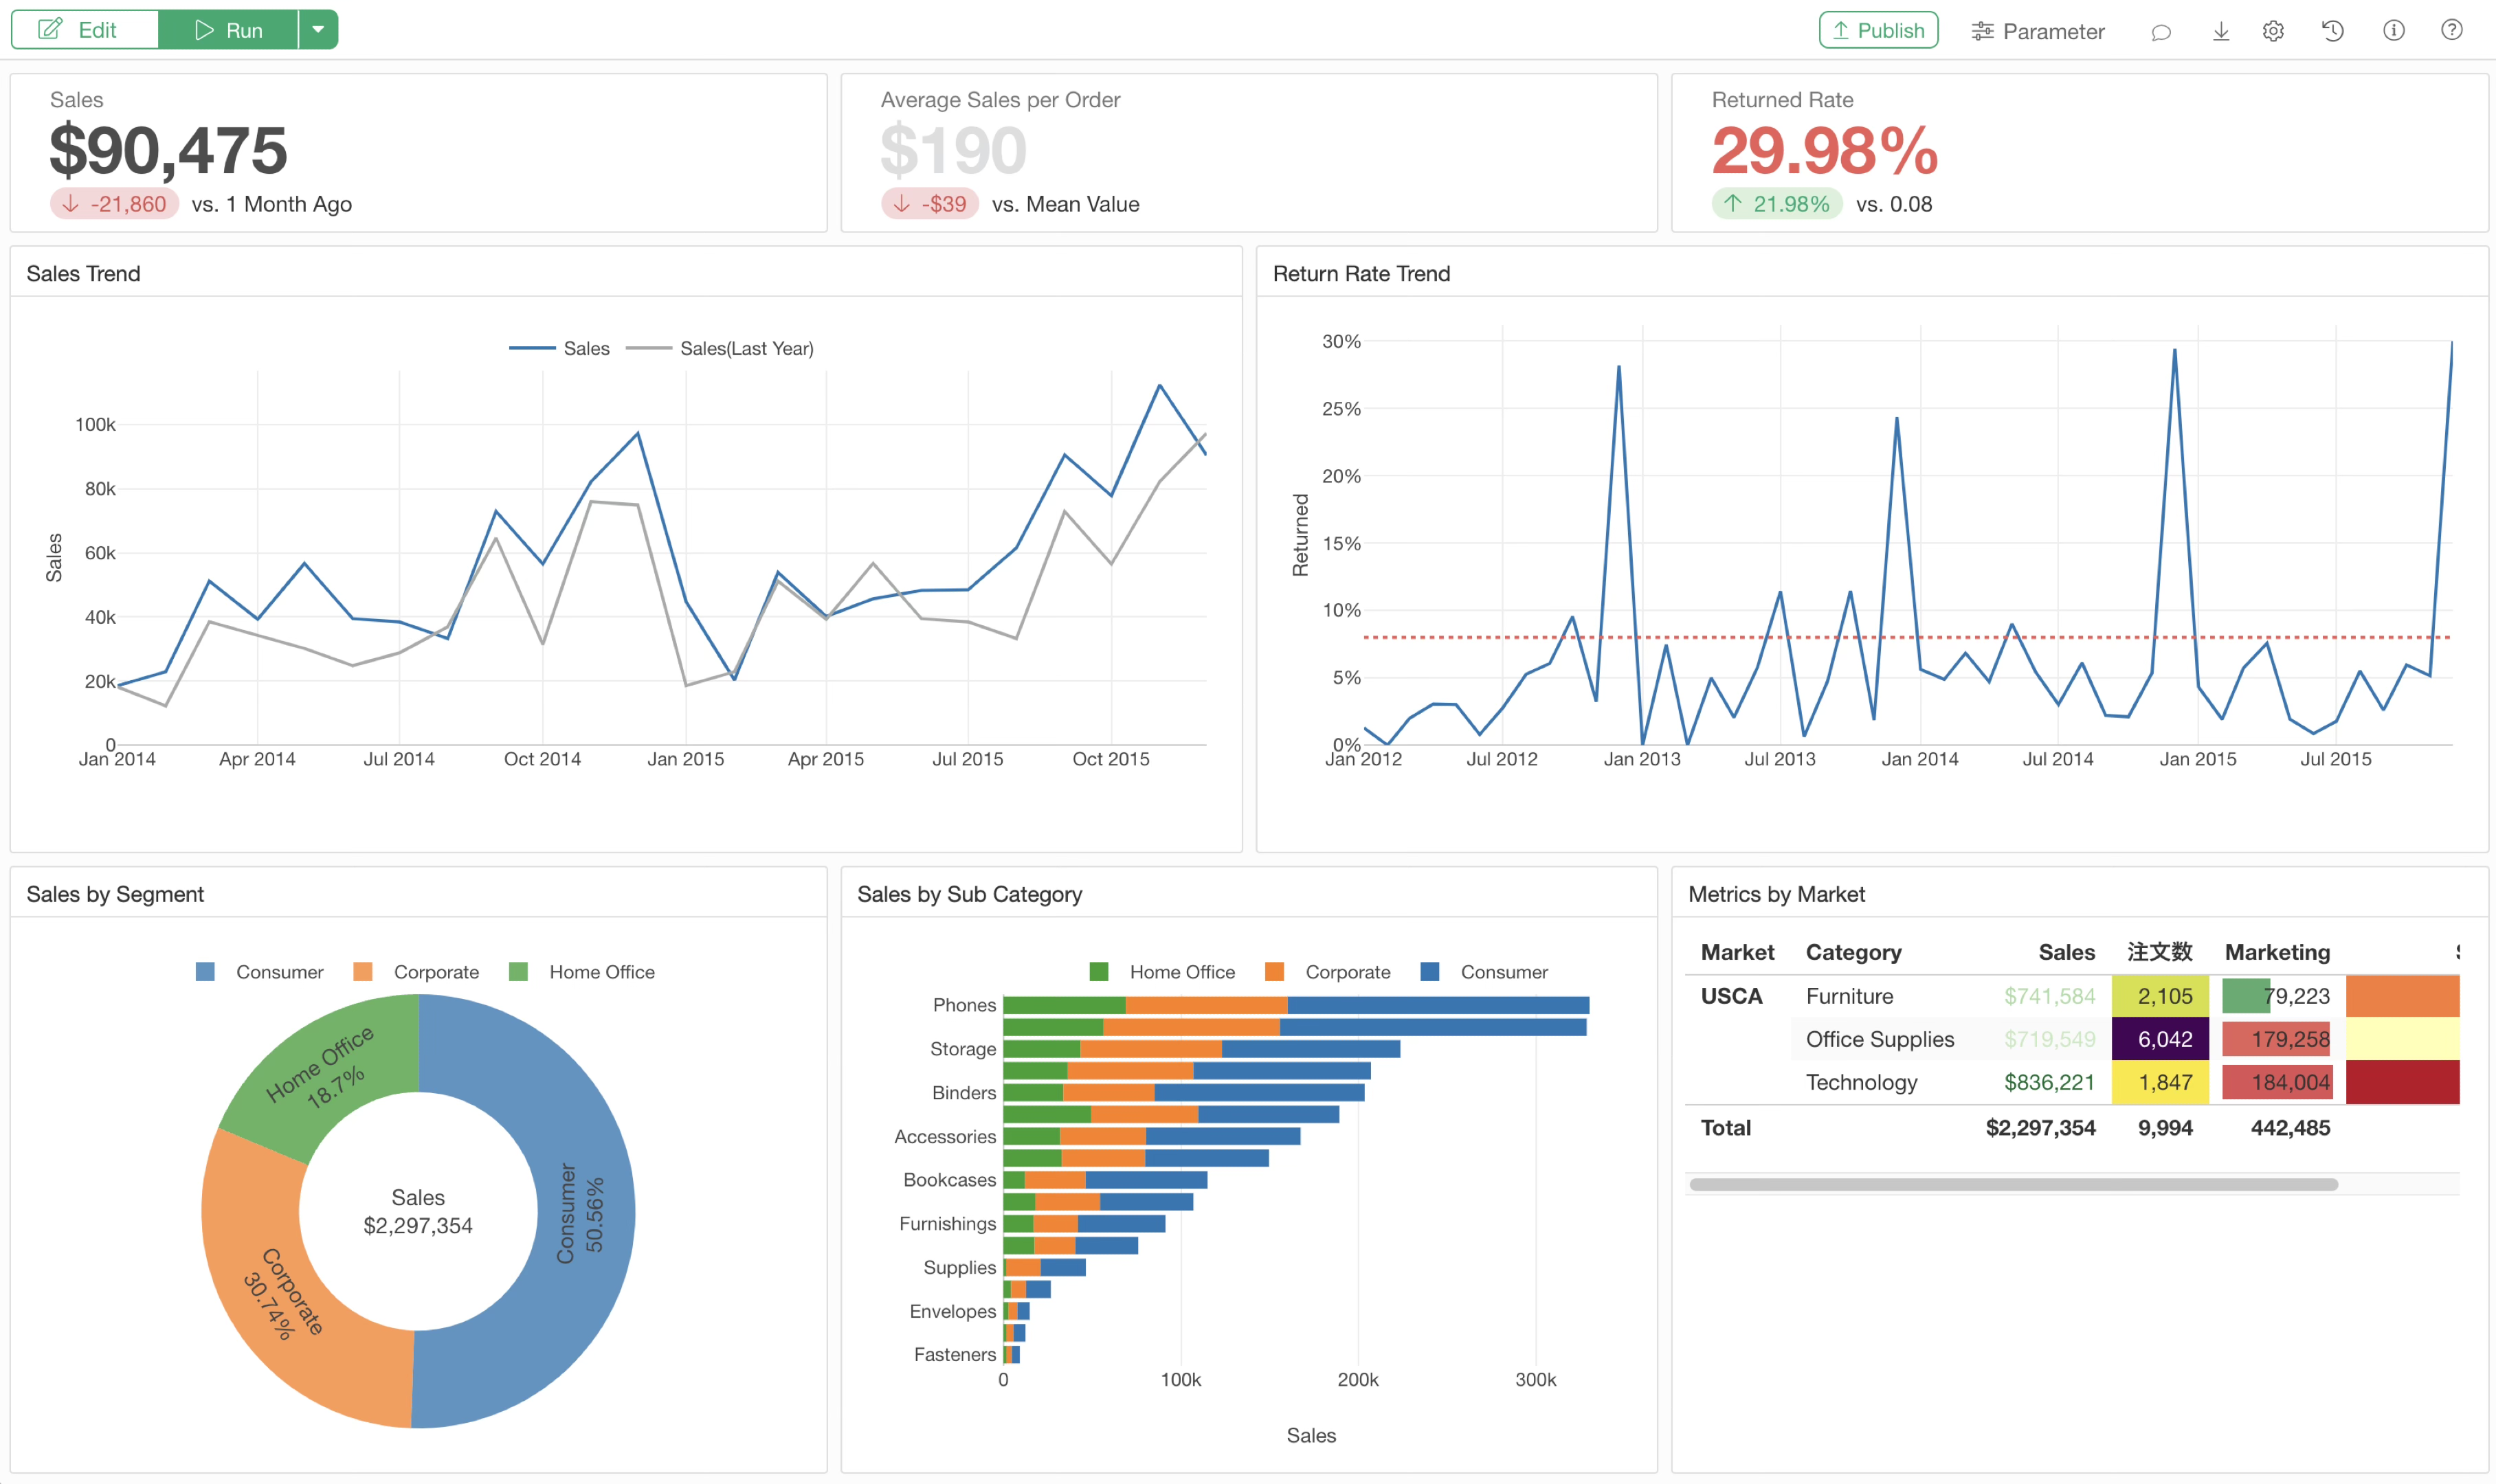
In this guide, we will add a text panel to a global sales dashboard like the one below and introduce each implementation method.
Specifying the URL Directly
First, let’s look at the simplest method: specifying the URL directly.
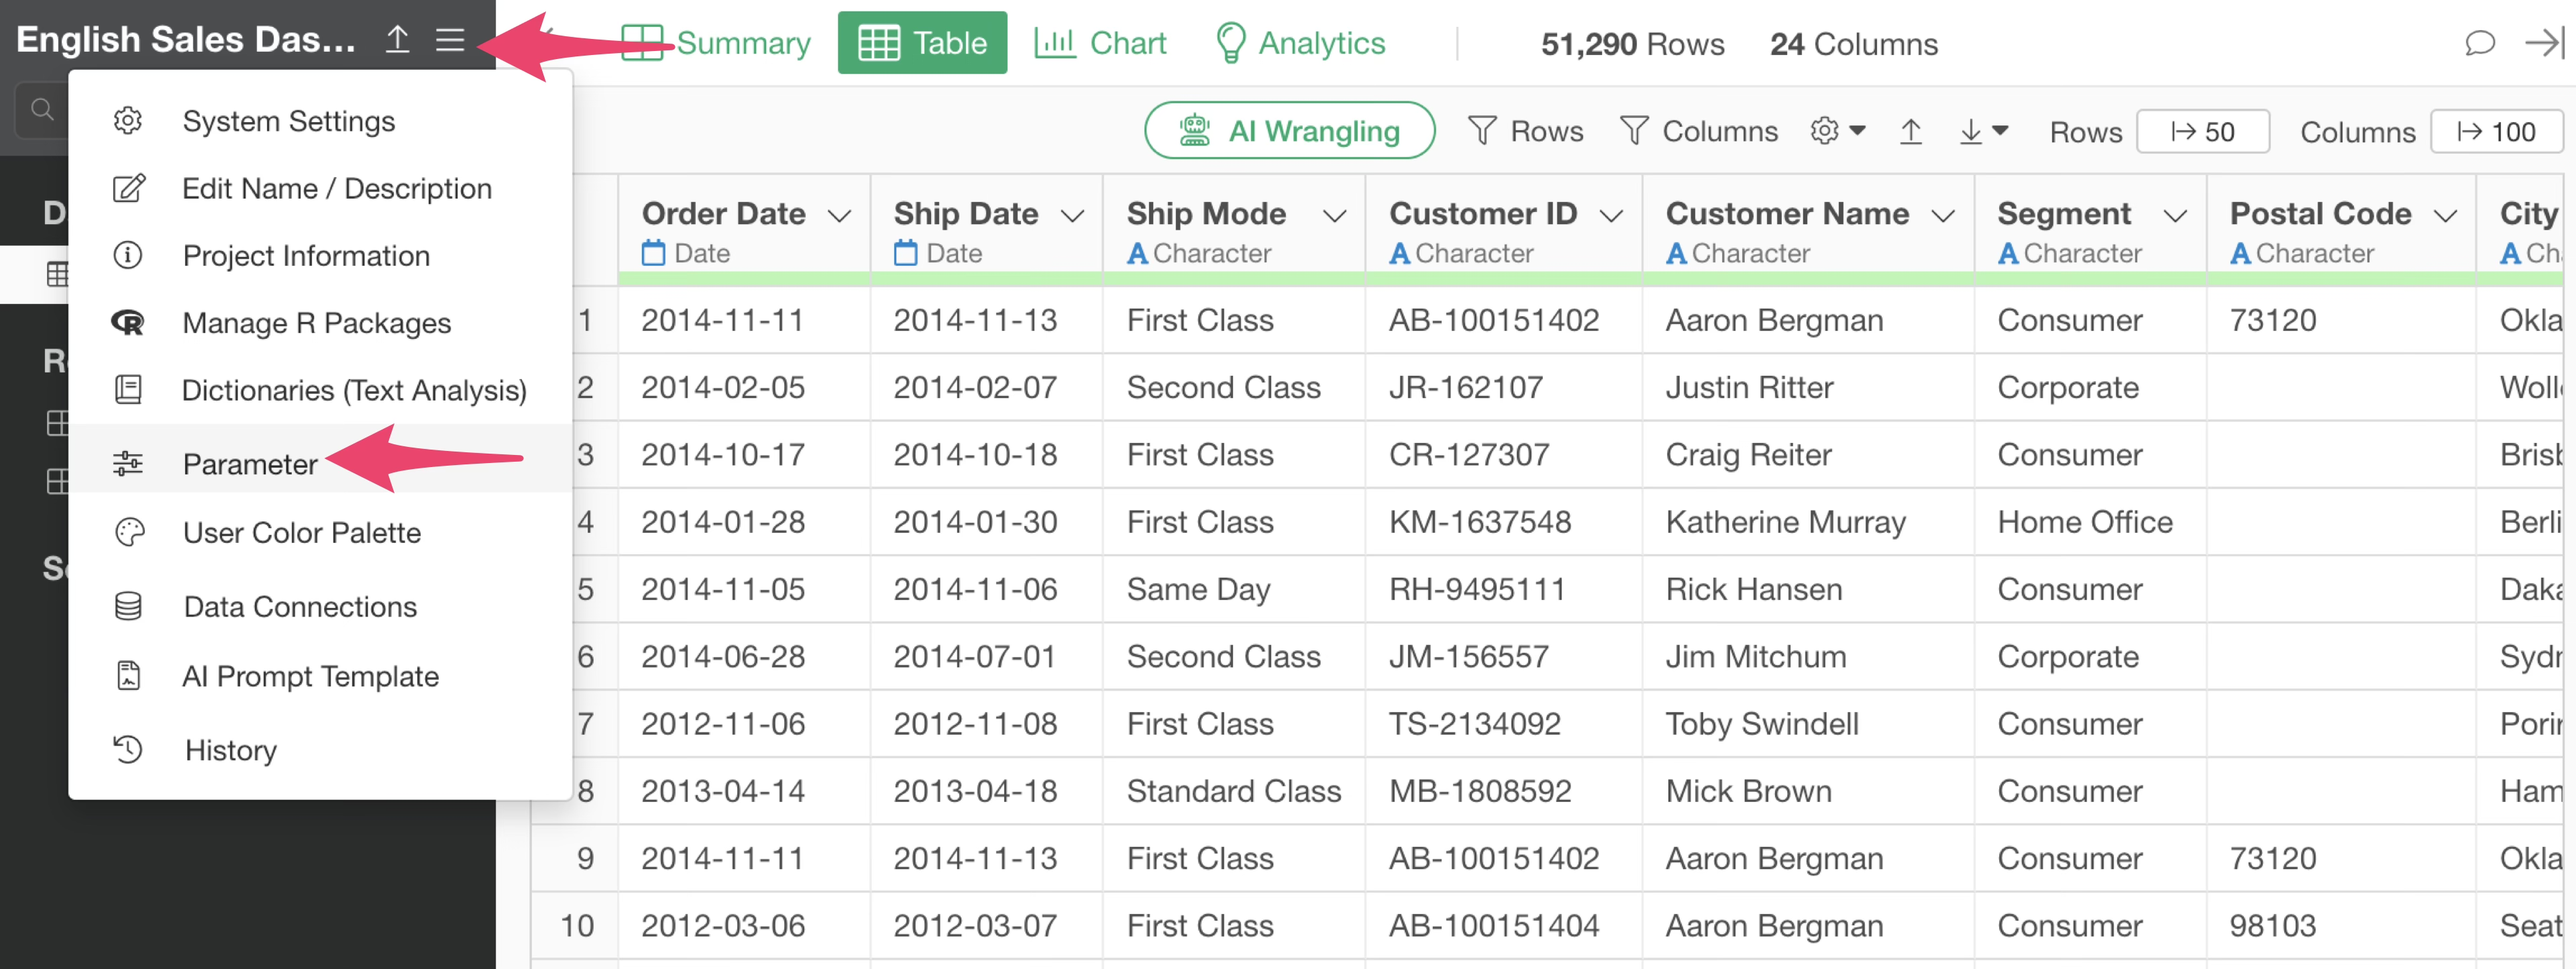
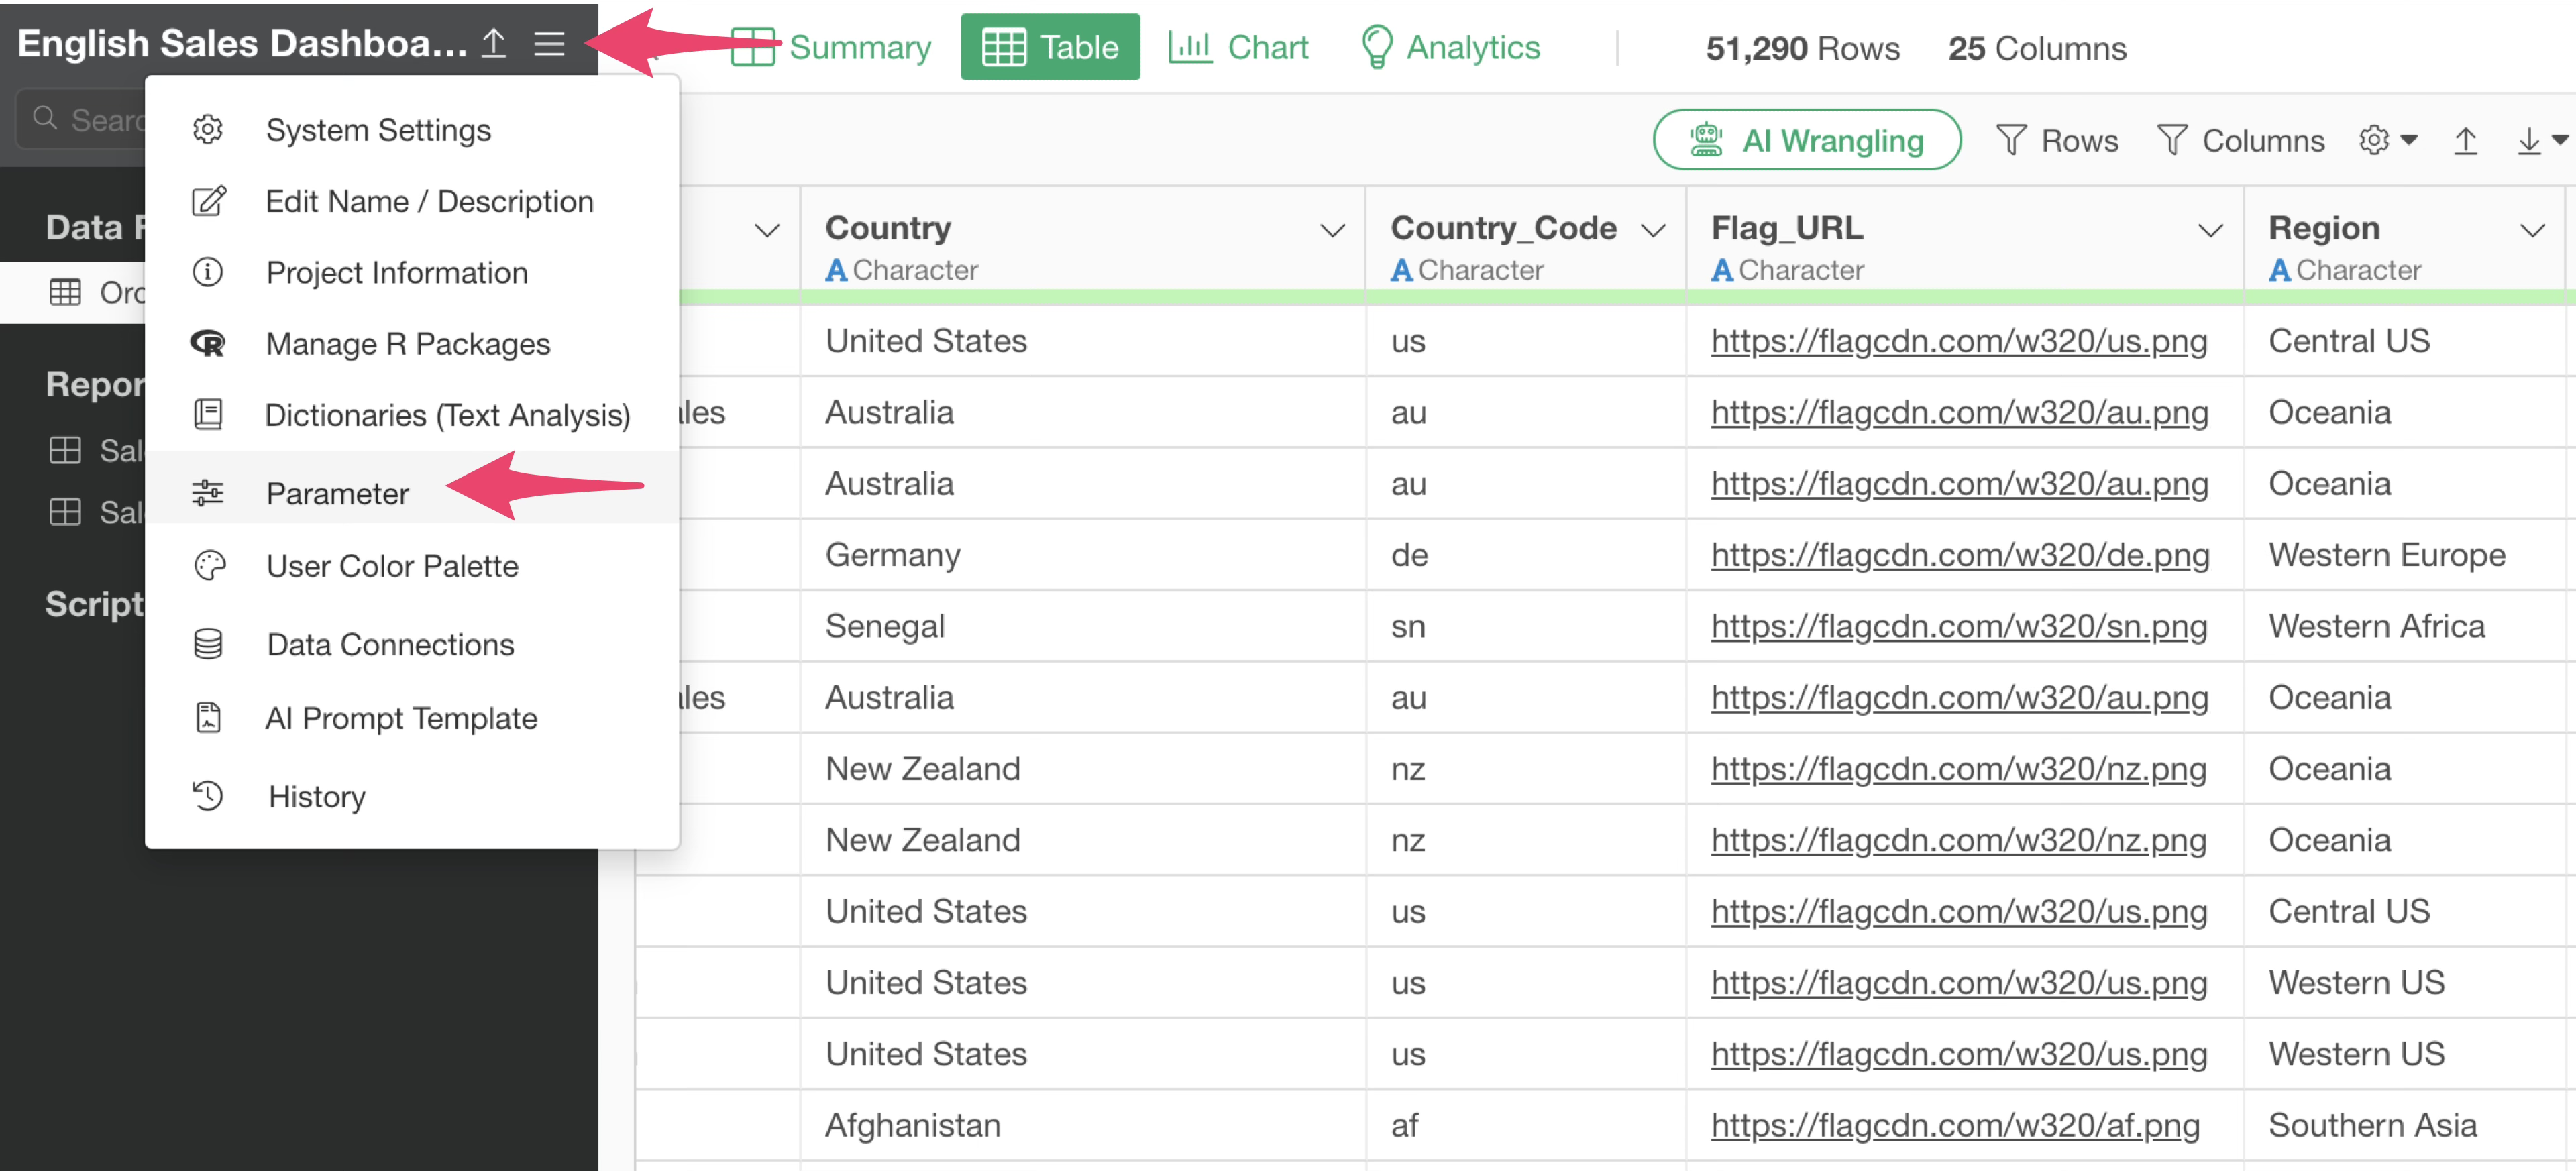
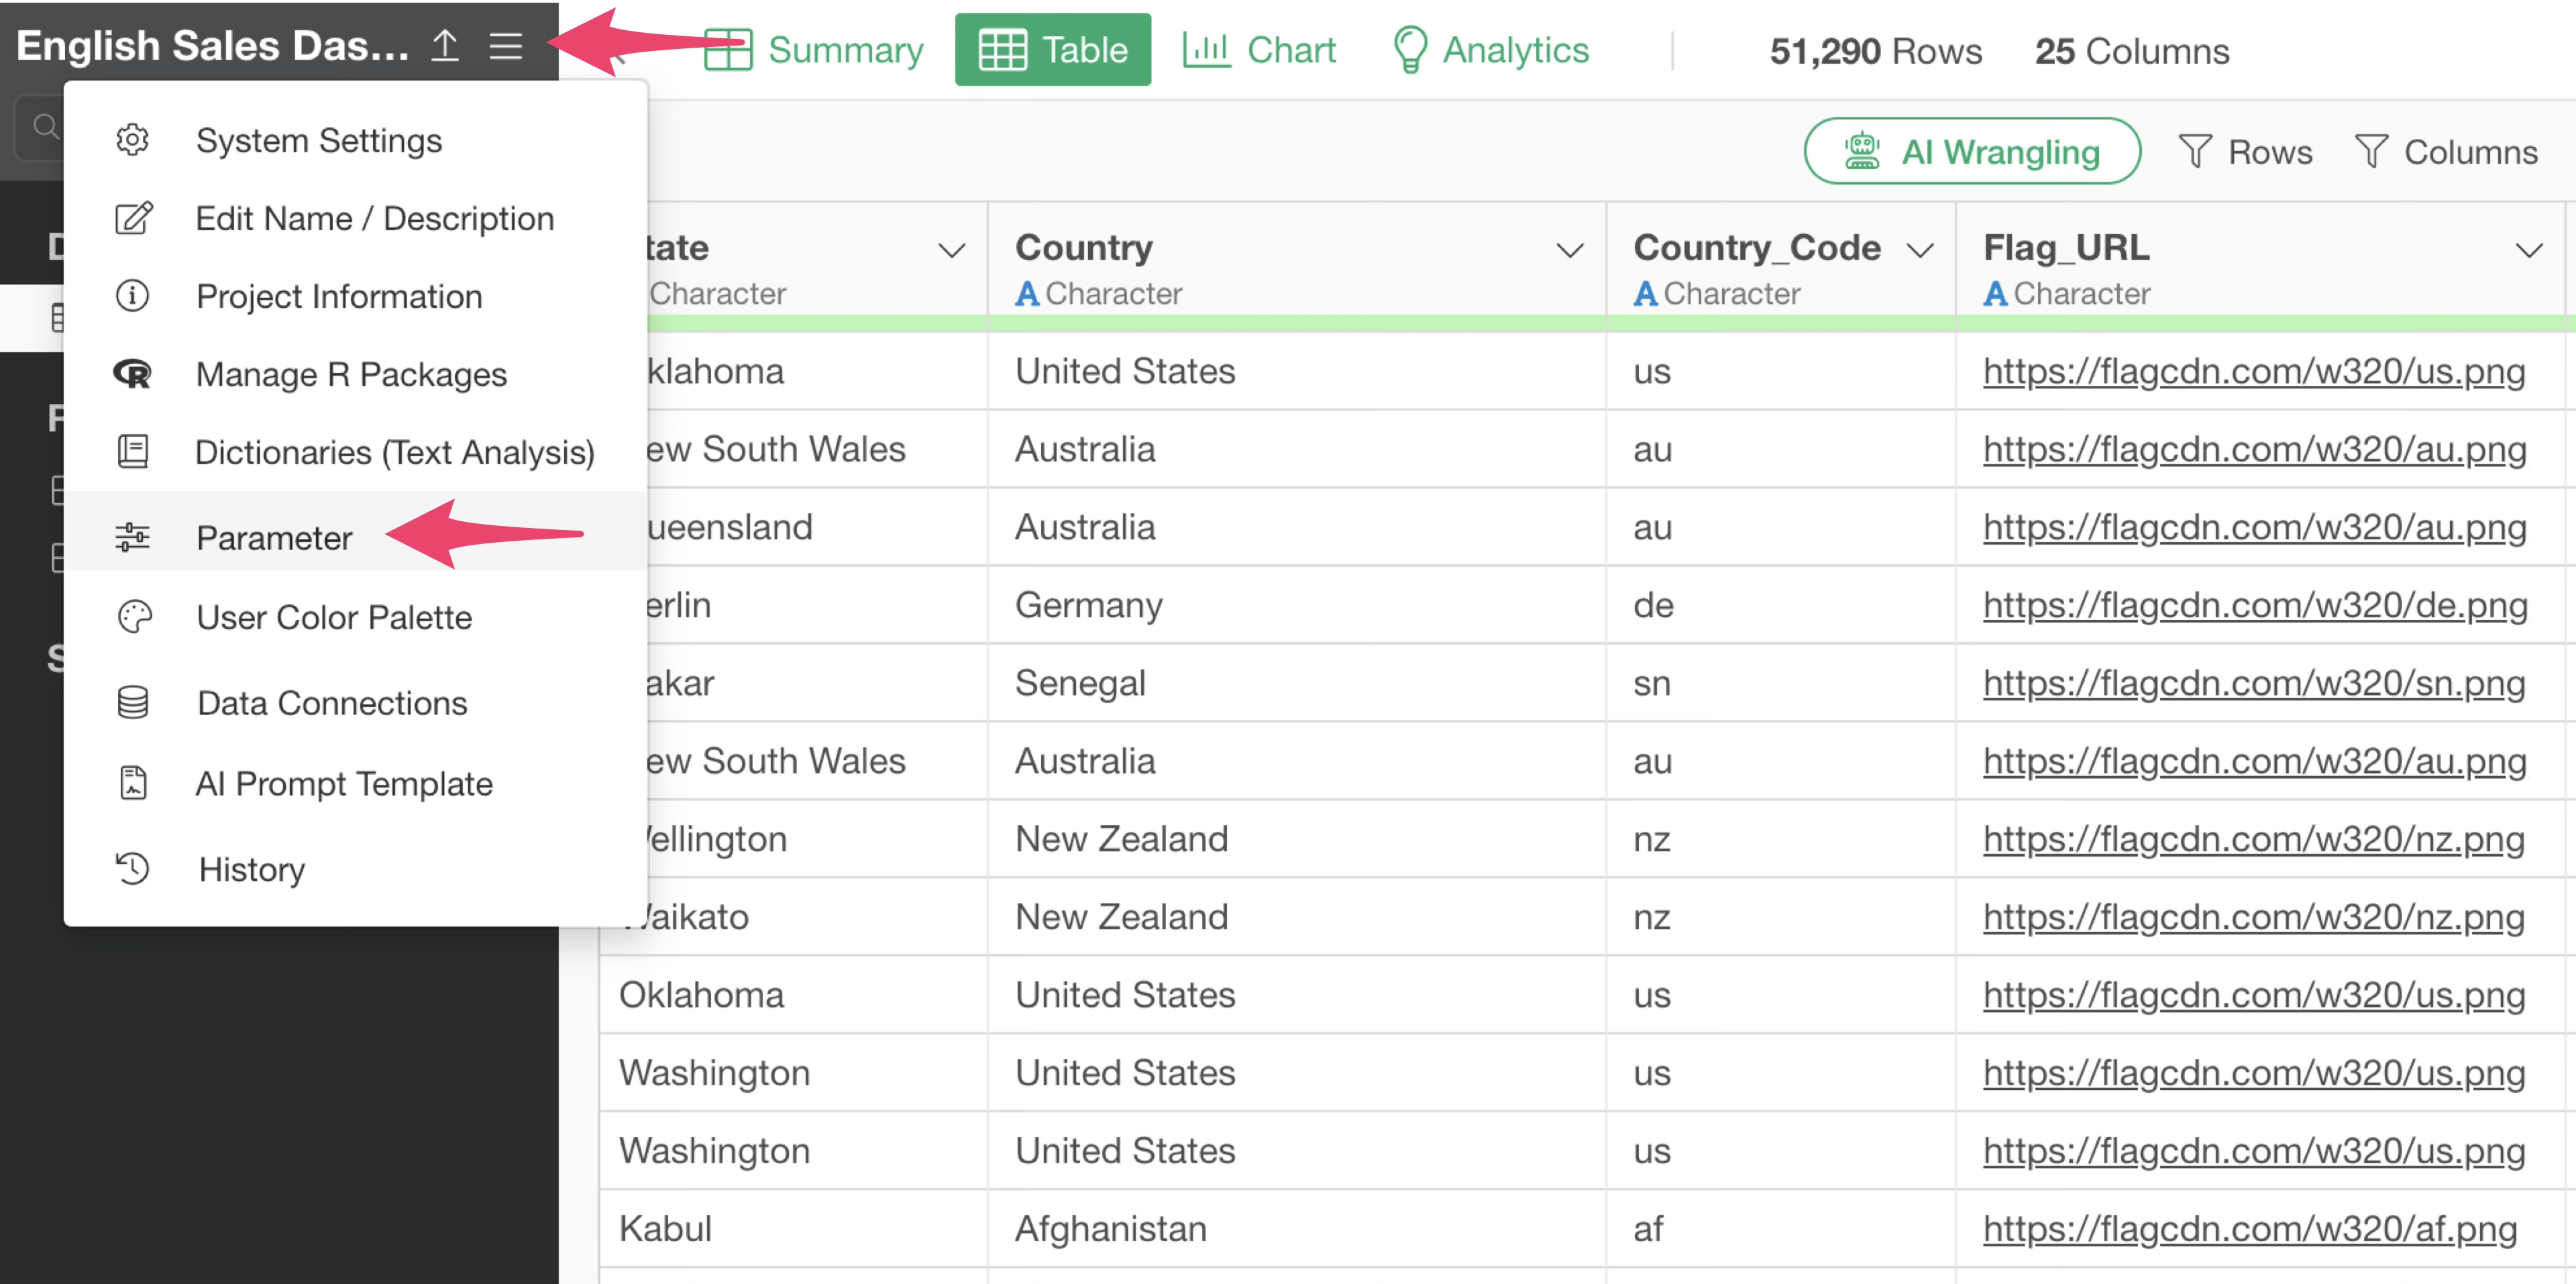
With any data frame open, select “Parameters” from the three-line menu at the top left of the project menu.
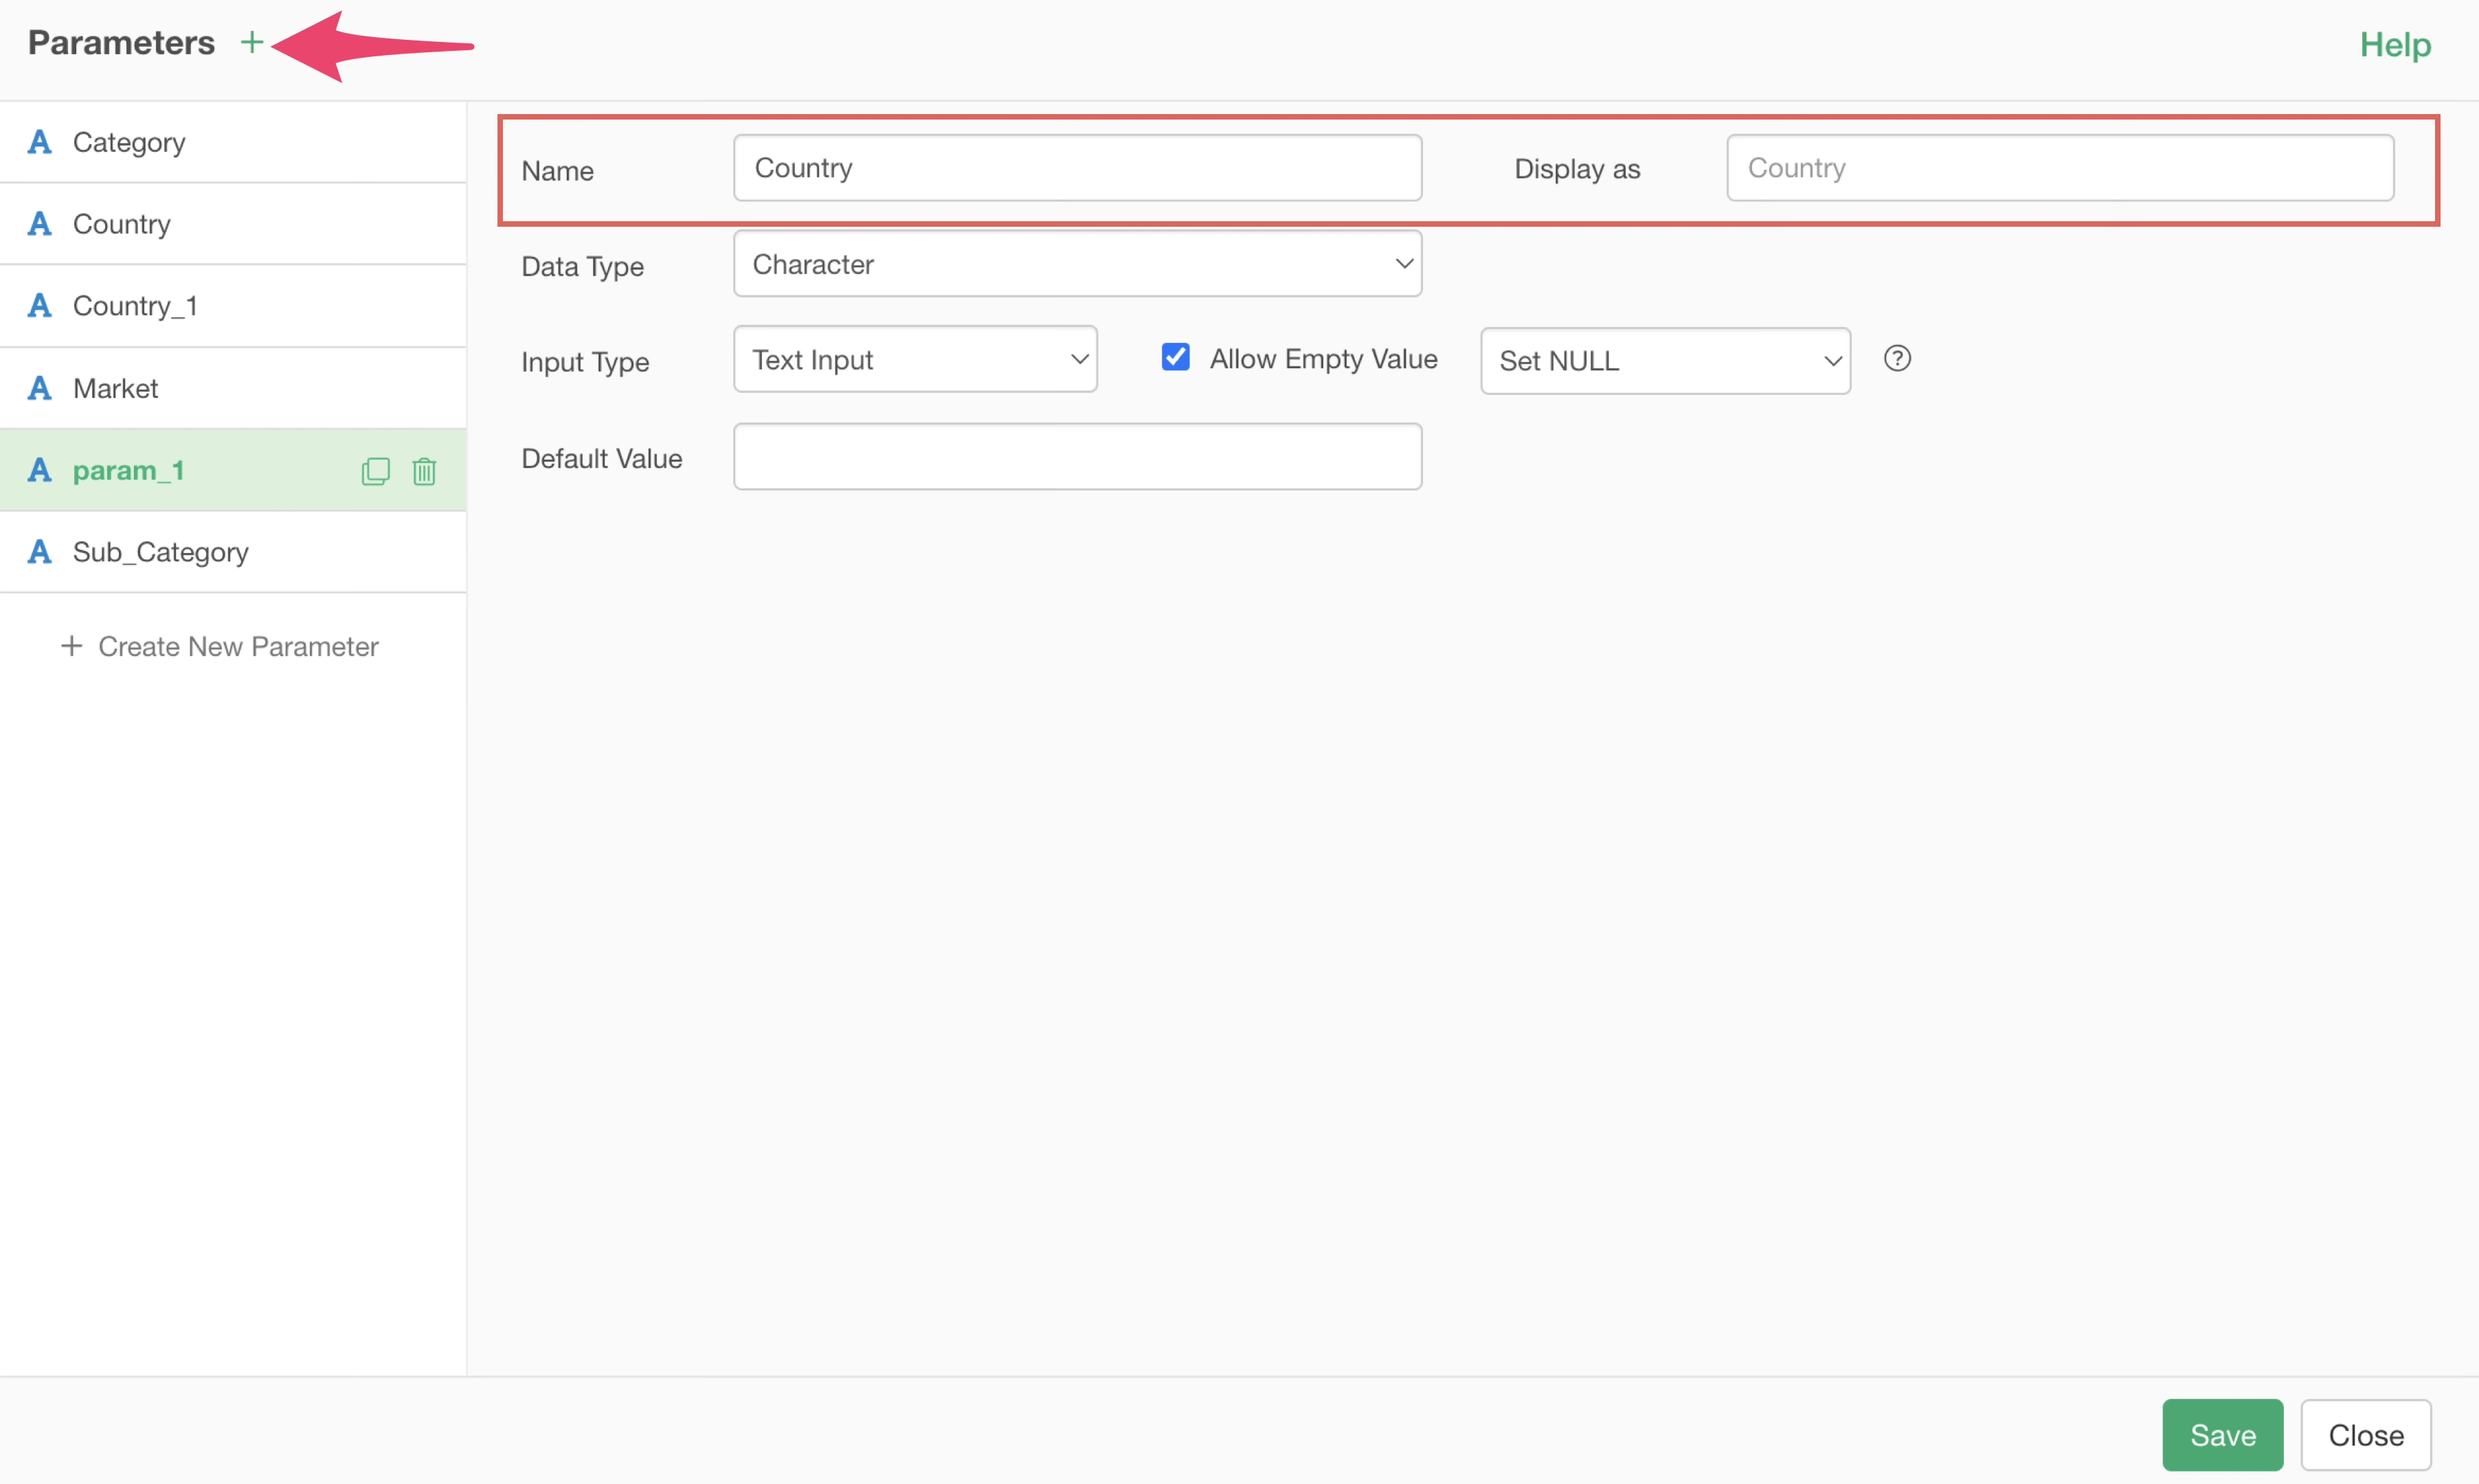
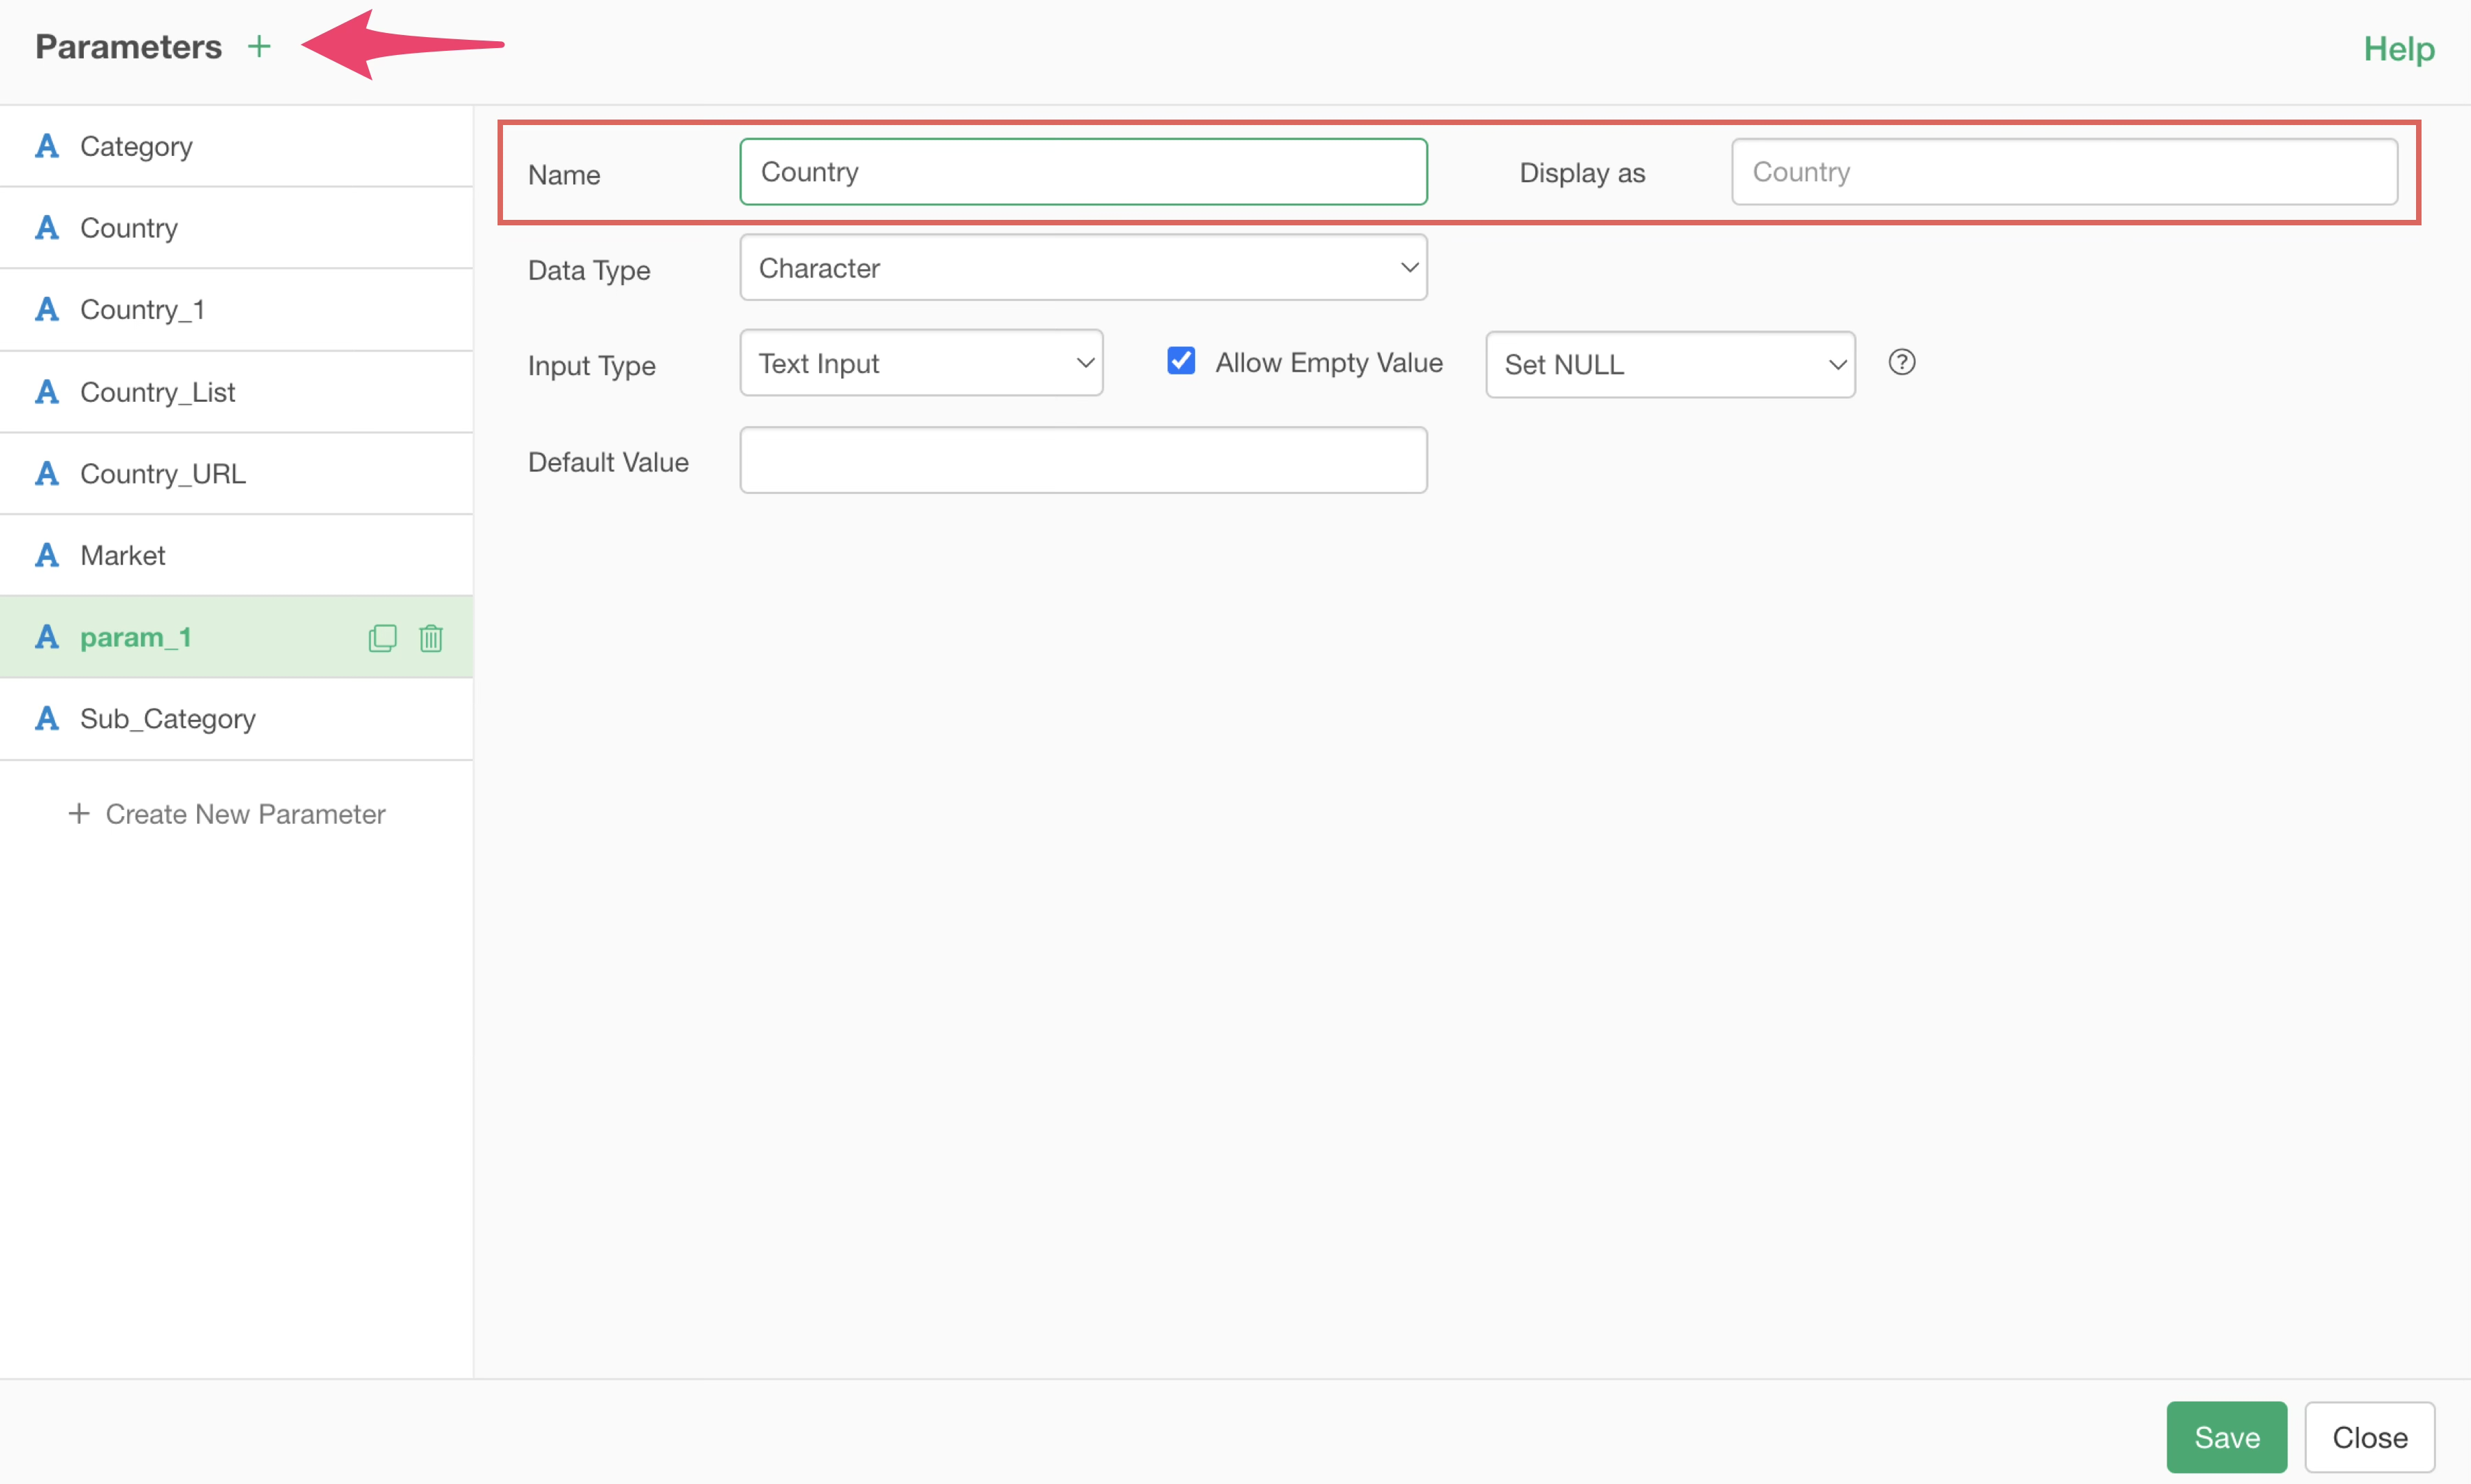
When the parameter dialog opens, click the “Add New Parameter” button and specify an arbitrary name for the Parameter Name and Display Name.
Since we are specifying a URL, select “Character” for the Data Type and “Text Input” for the Input Type.
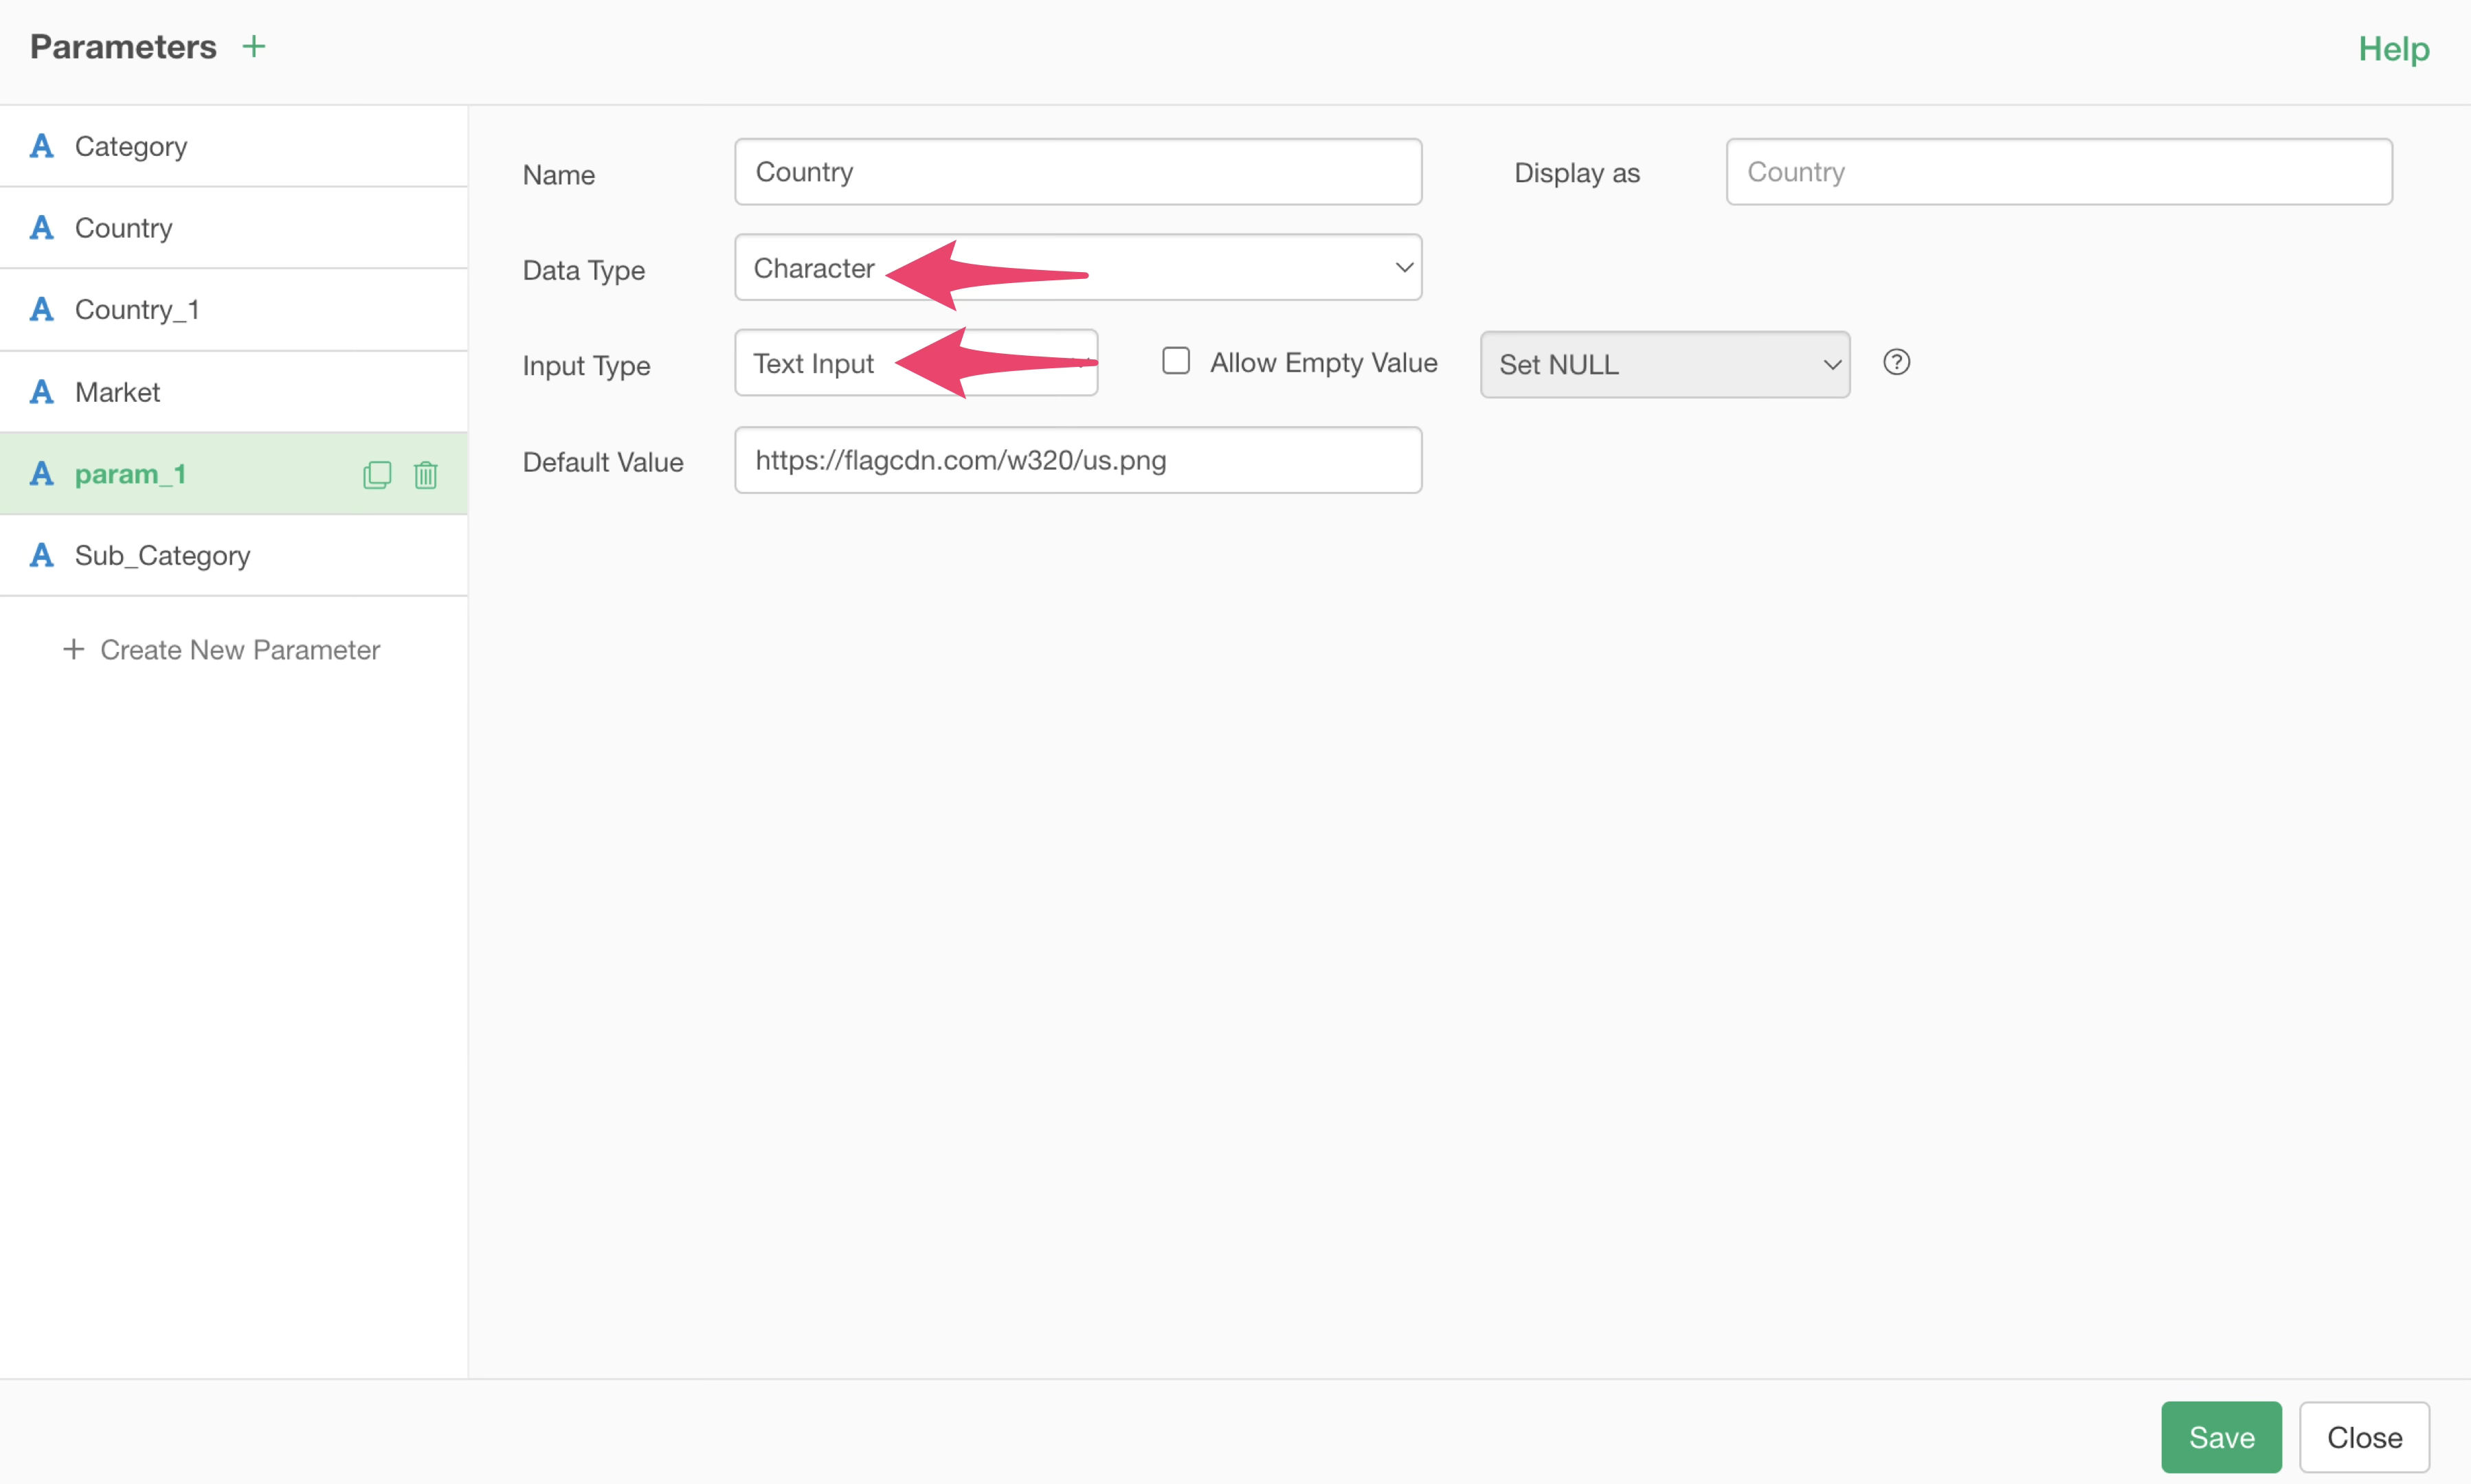
Since we want to always specify a unique URL, uncheck “Support Empty Value.”
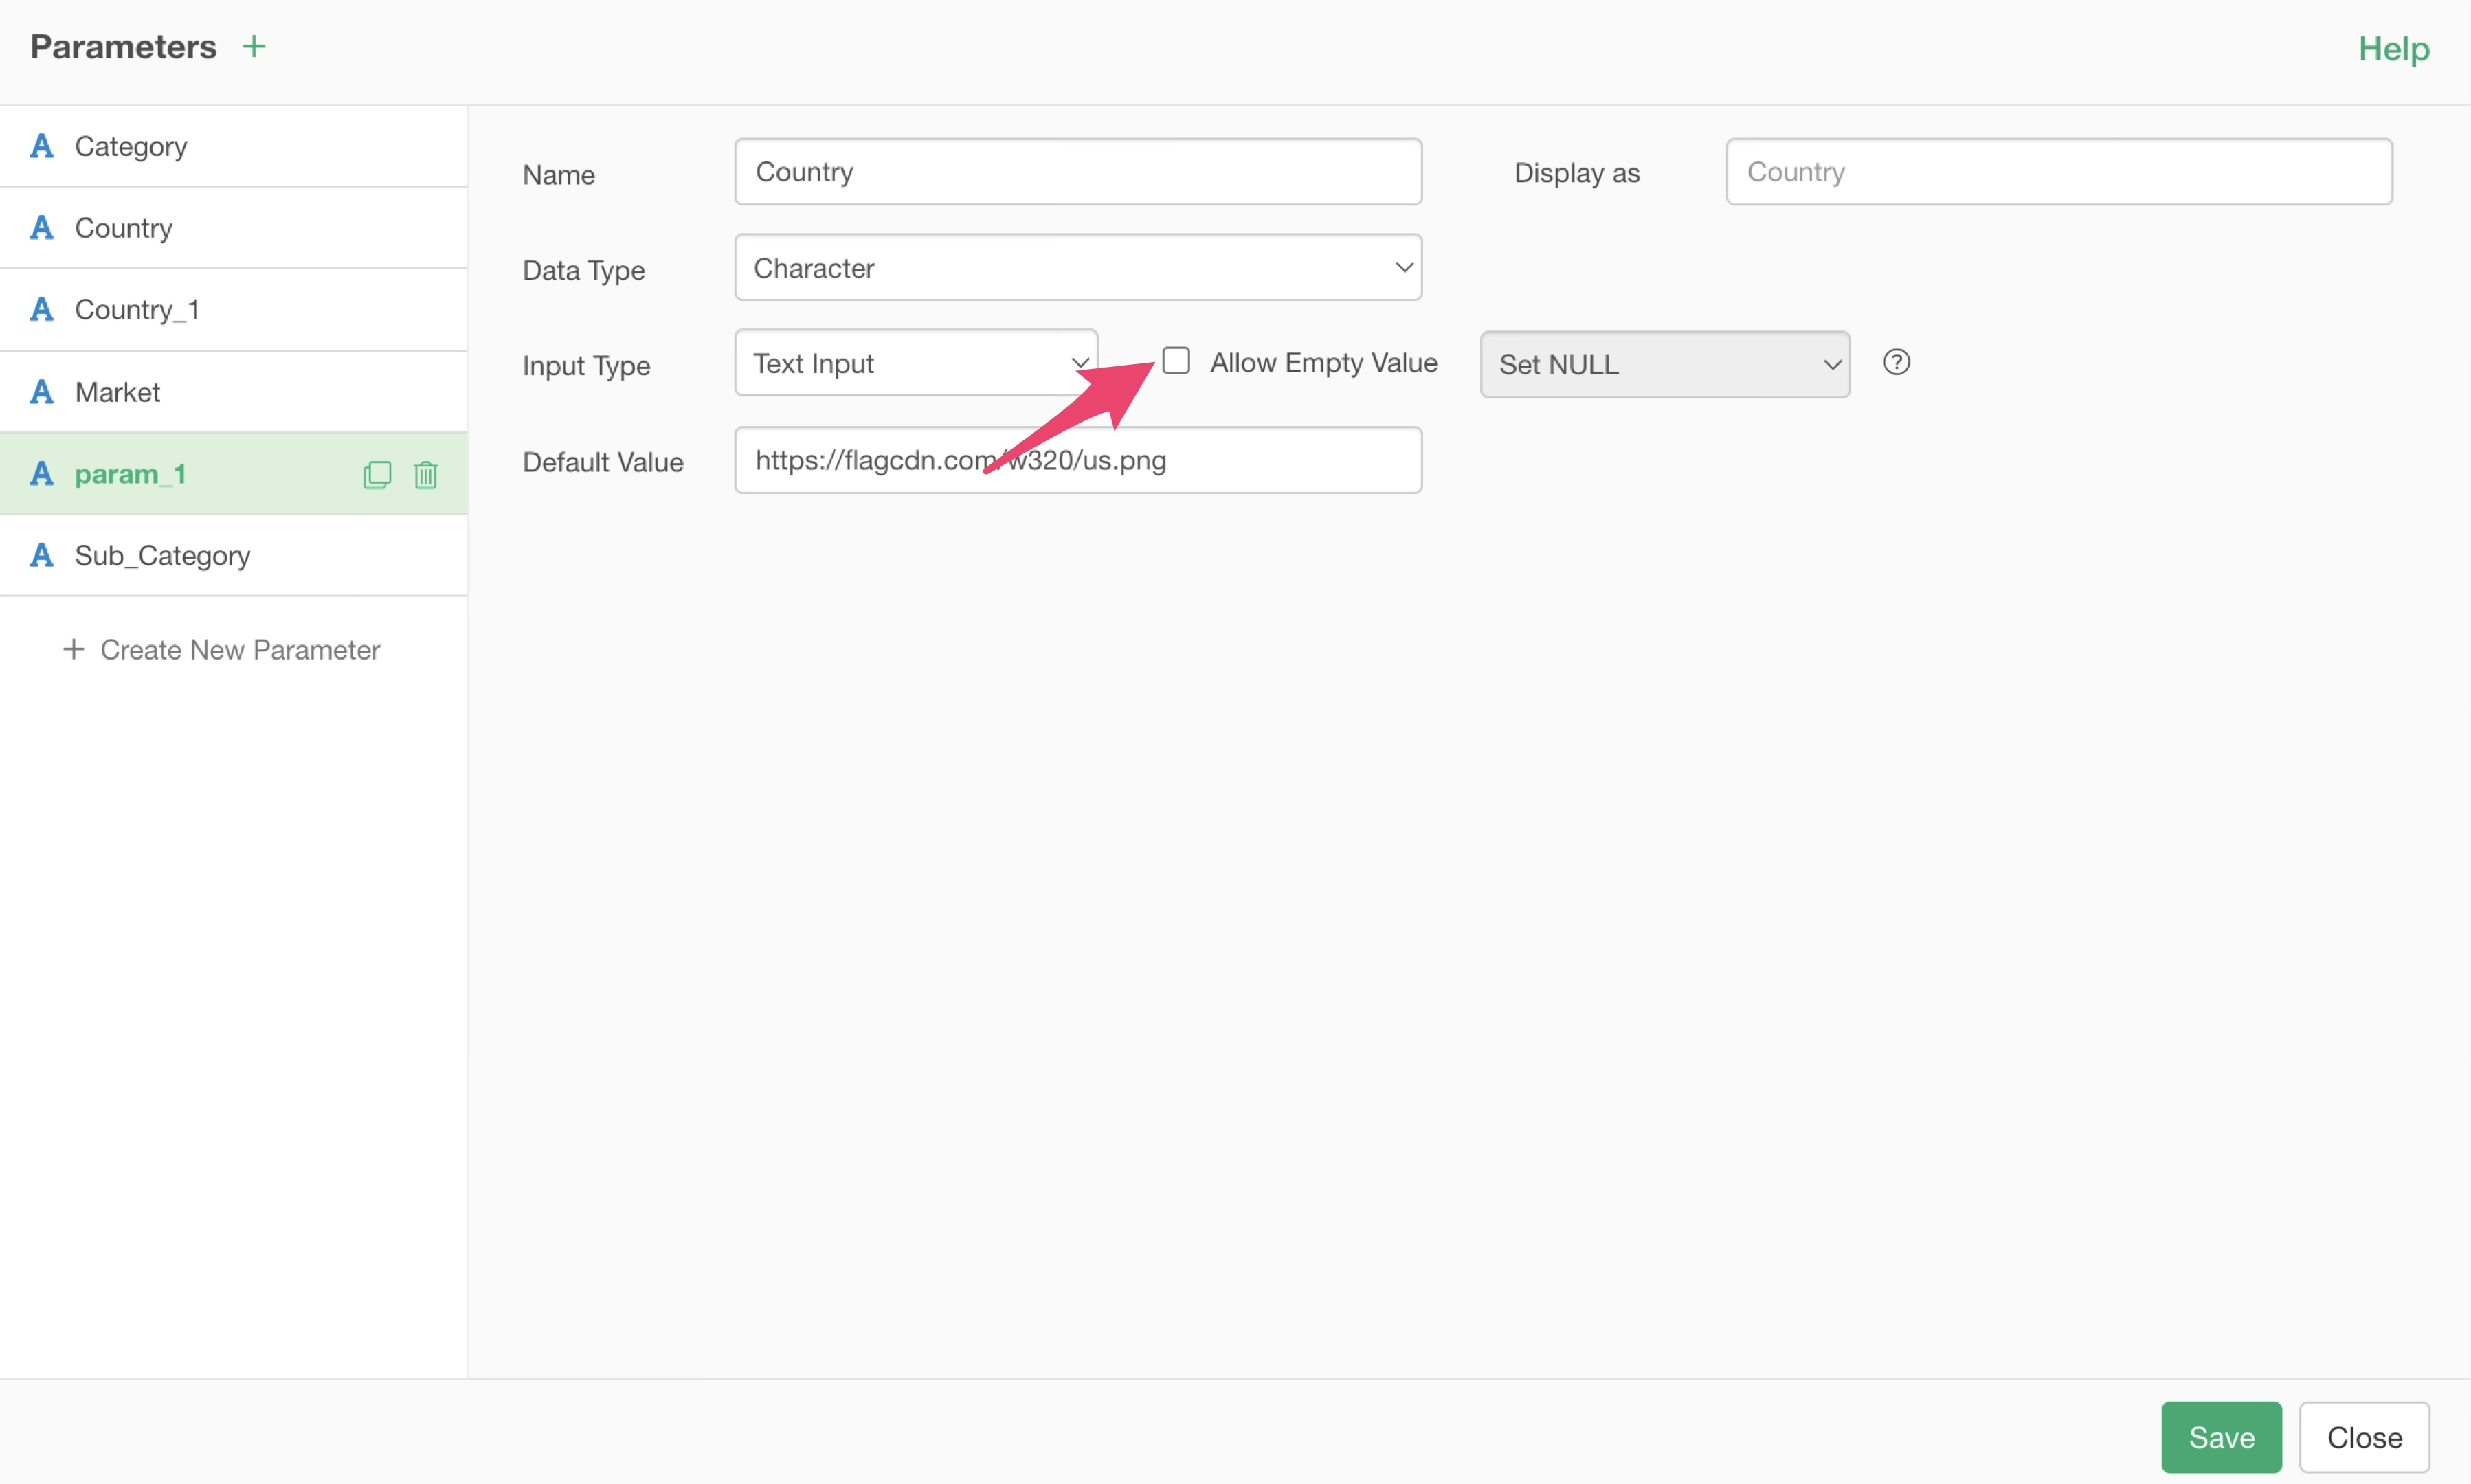
Next, a dialog to determine the default value will appear; specify the default value. (In this example, we specify a URL that displays the US flag by default.)
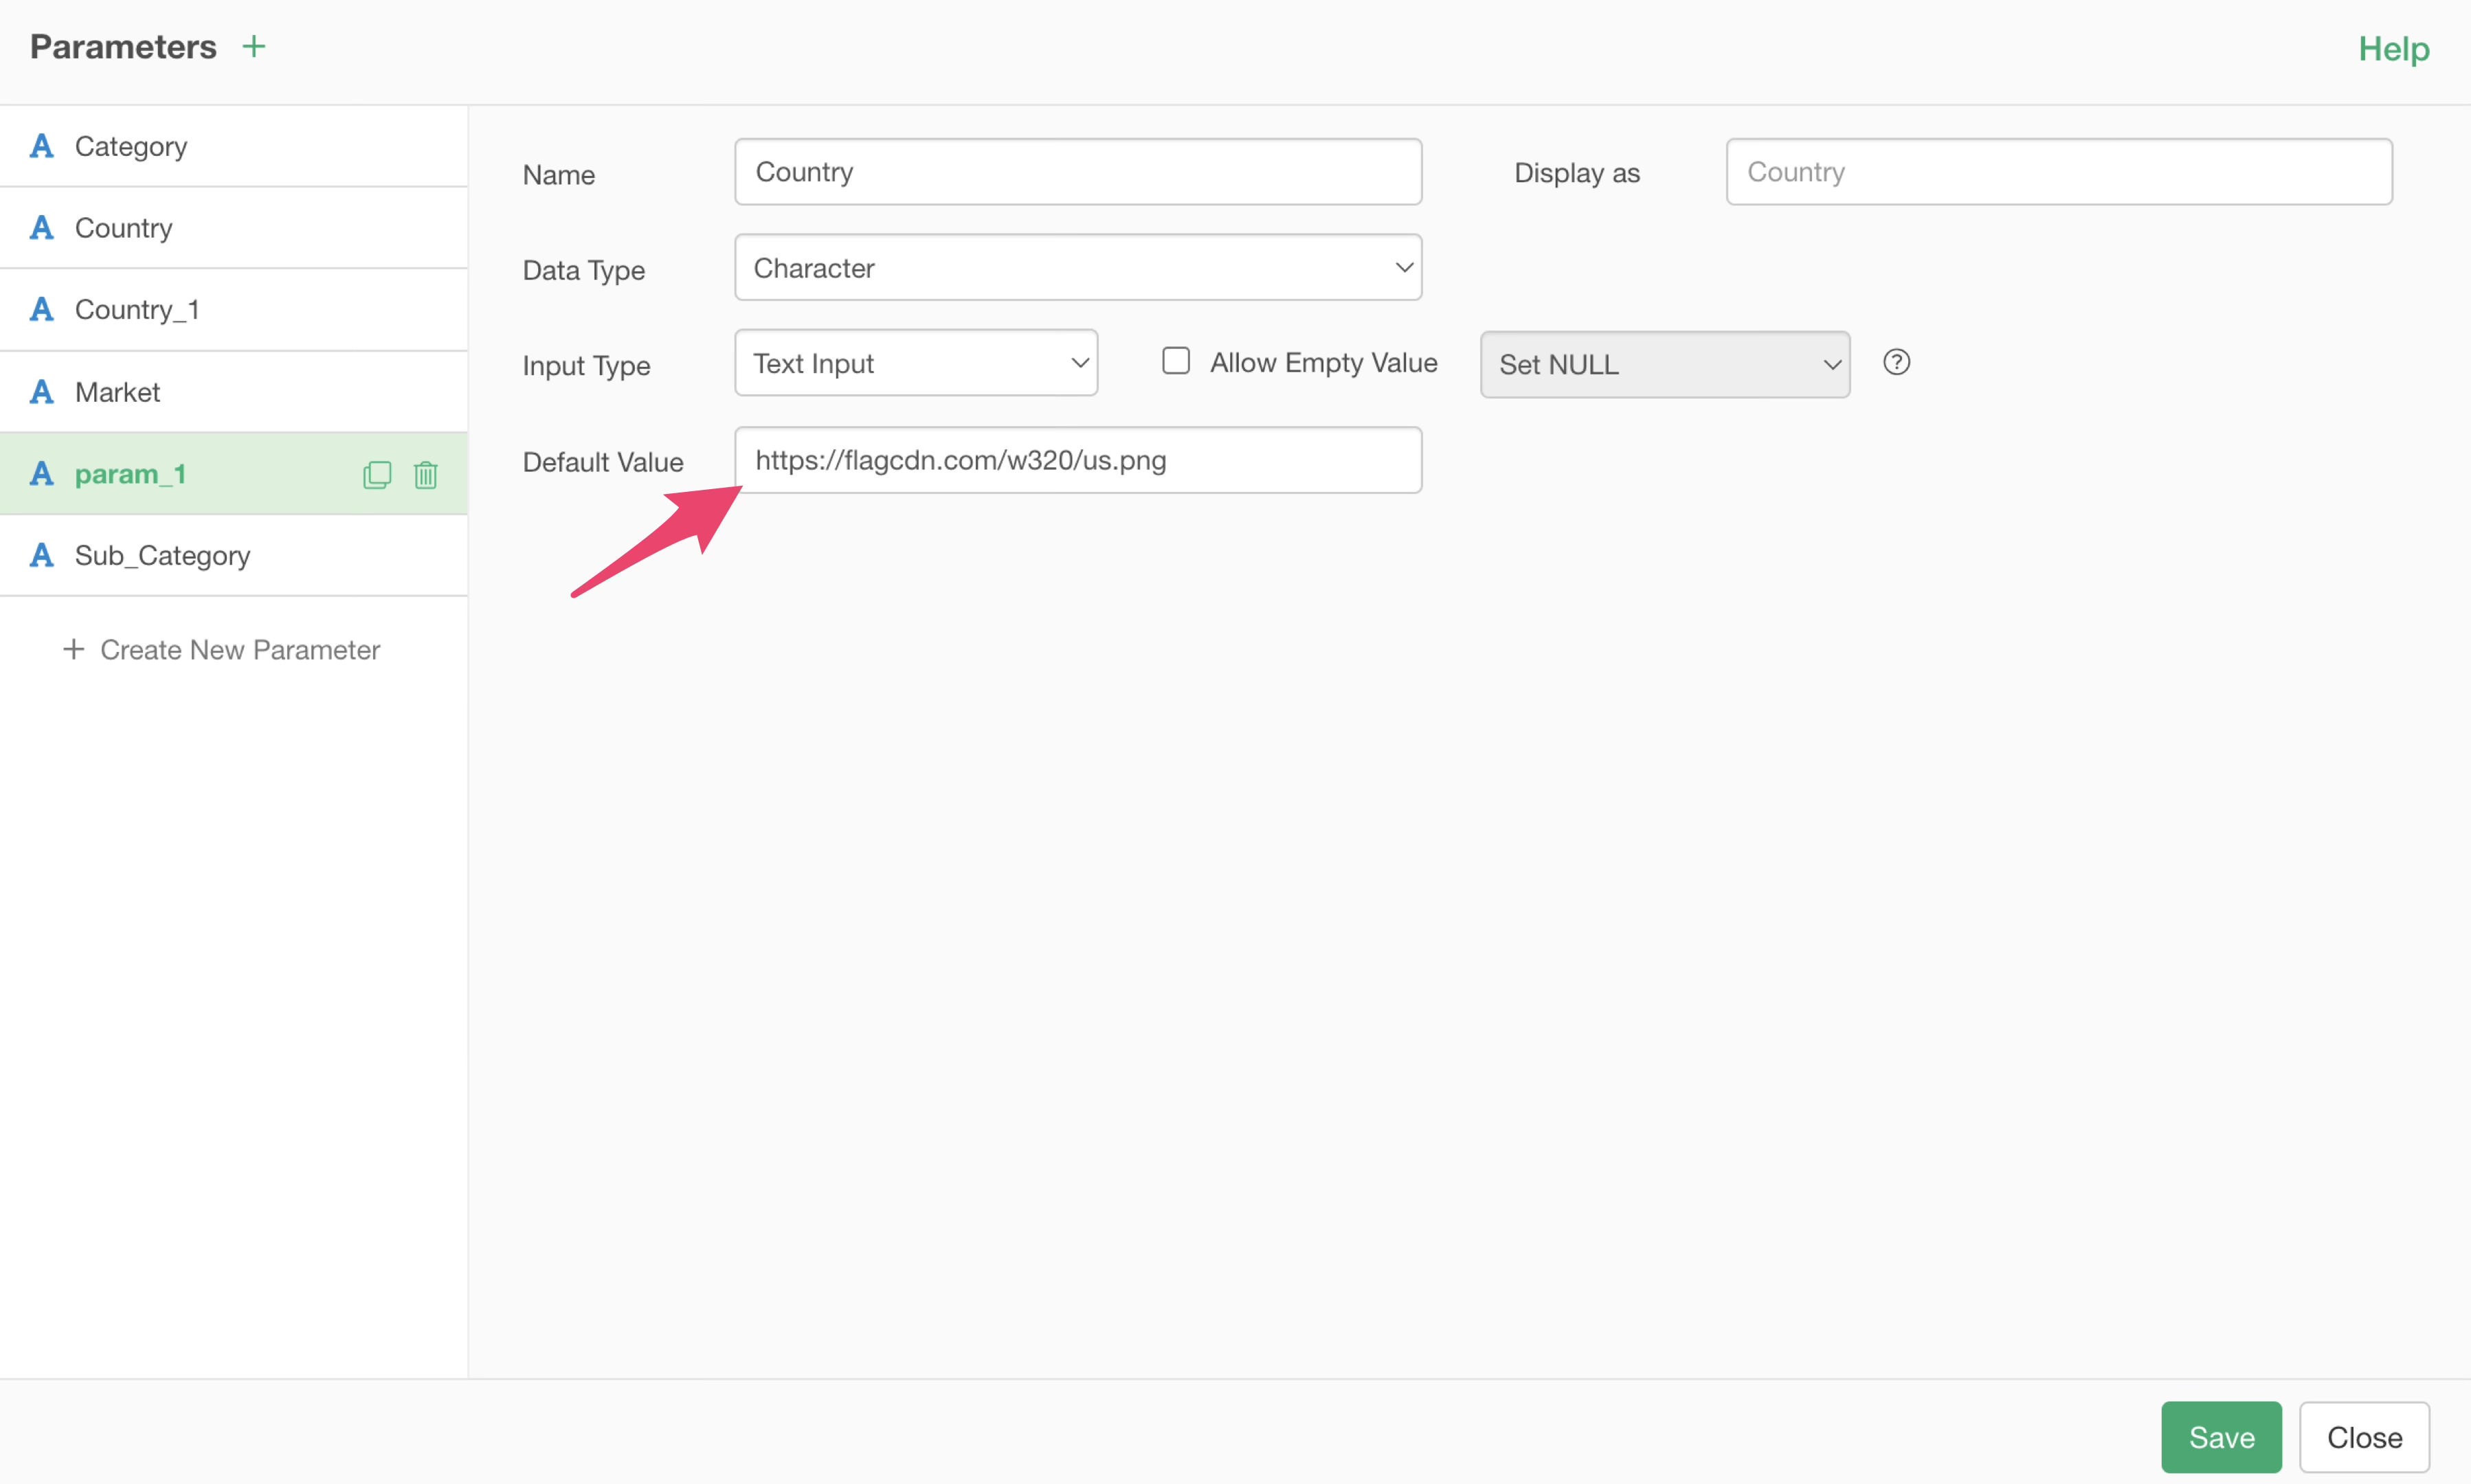
After creating the parameter, save it.
Next, open the dashboard where you want to display the image, click the “Add Content” button from the edit menu, and select “Add Text.”
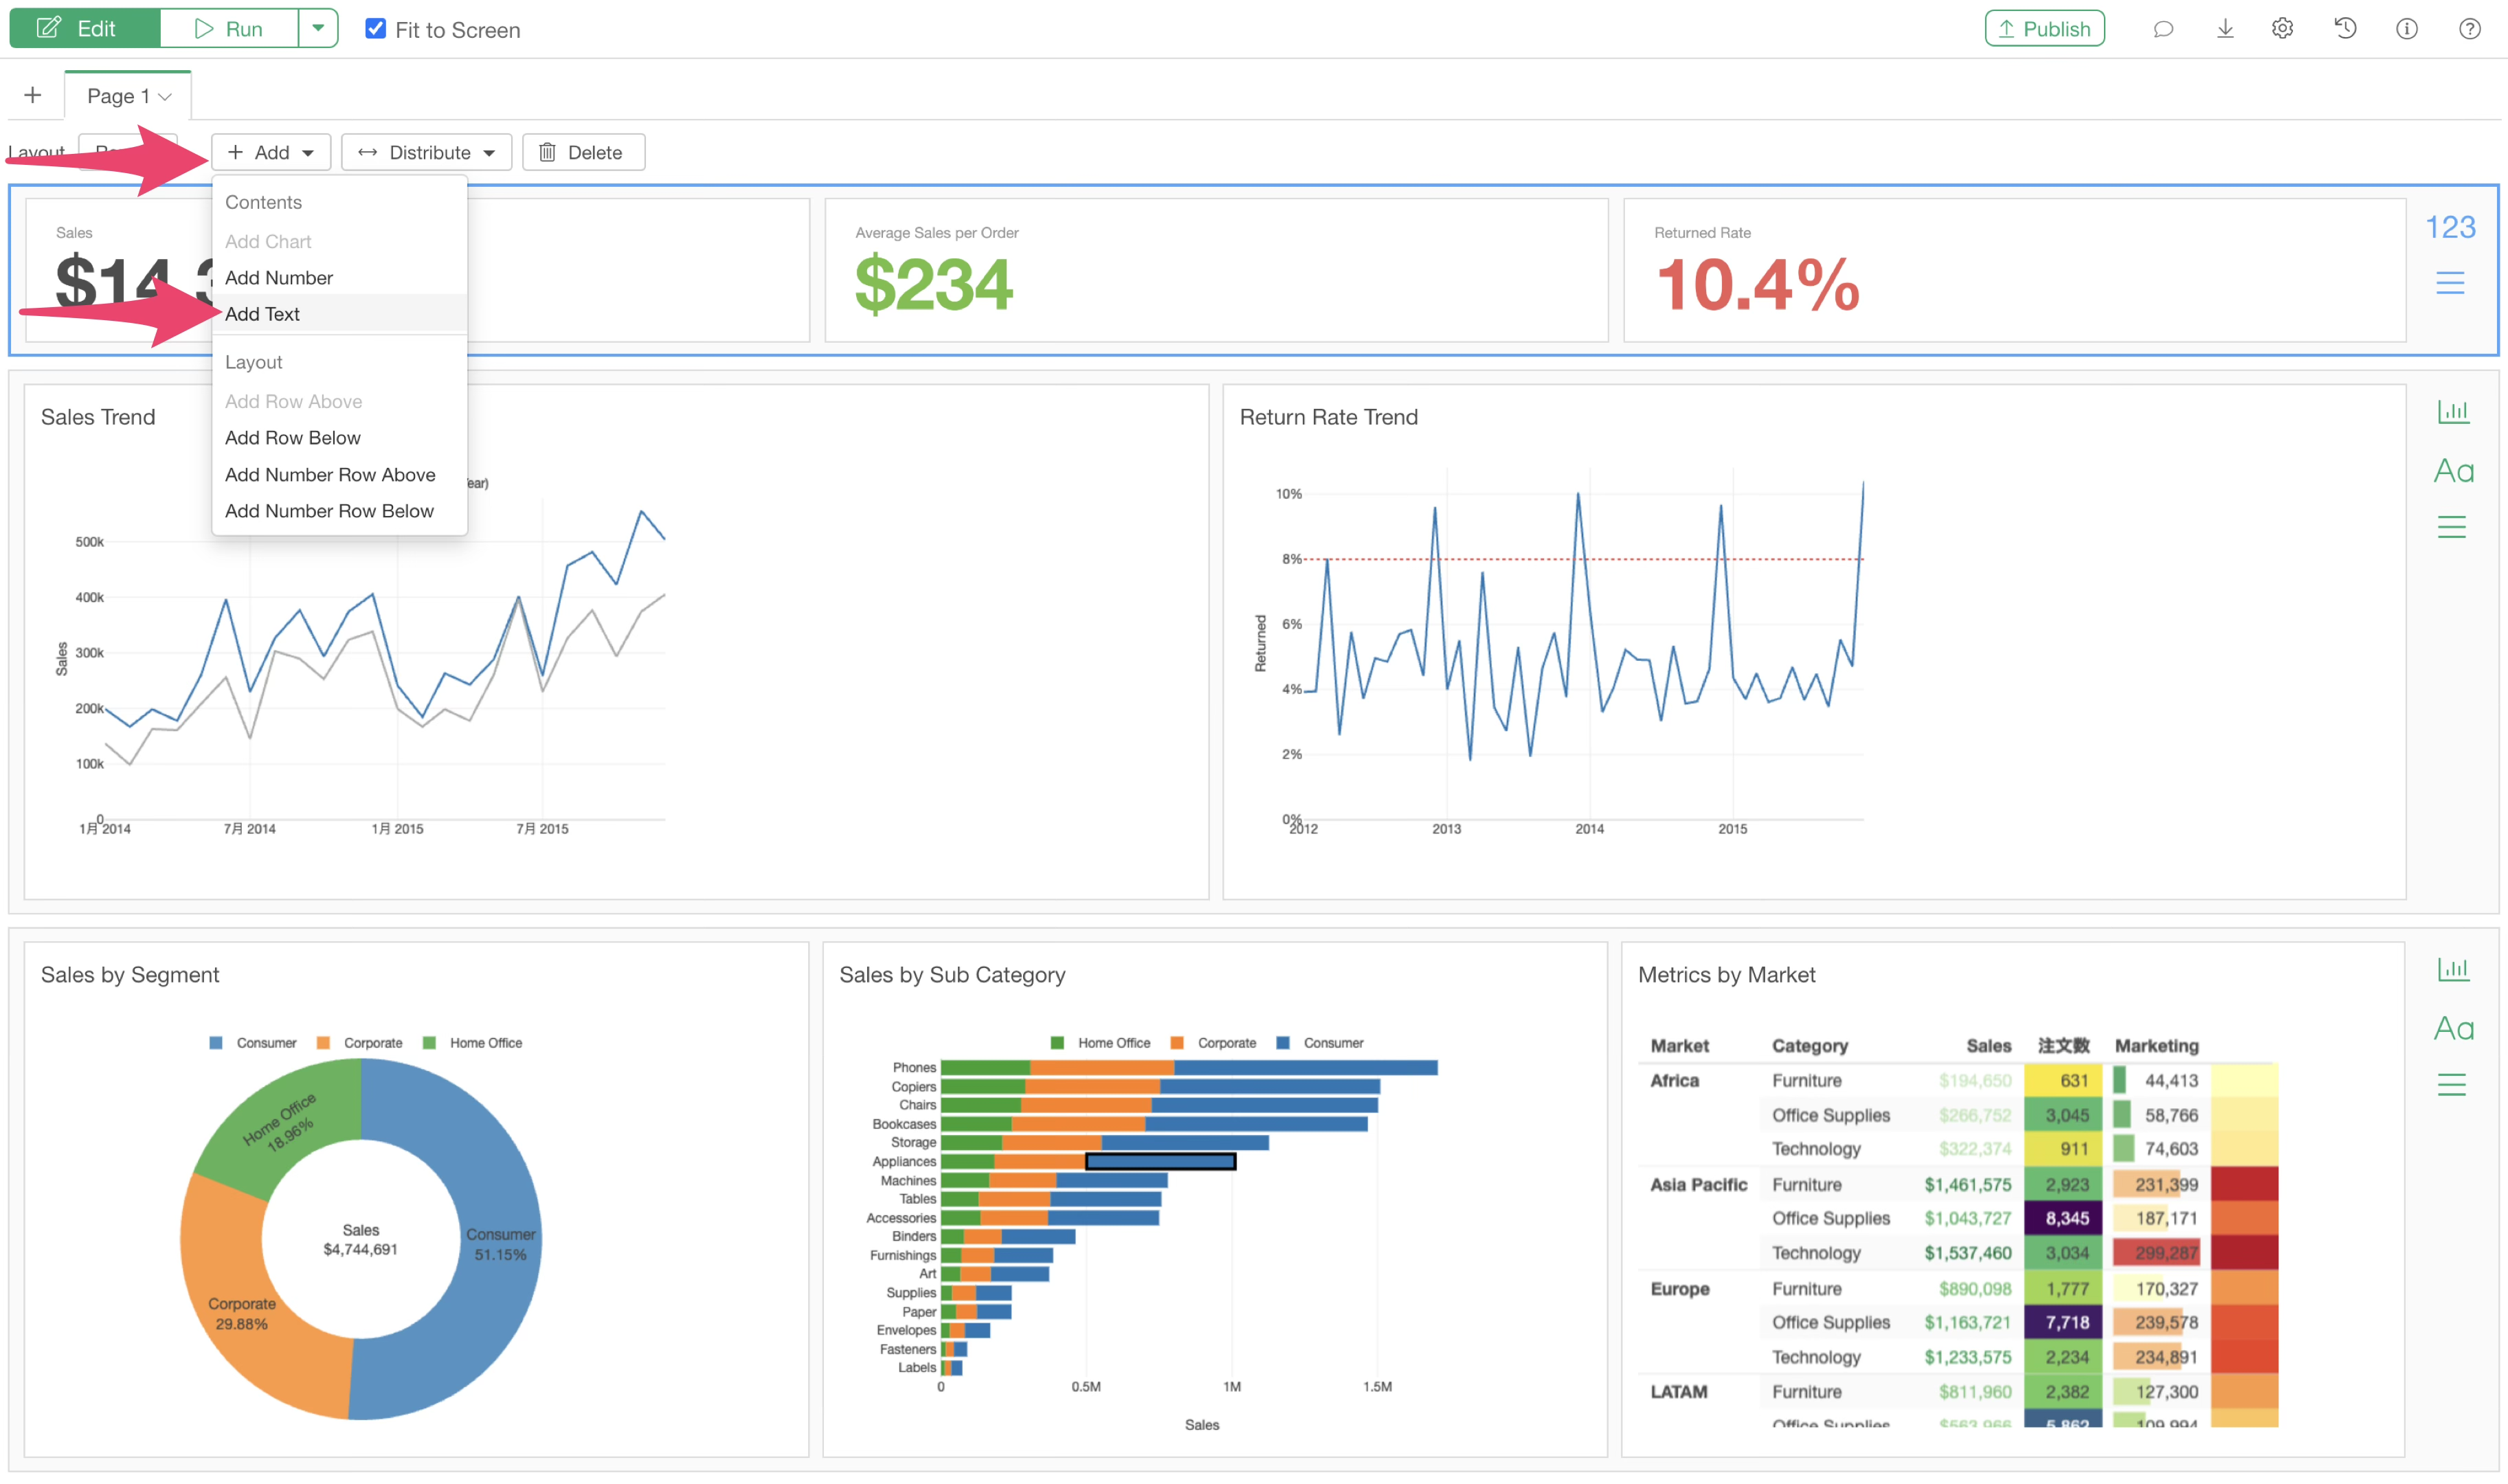
At this point, the text panel can be added to either a “Number” row or a “Regular” row, but for this example, we will add the text to a Number row.
When you select “Add Text,” the text panel will appear in the Number row. Click the “Edit Text” button.
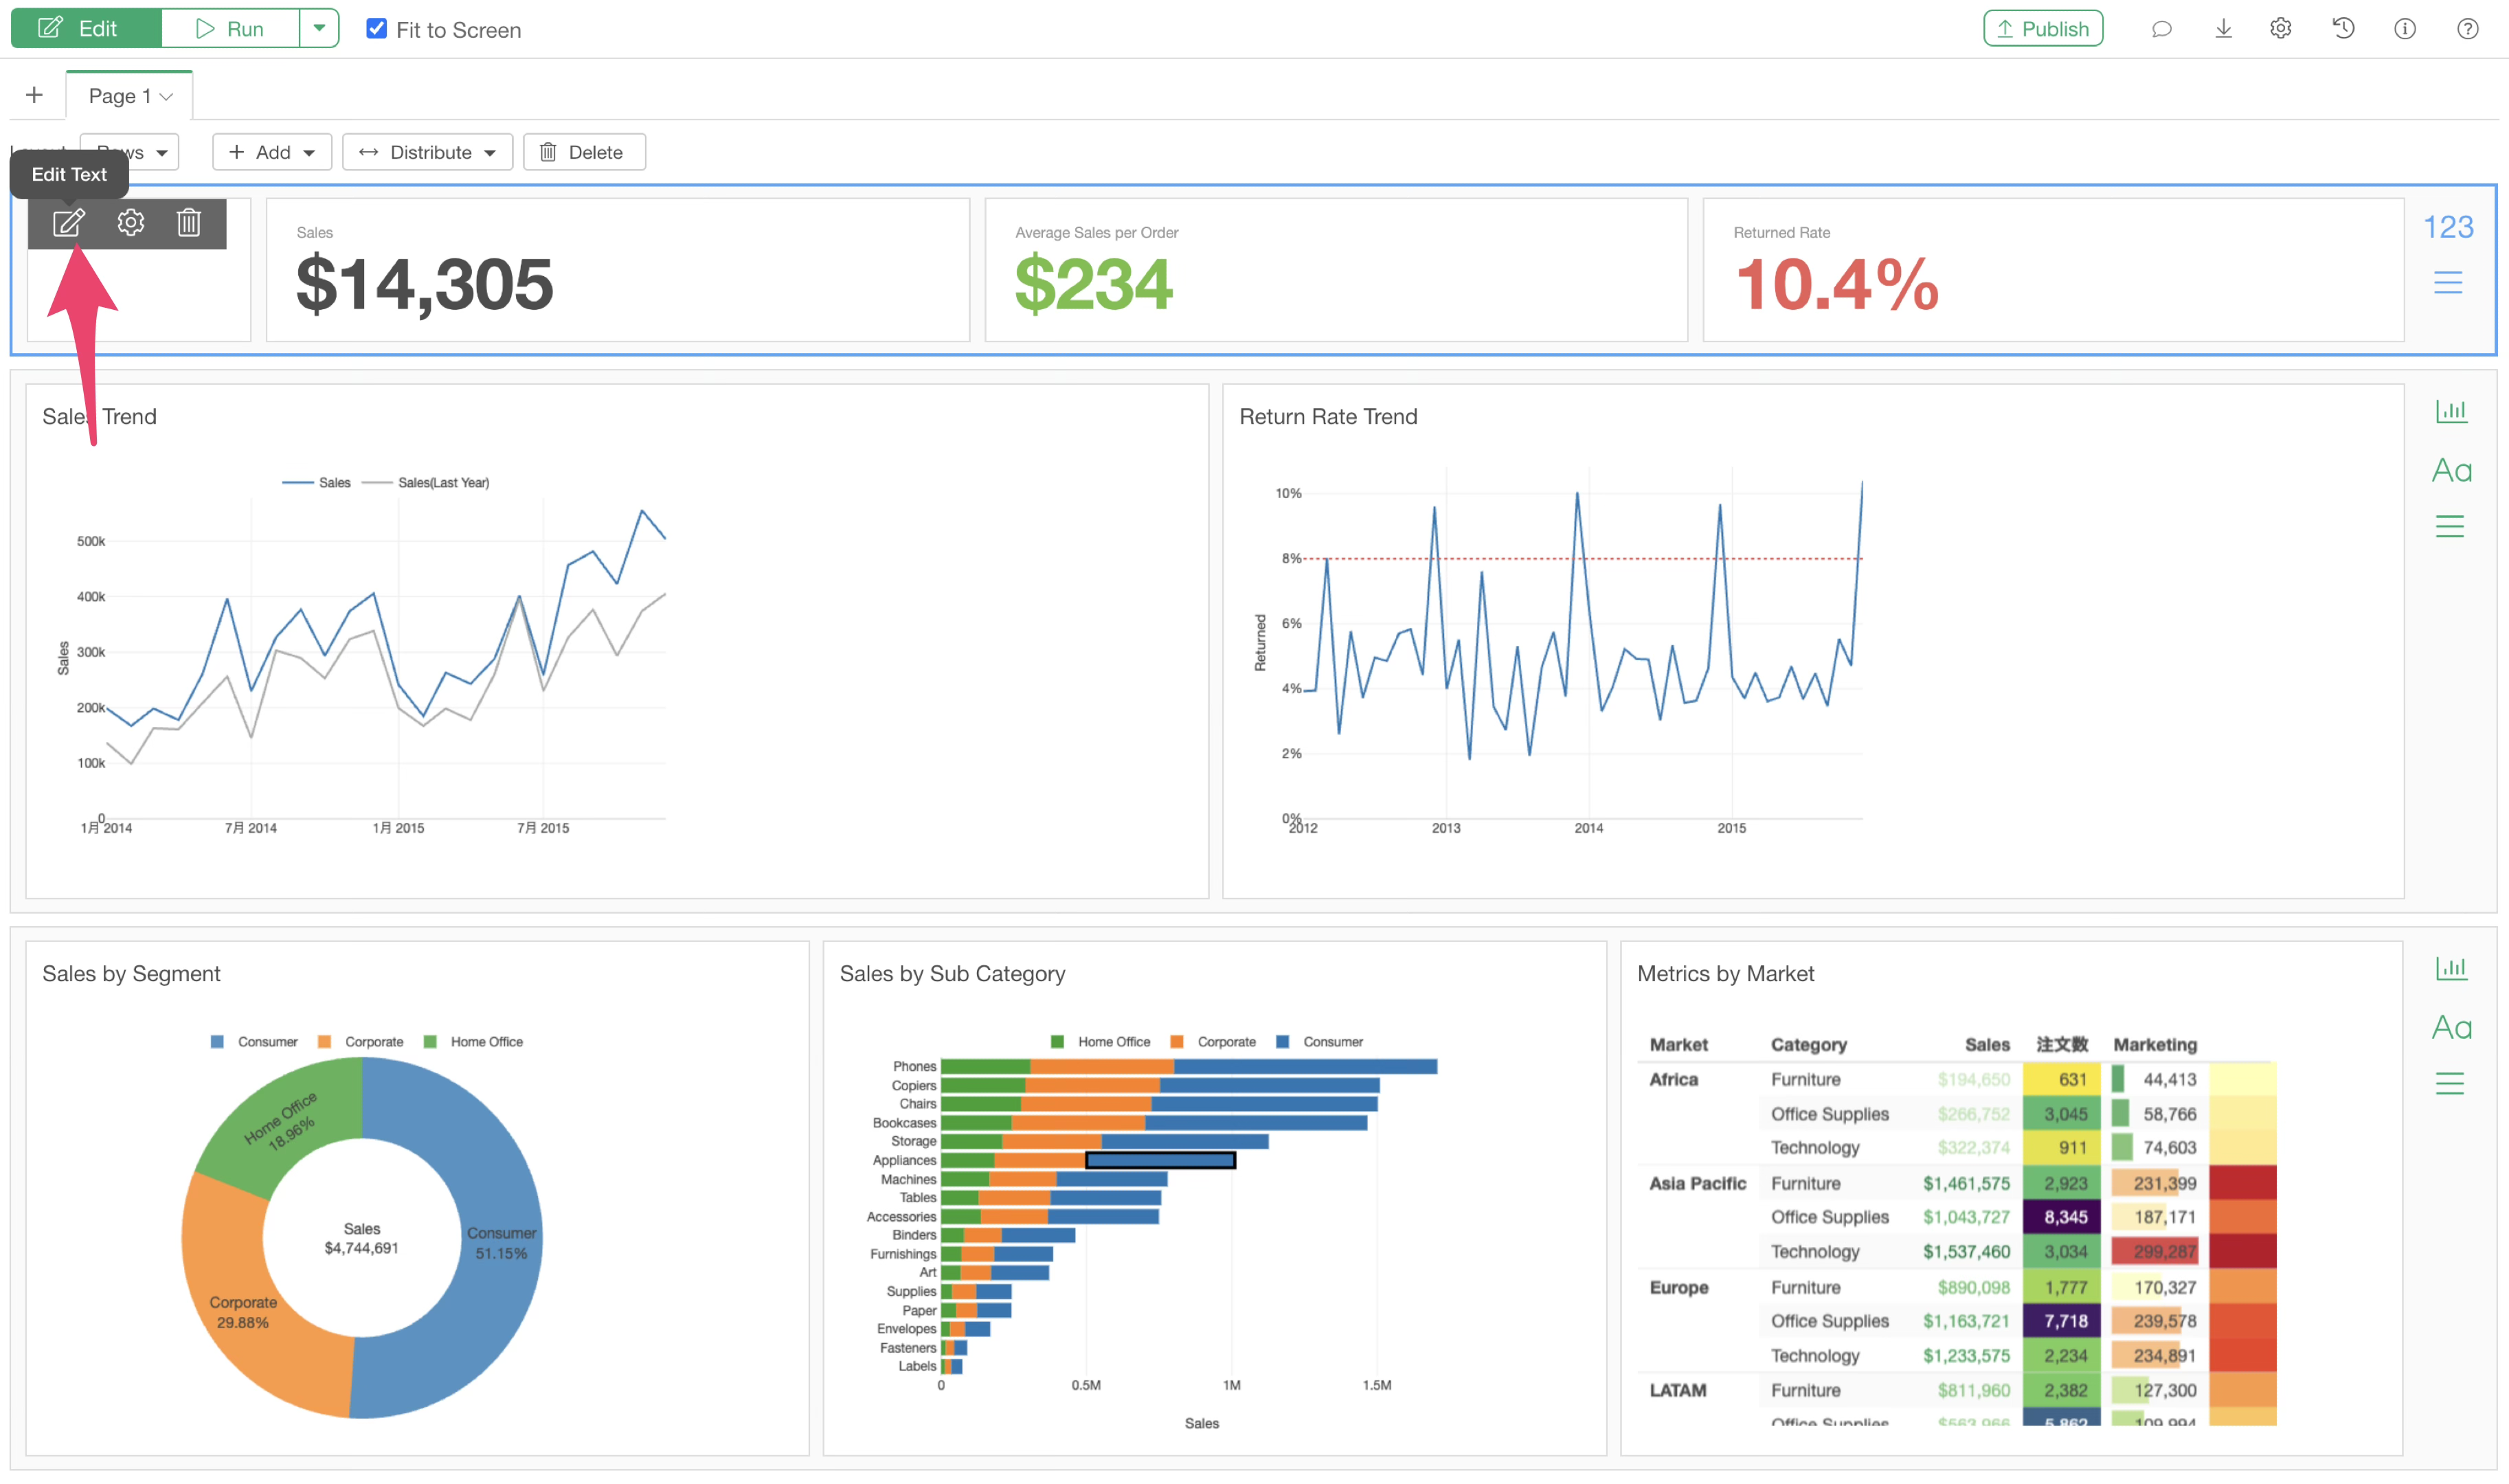
To call the image directly, you will use the R language. Enter the following code within an inline R code block:
r paste0 (‘<img style=“width:100px” src=“‘, @Country,’”>’)
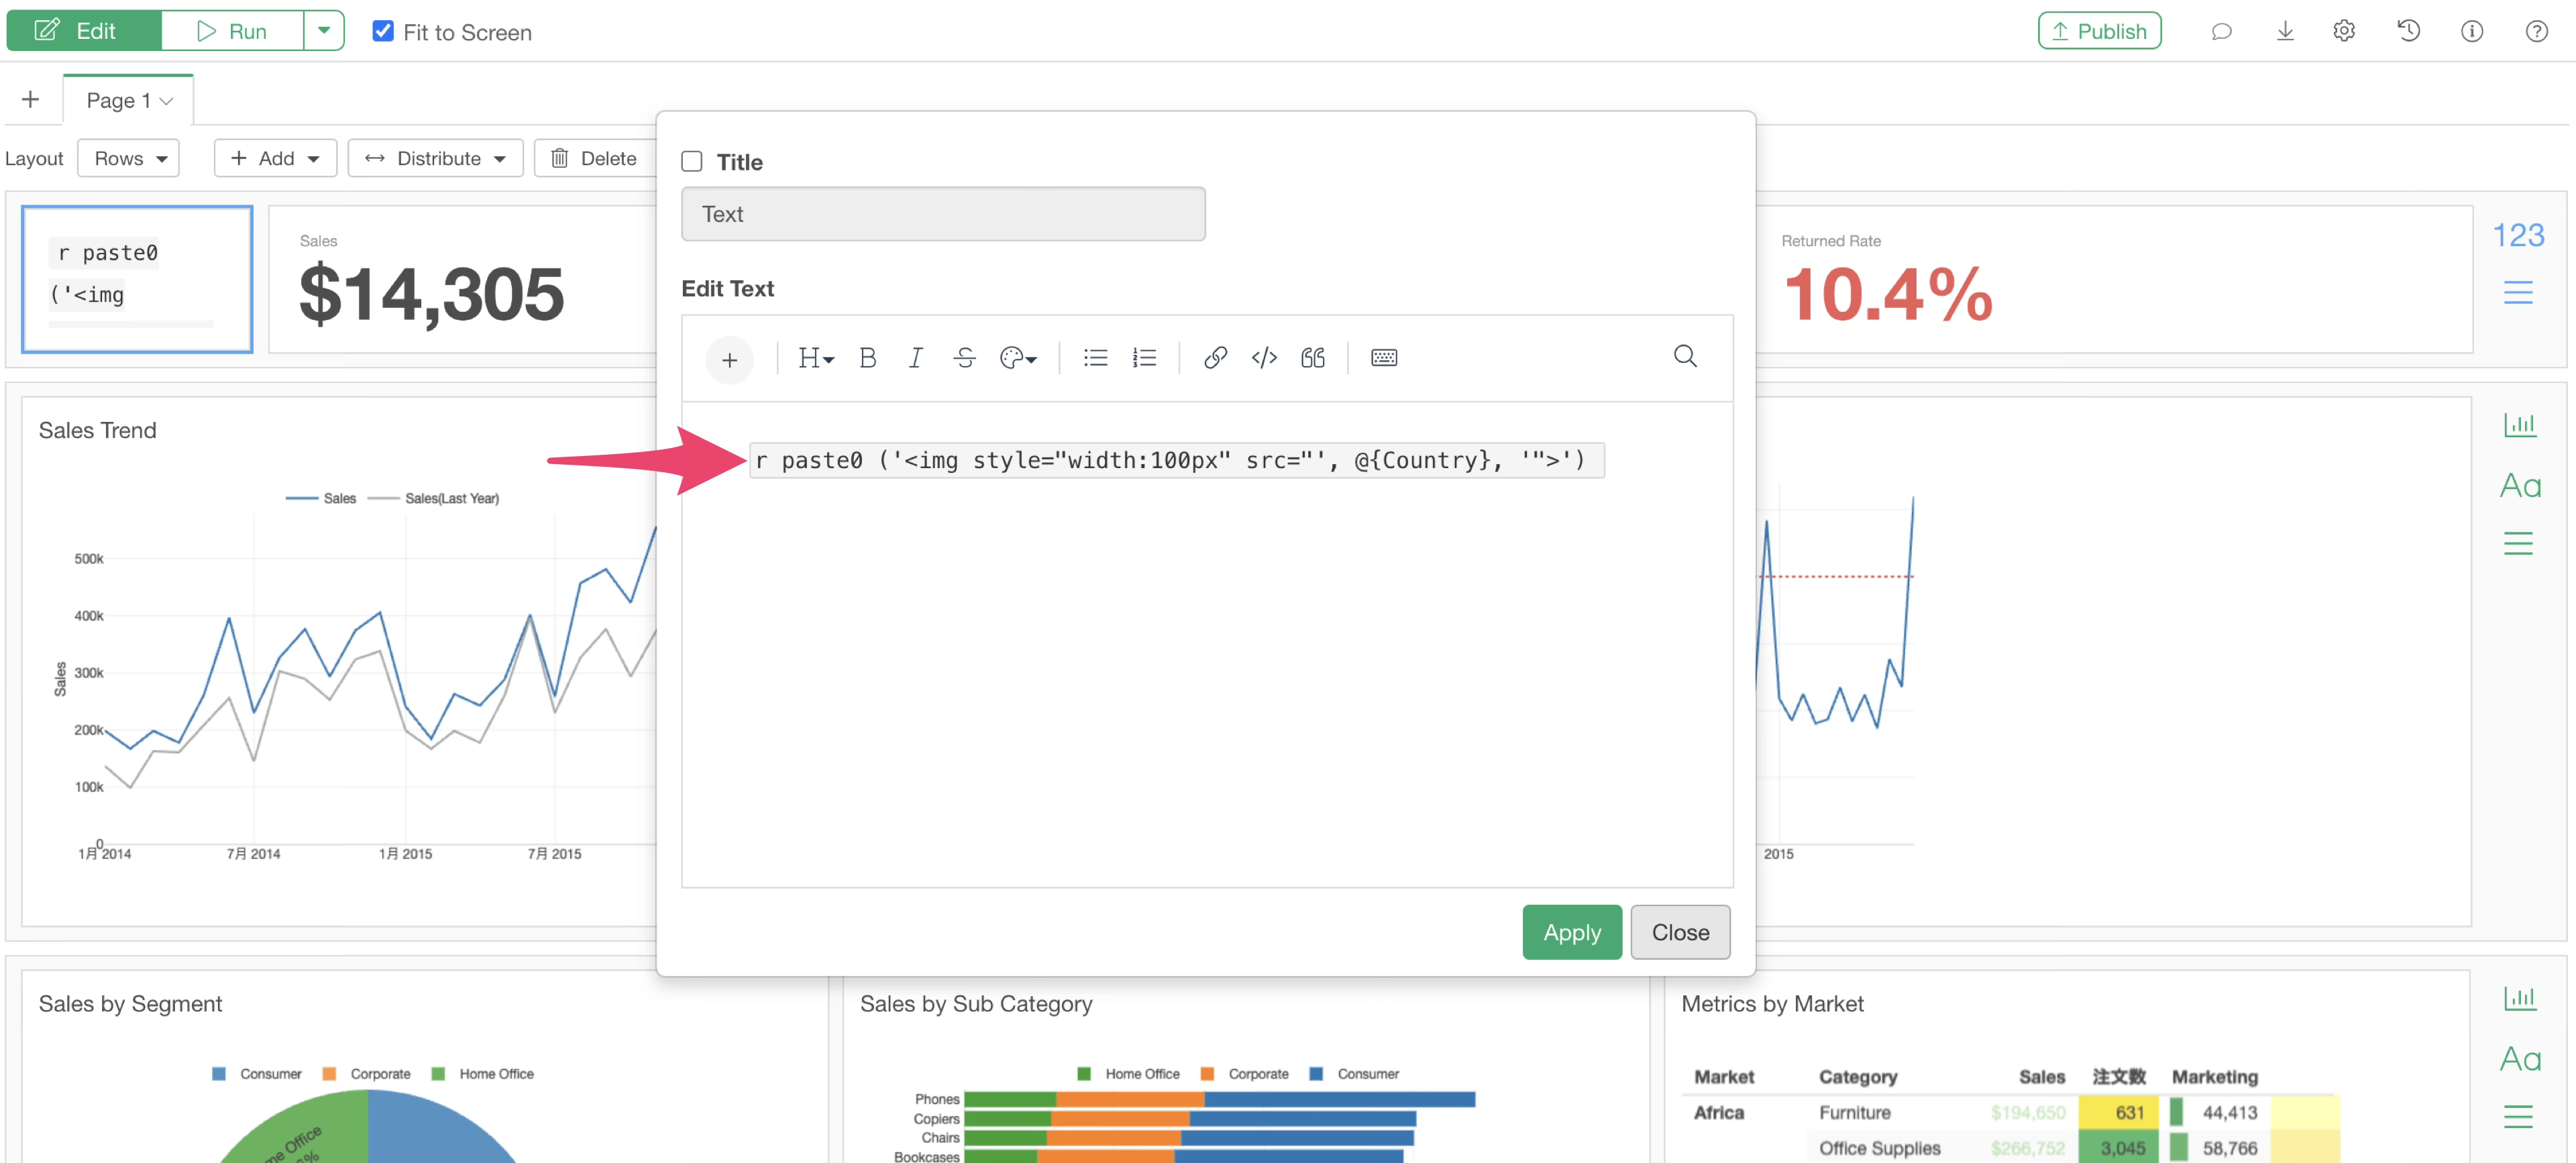
This code specifies the src (source) element of the
media or image using the parameter value. The parameter is specified by
enclosing the parameter name in curly braces.
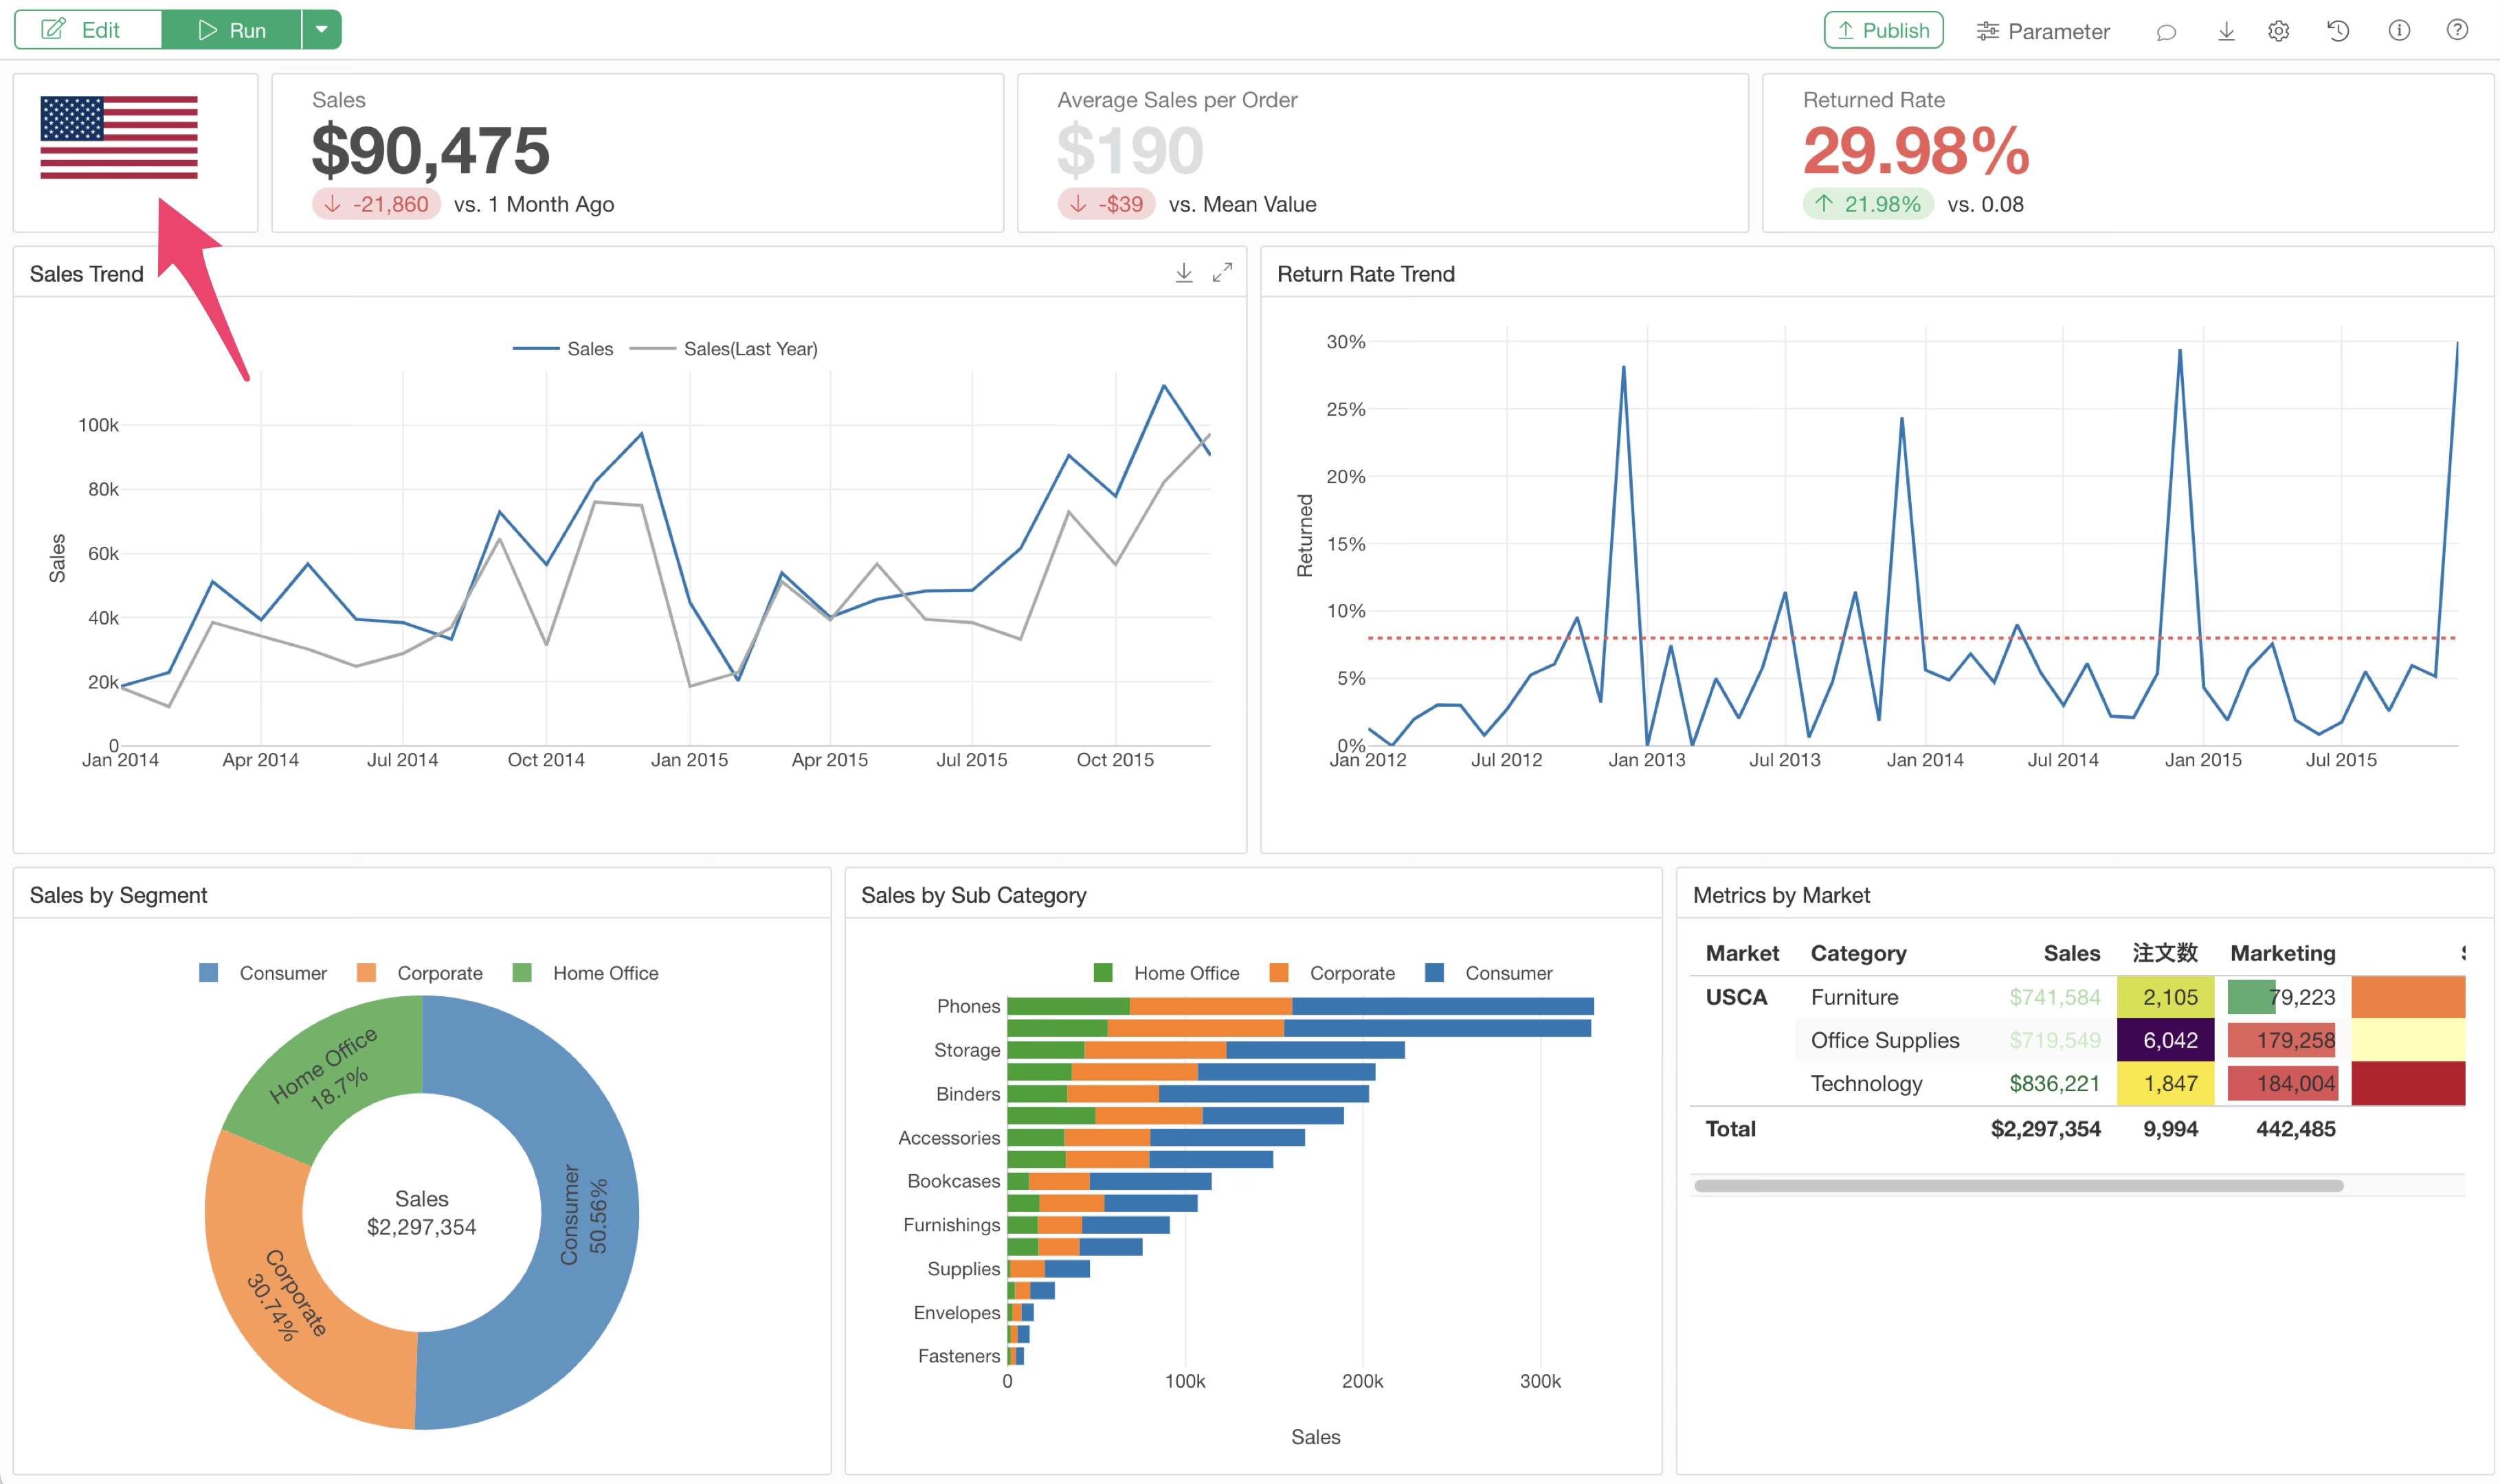
When you run the dashboard in this state, the default URL specified earlier is substituted, and the US flag is displayed.
If you open the parameter pane, enter a different URL, and run it, a different flag will be displayed.
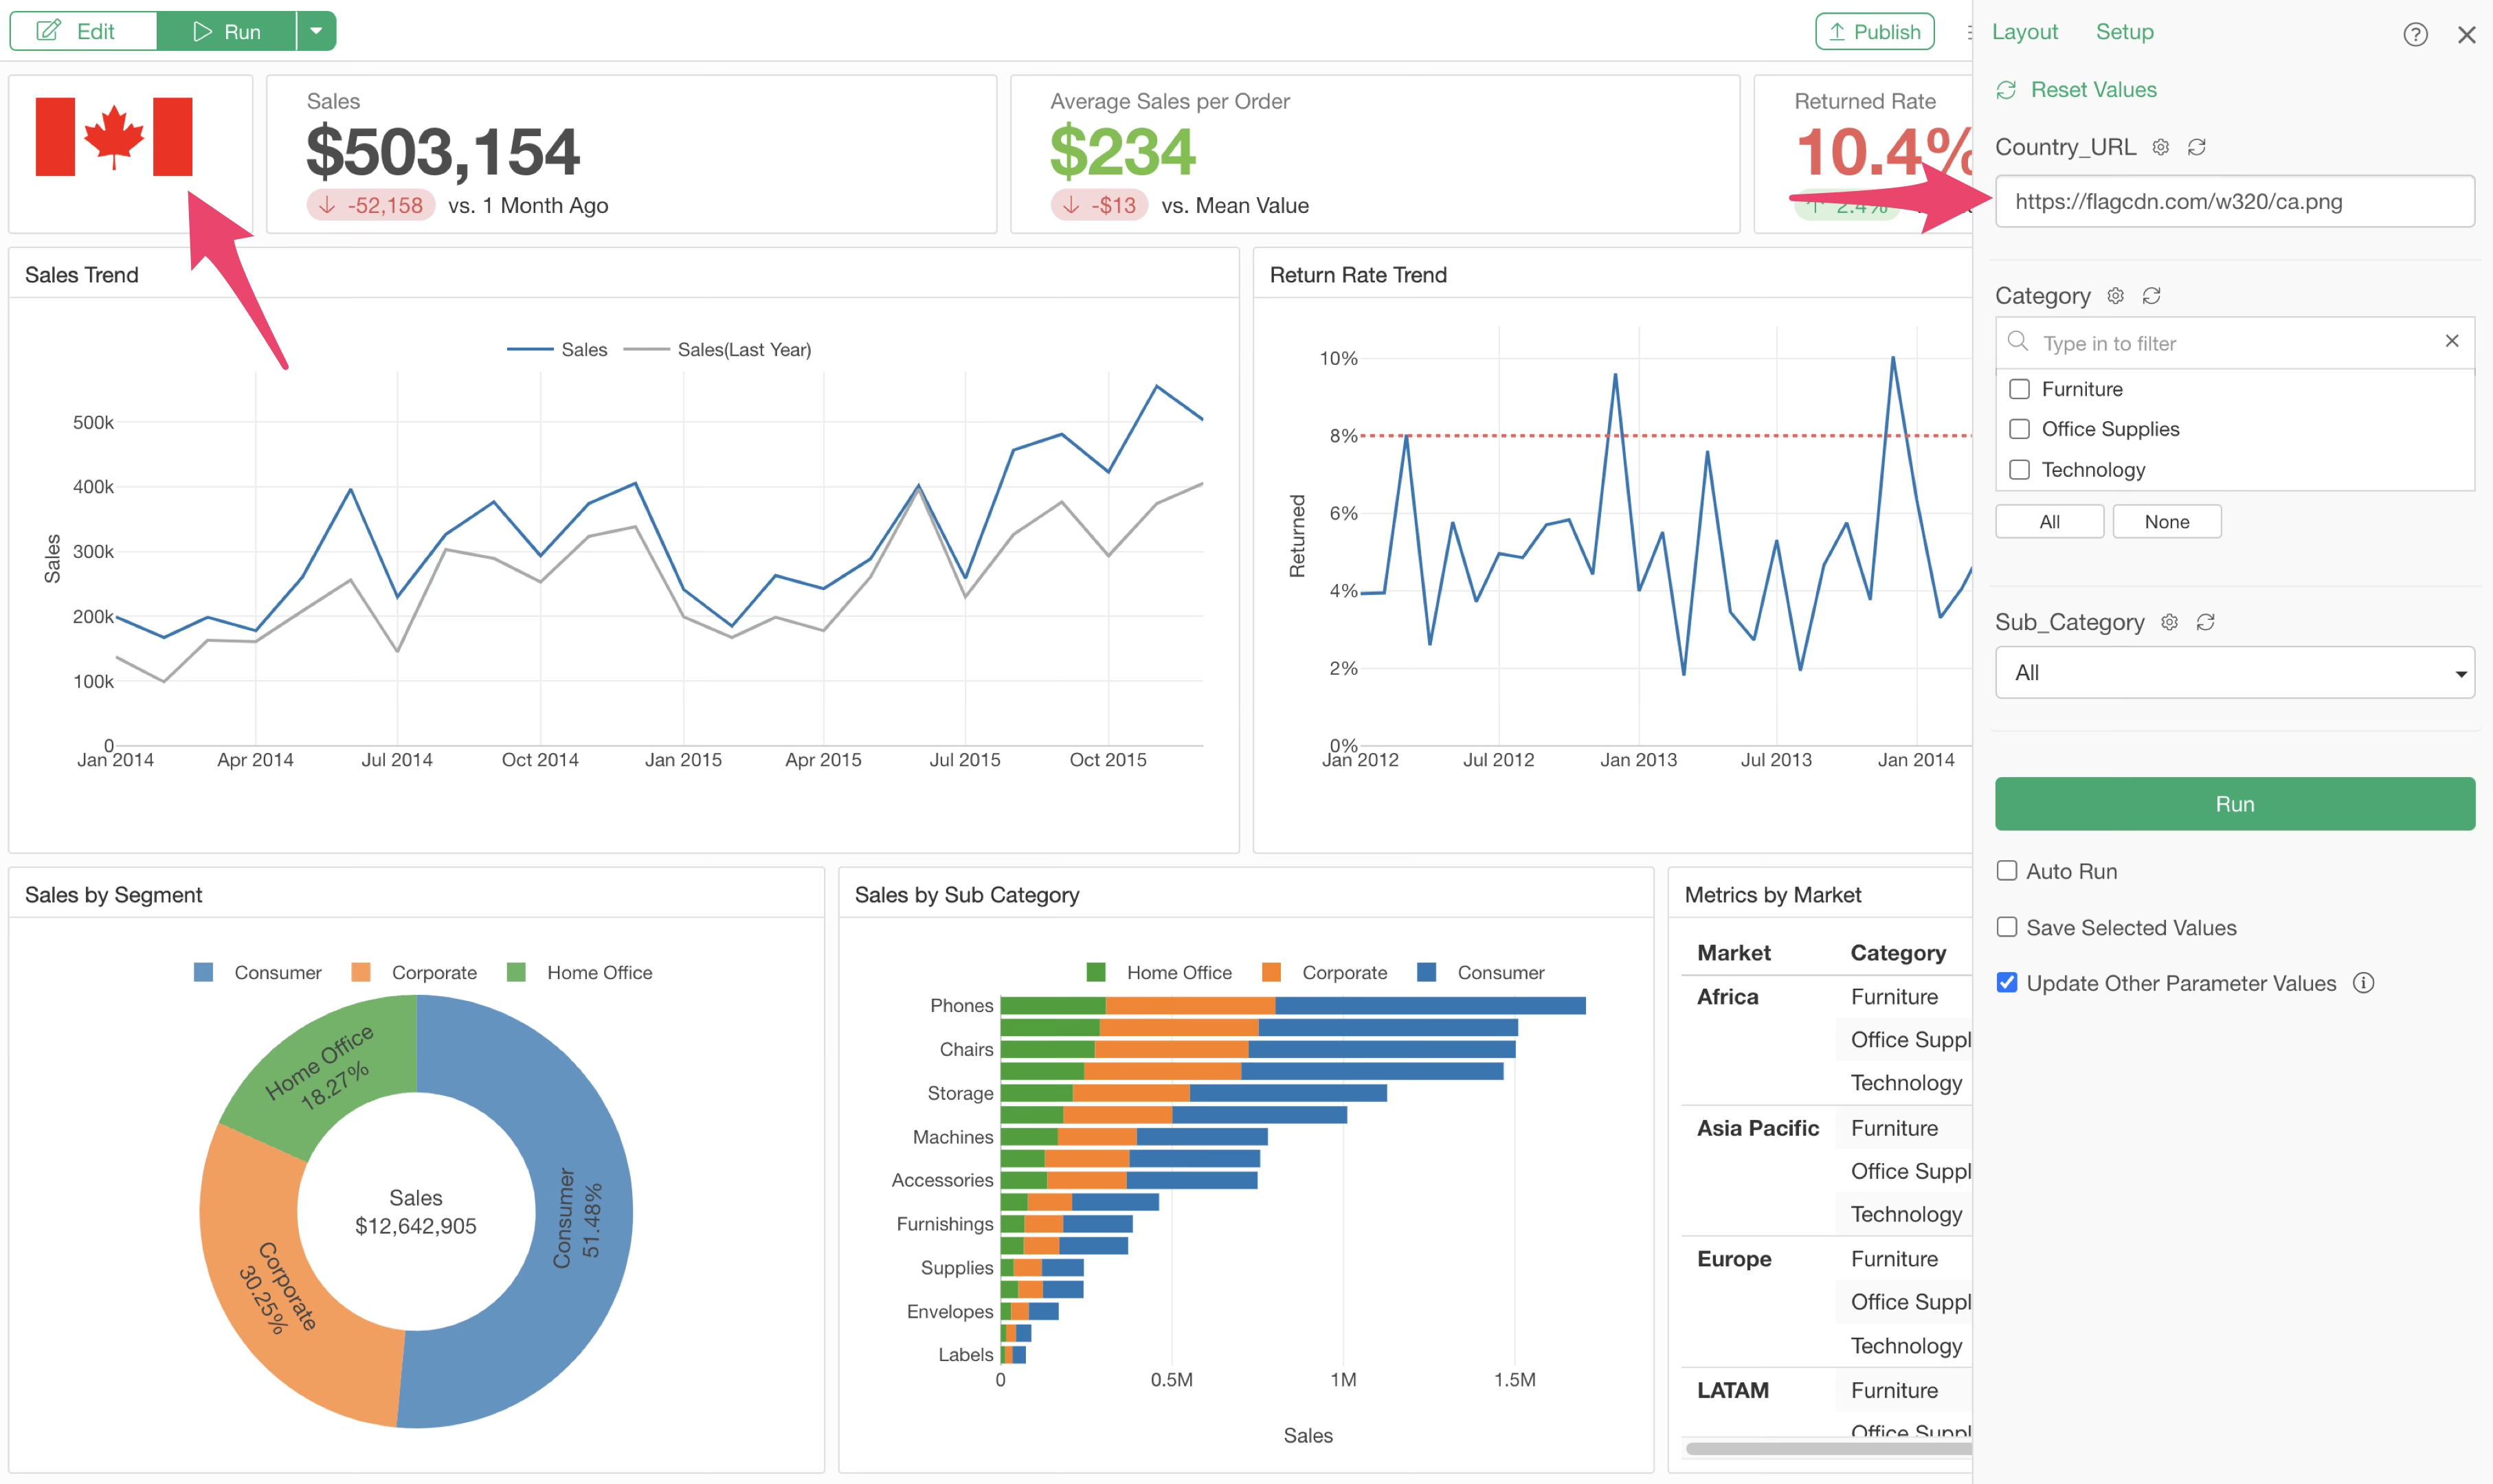
You have now successfully displayed images dynamically by specifying the URL directly.
Selecting a Category Corresponding to a URL
The approach introduced above involves specifying the URL directly. However, in many cases, rather than entering a URL, a behavior is required where selecting a country automatically changes the associated URL.
This behavior can be achieved if the corresponding URLs are included in the original data.
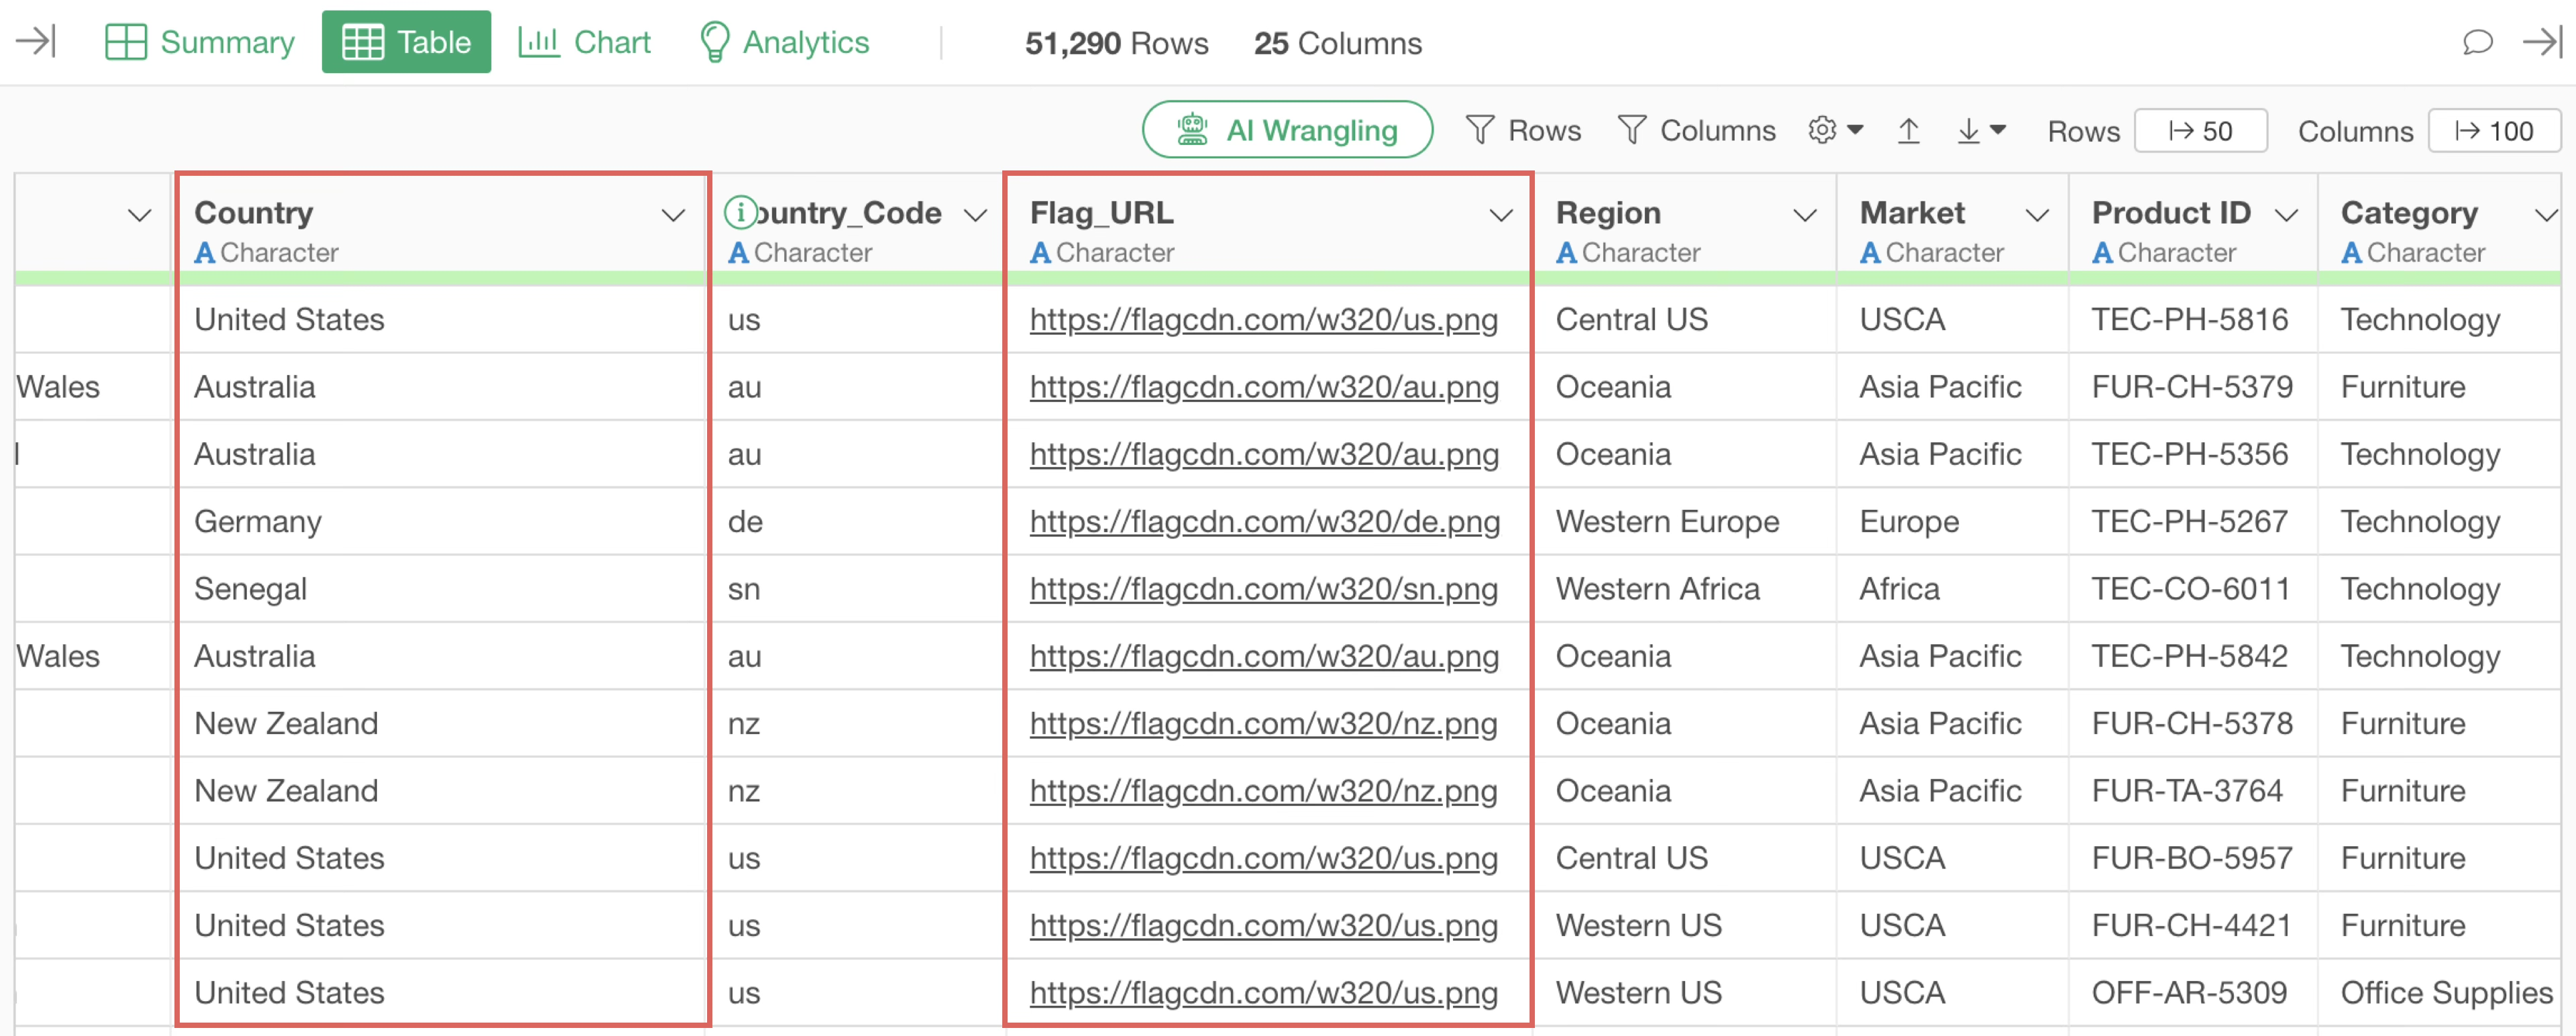
Specifically, we assume a state where URL information corresponding to each country is already included in the data (columns), perhaps through a join.
If you can prepare such data in advance, you can set up the behavior so that the URL changes dynamically just by selecting a country.
Let’s look at the specific steps. First, create a list for the URL parameter.
As before, select “Parameters” from the project menu and create a new parameter.
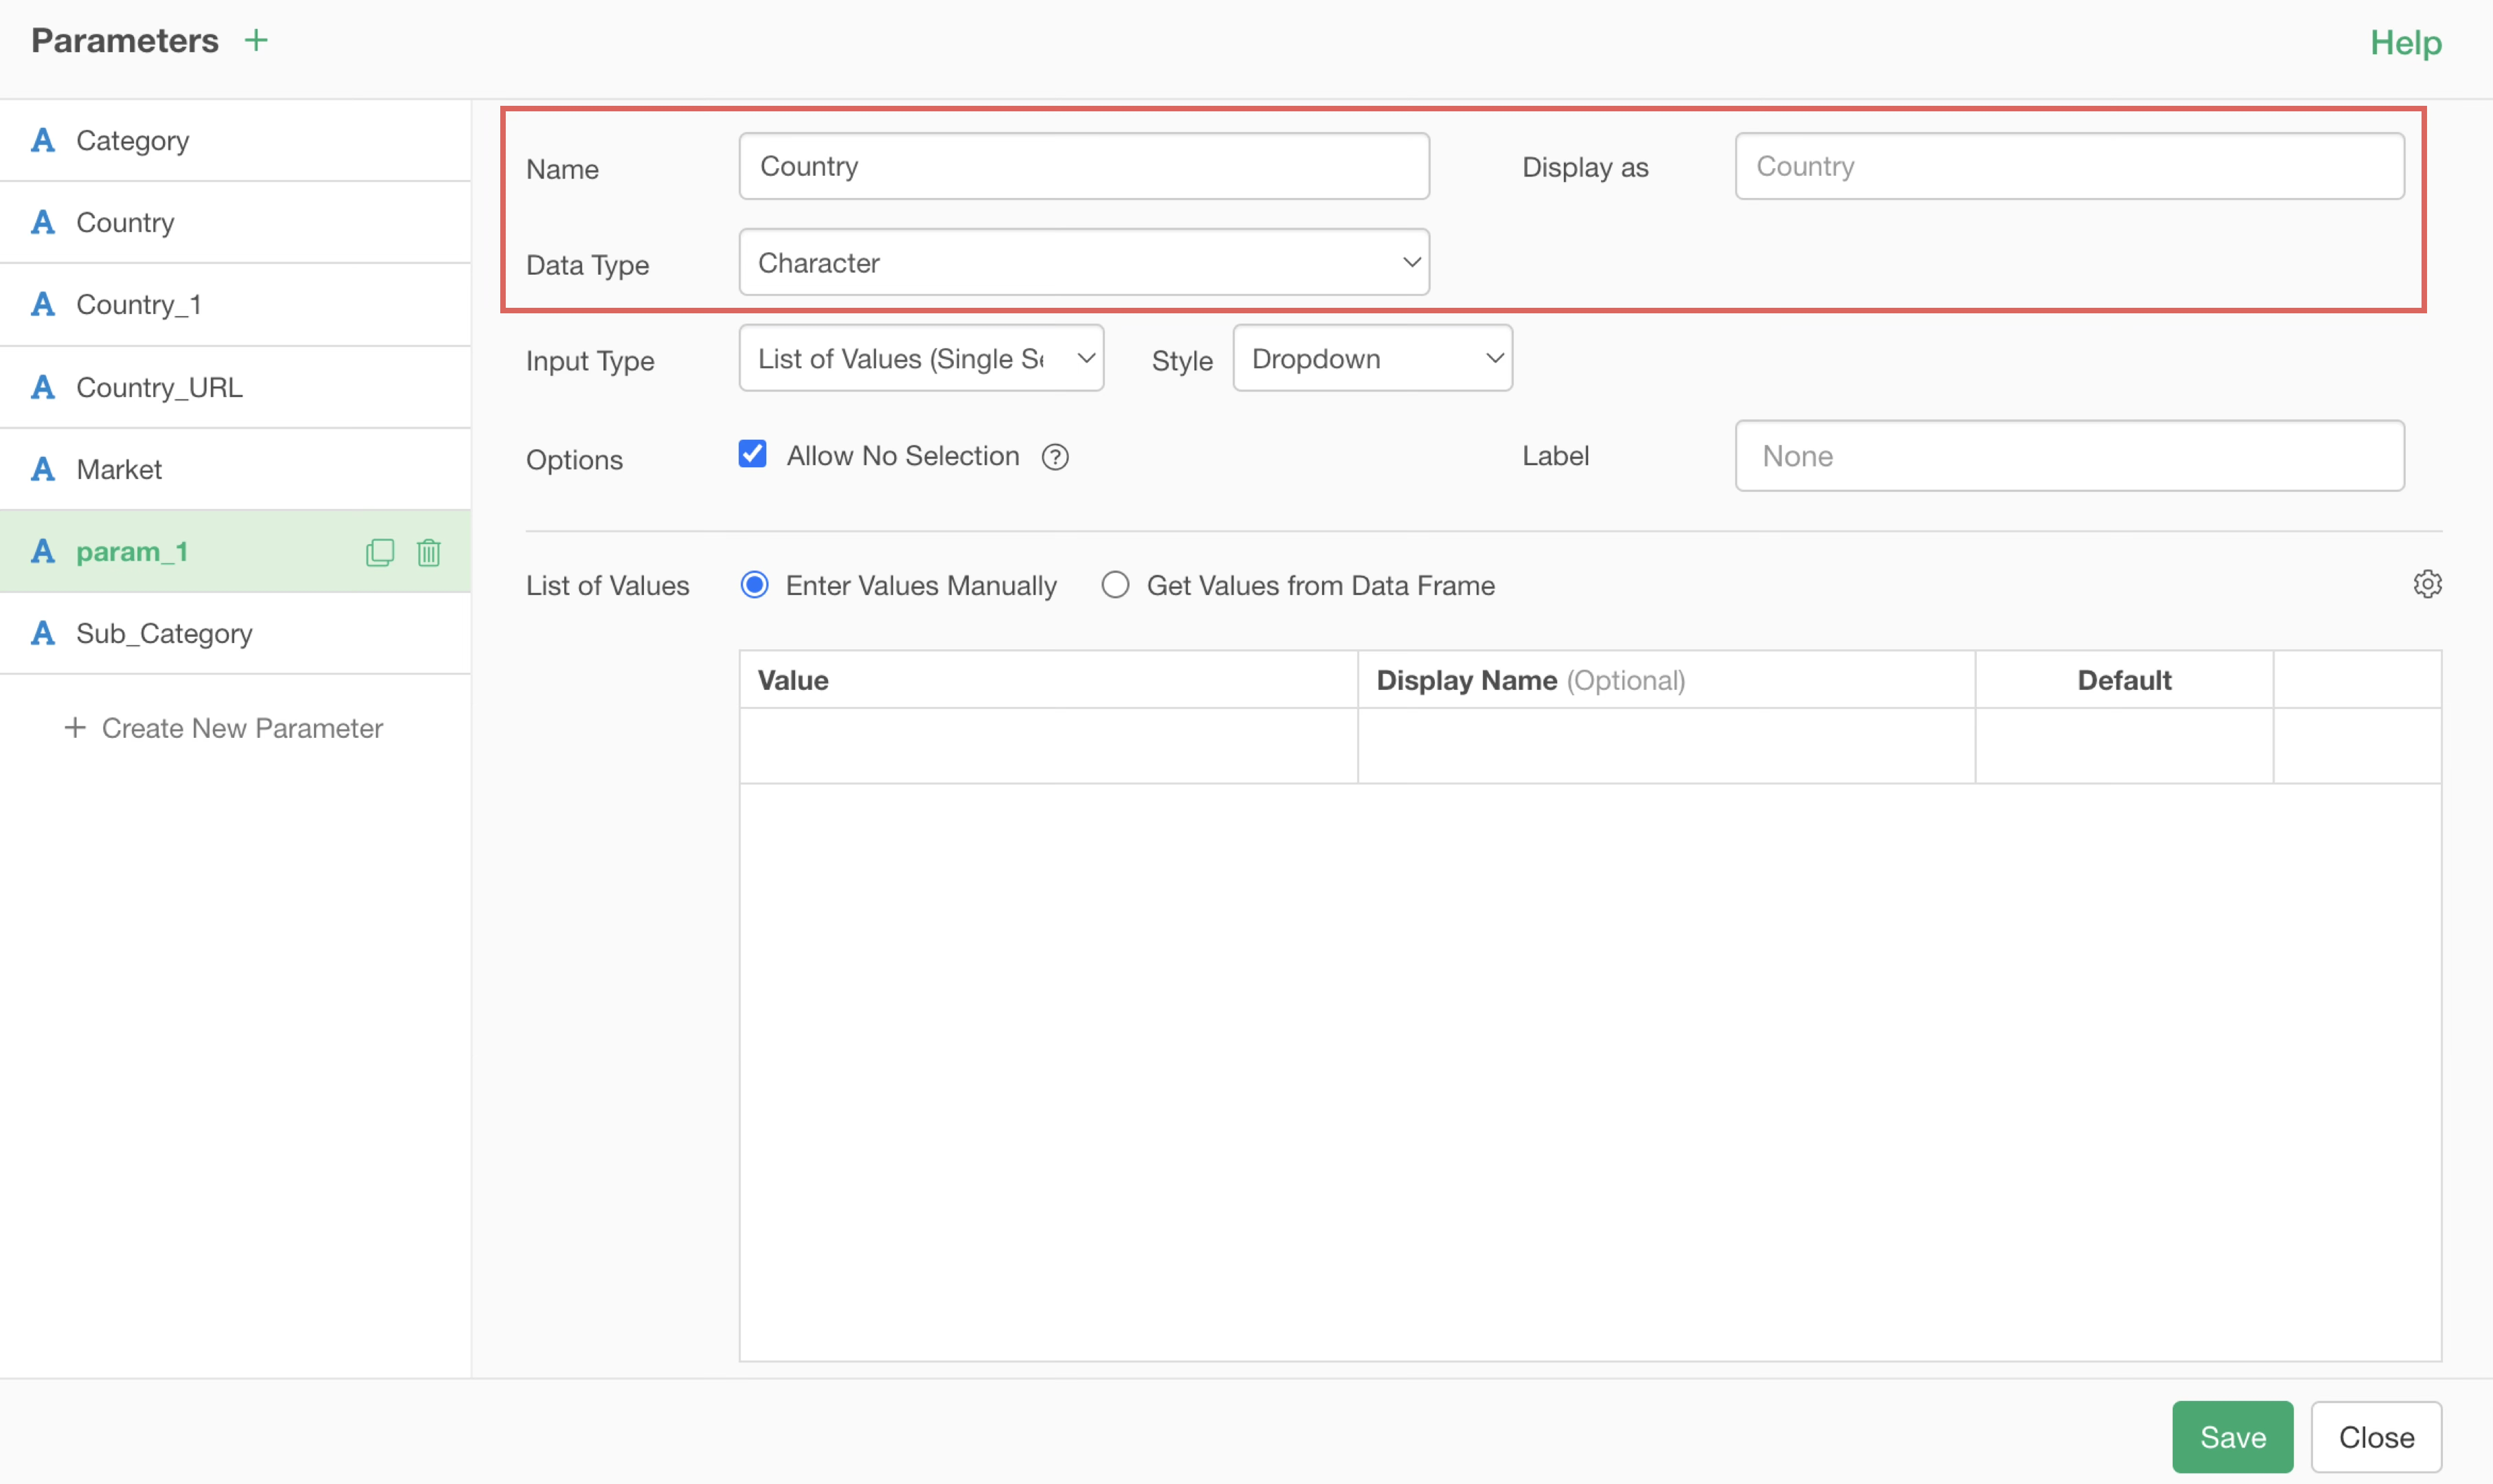
Give it an arbitrary name and display name, and select “Character” for the Data Type.
This time, since we want to generate the URL list dynamically, select “List of Values (Single Selection)” for the Input Type.
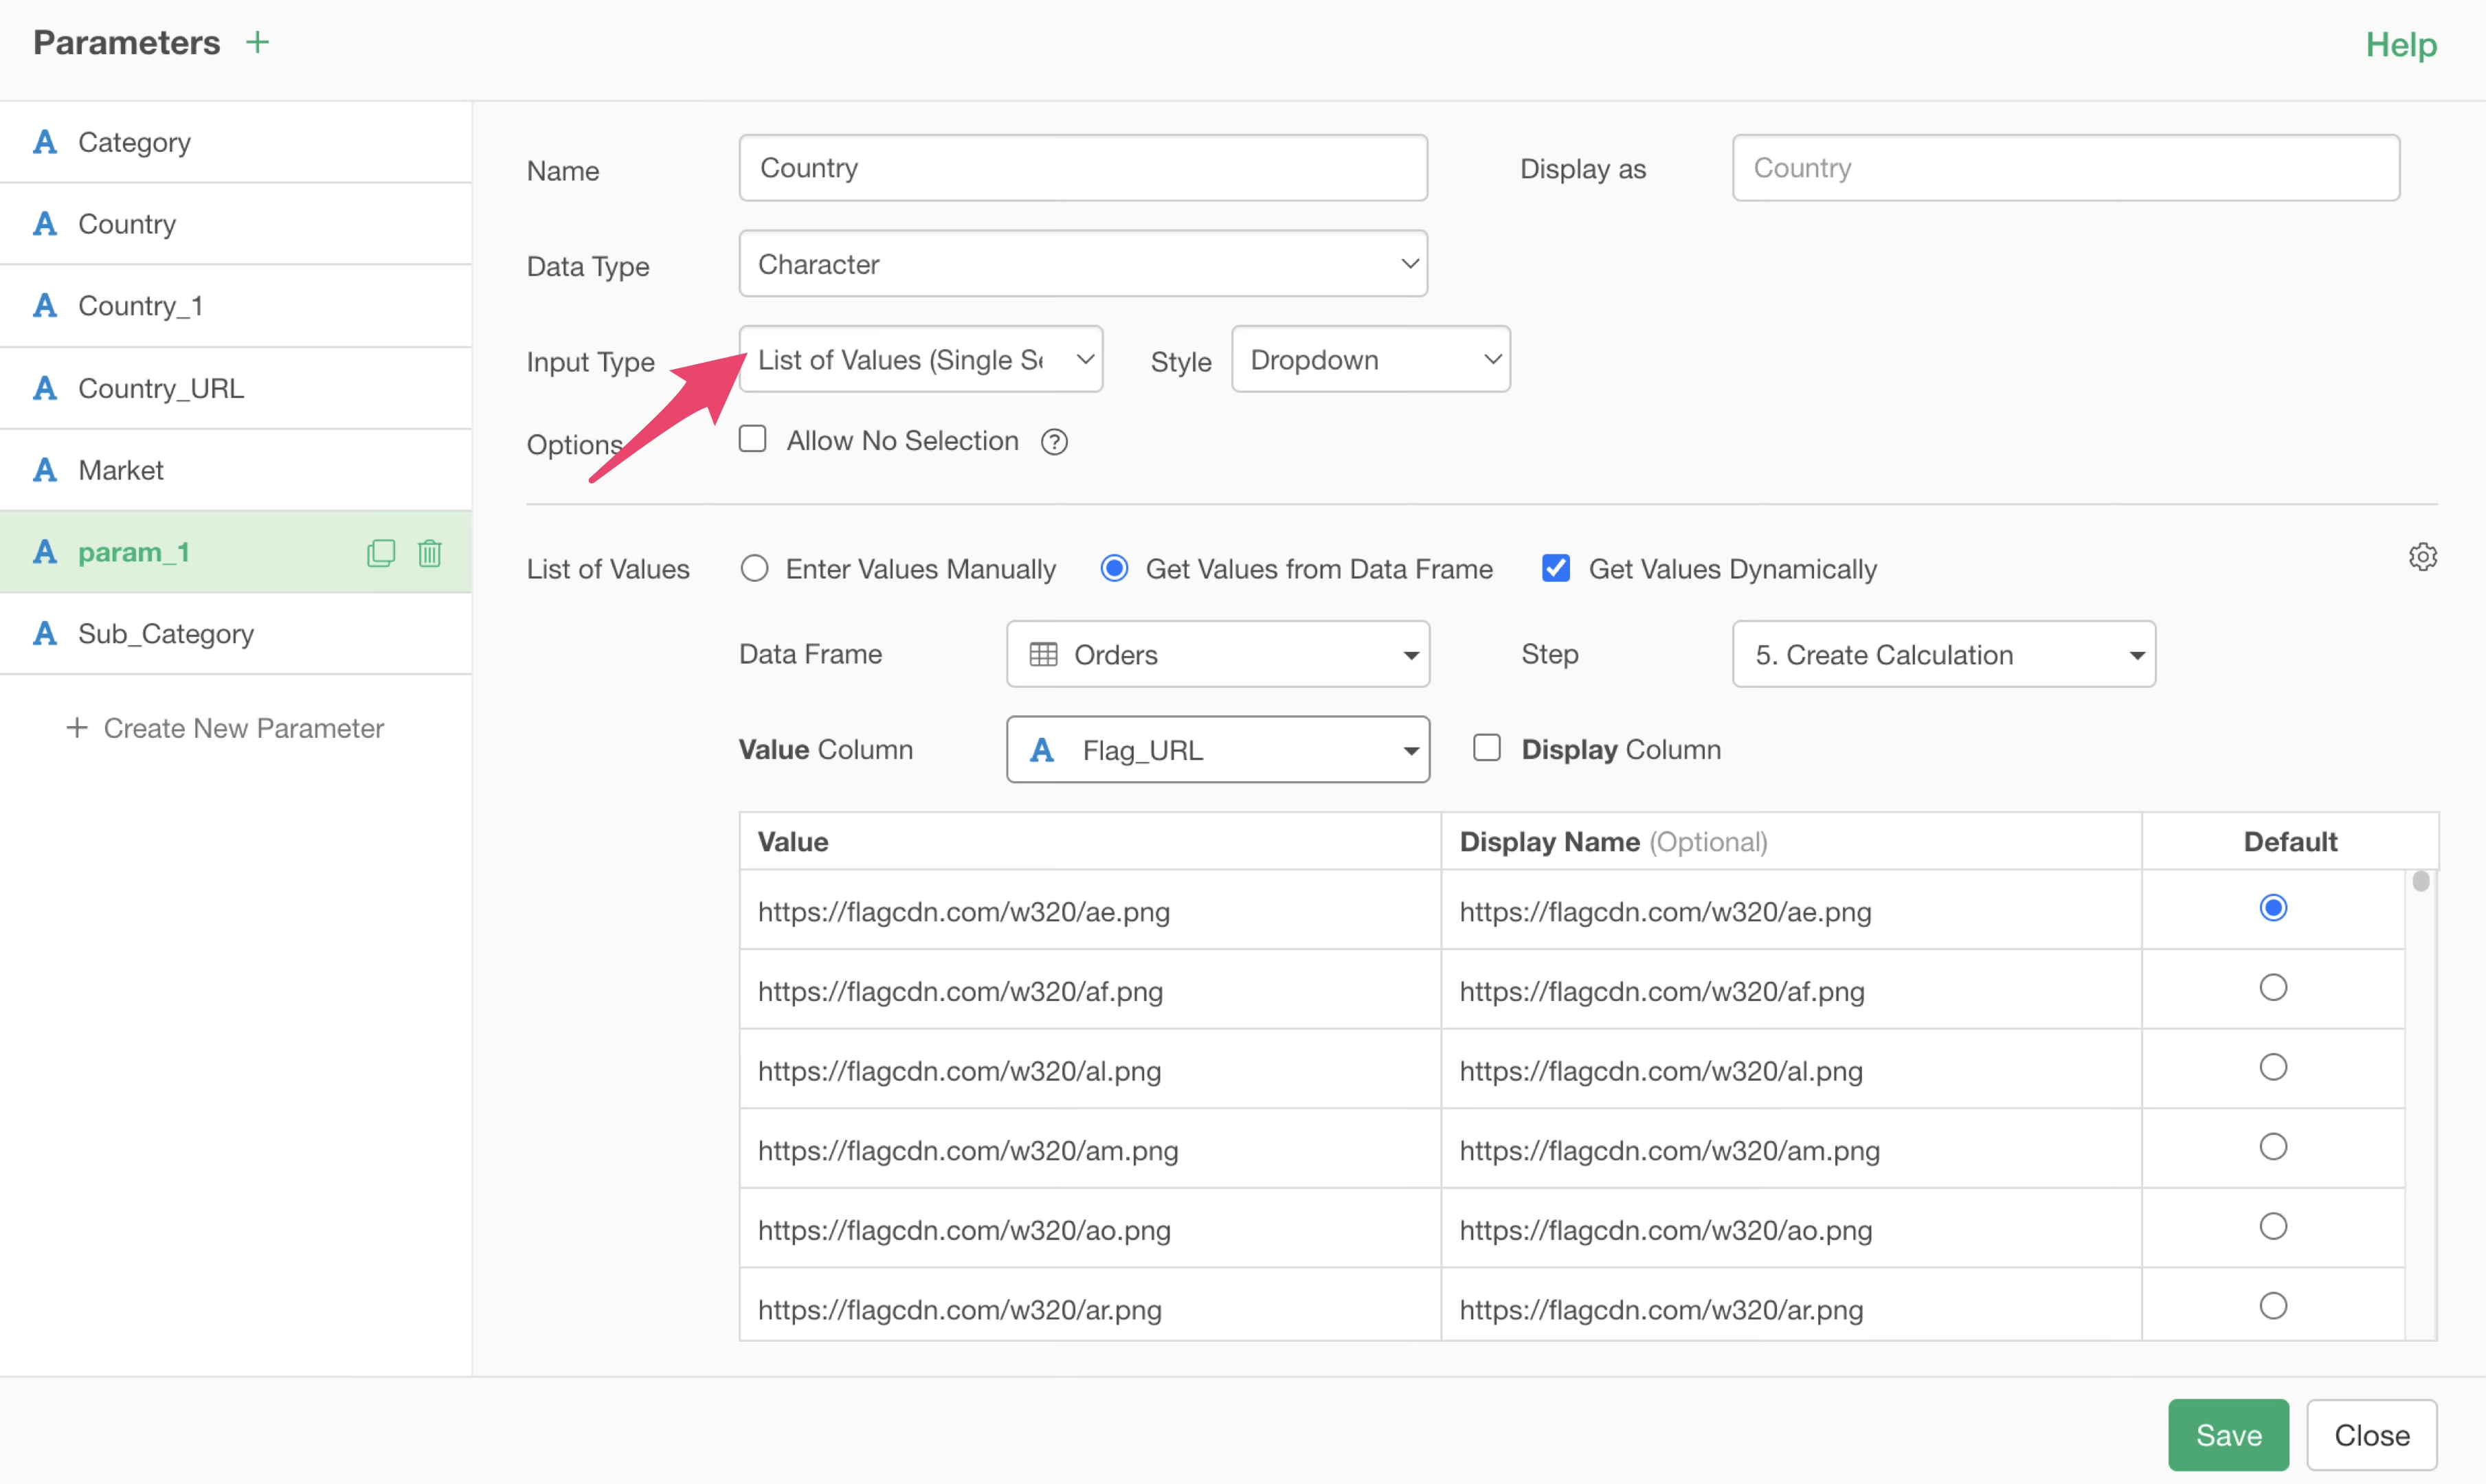
The style can be any option you prefer.
Next, uncheck “Allow No Selection.”
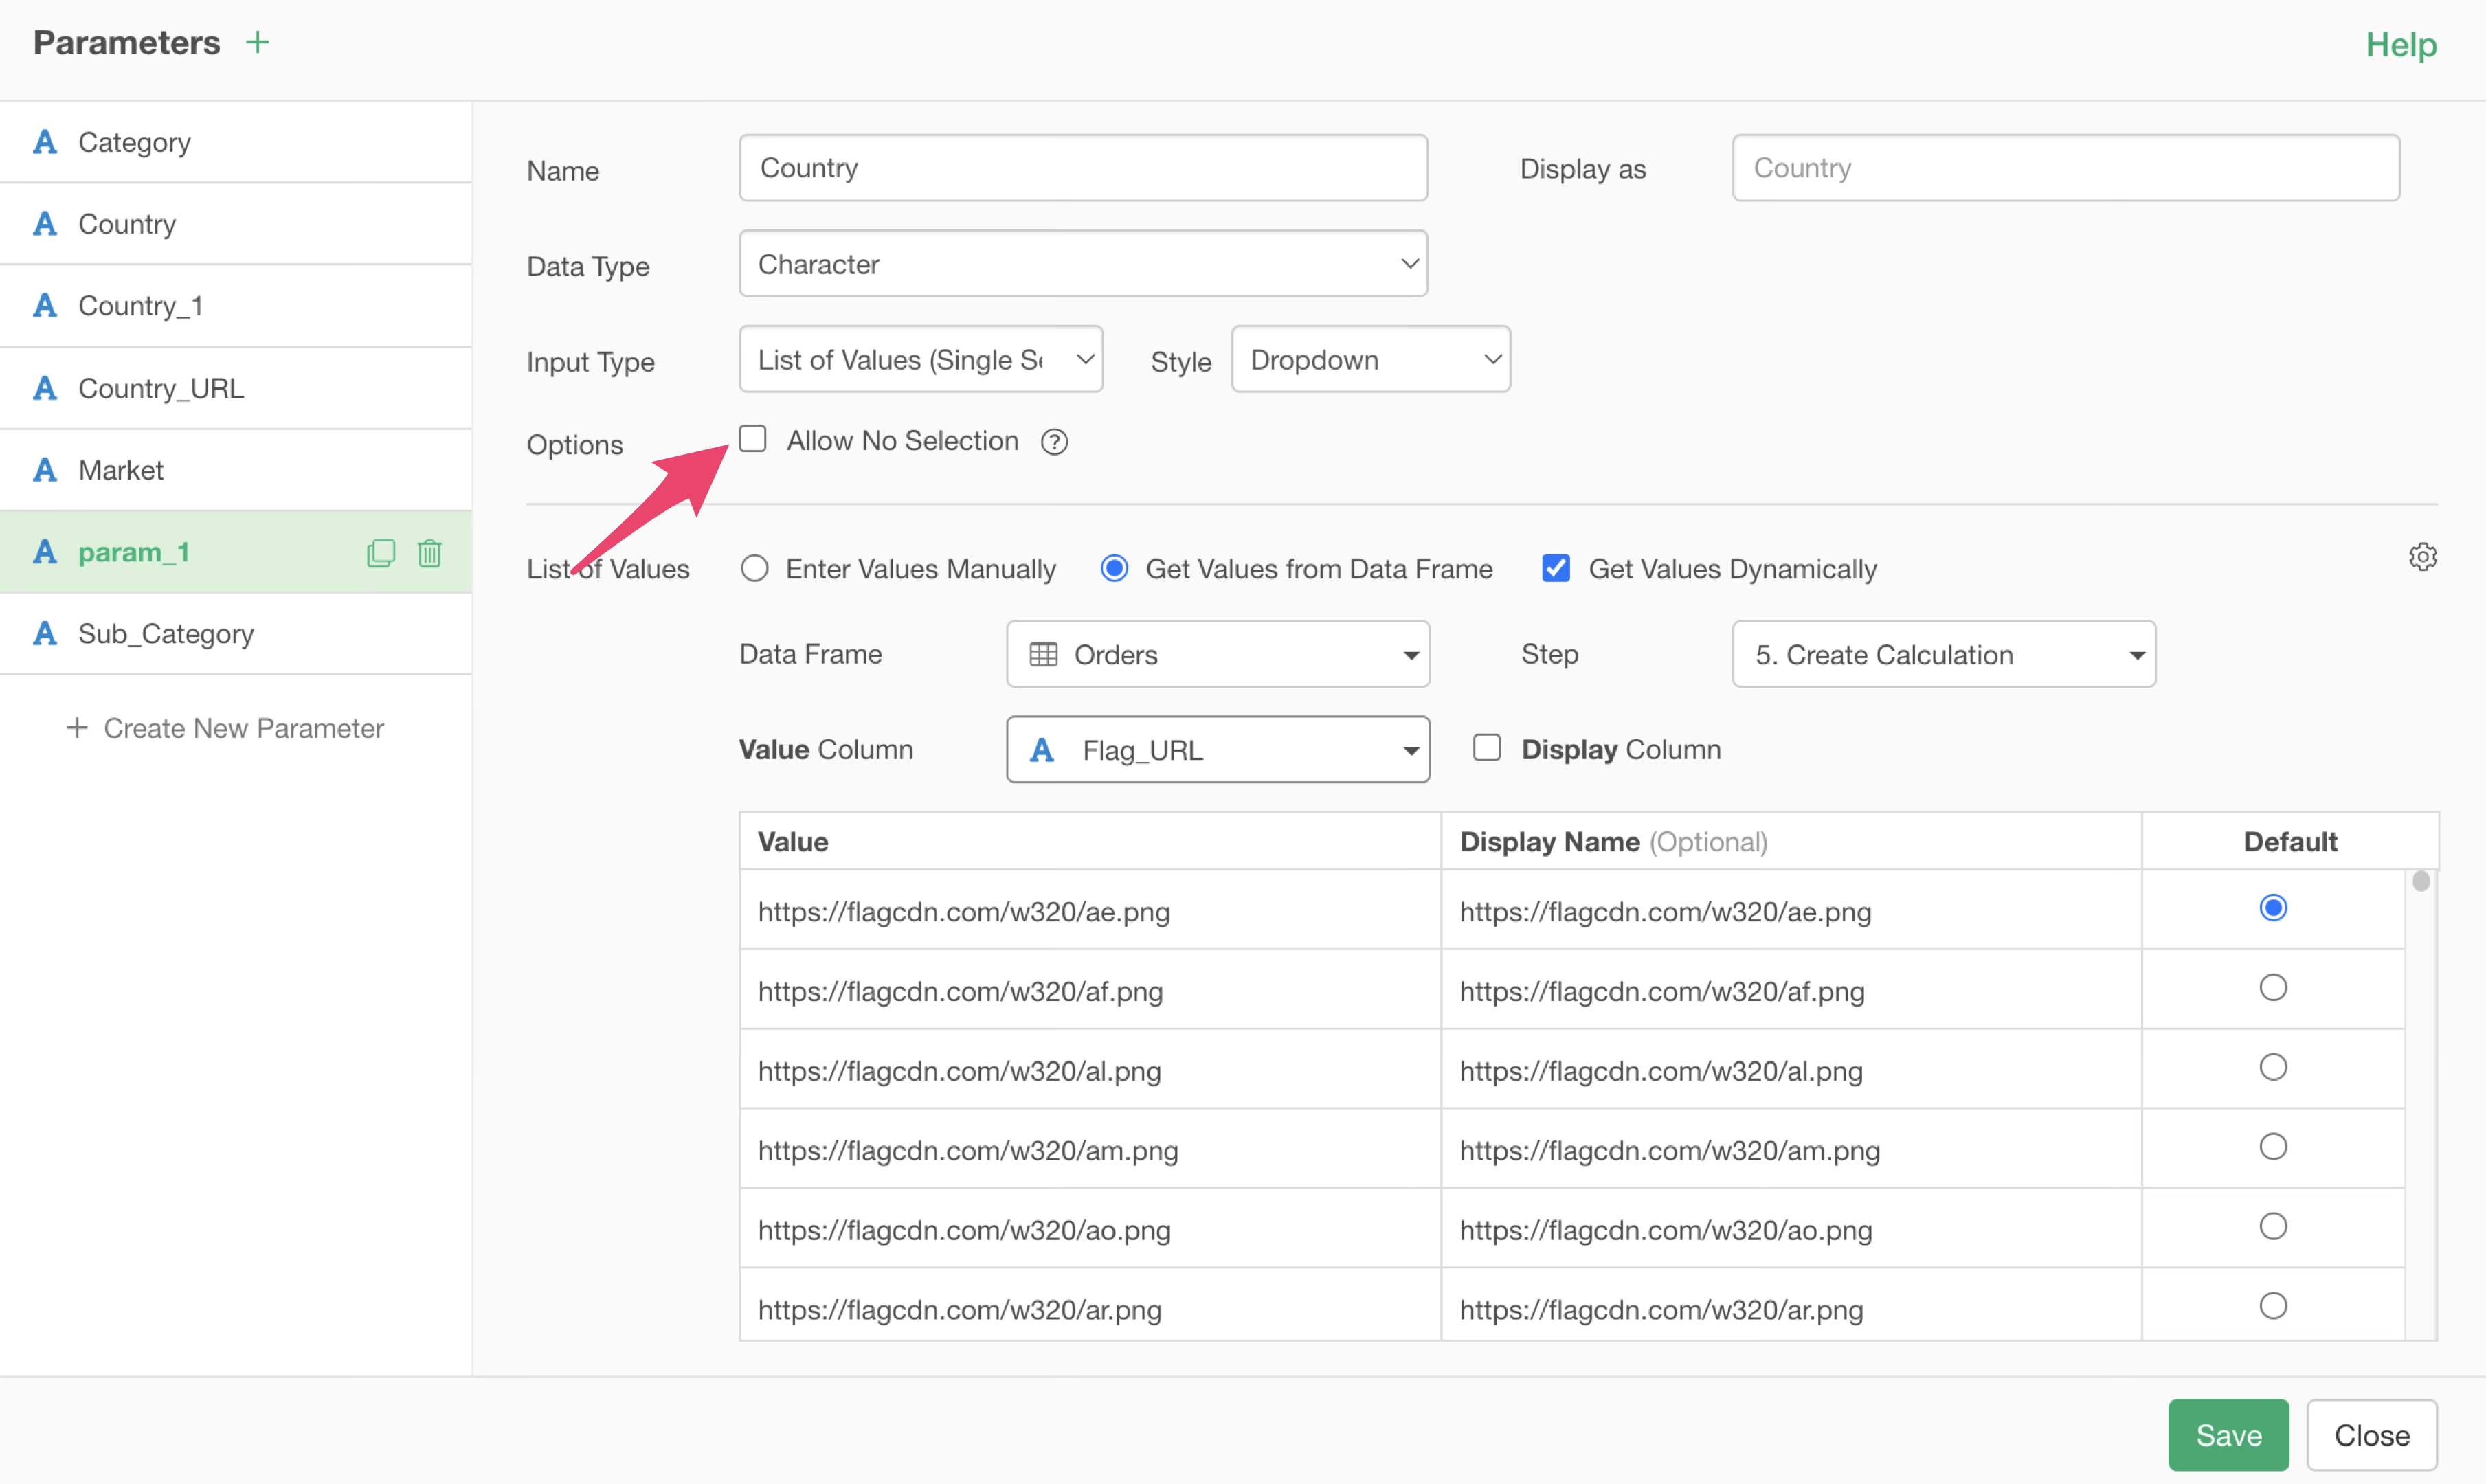
If “Allow No Selection” is checked, the behavior when no value is specified in the parameter would return all values, which might prevent the URL from being uniquely determined and cause an error.
Next, change the List of Values to “Get Values from Data Frame” and check “Get Values Dynamically” to retrieve values automatically.
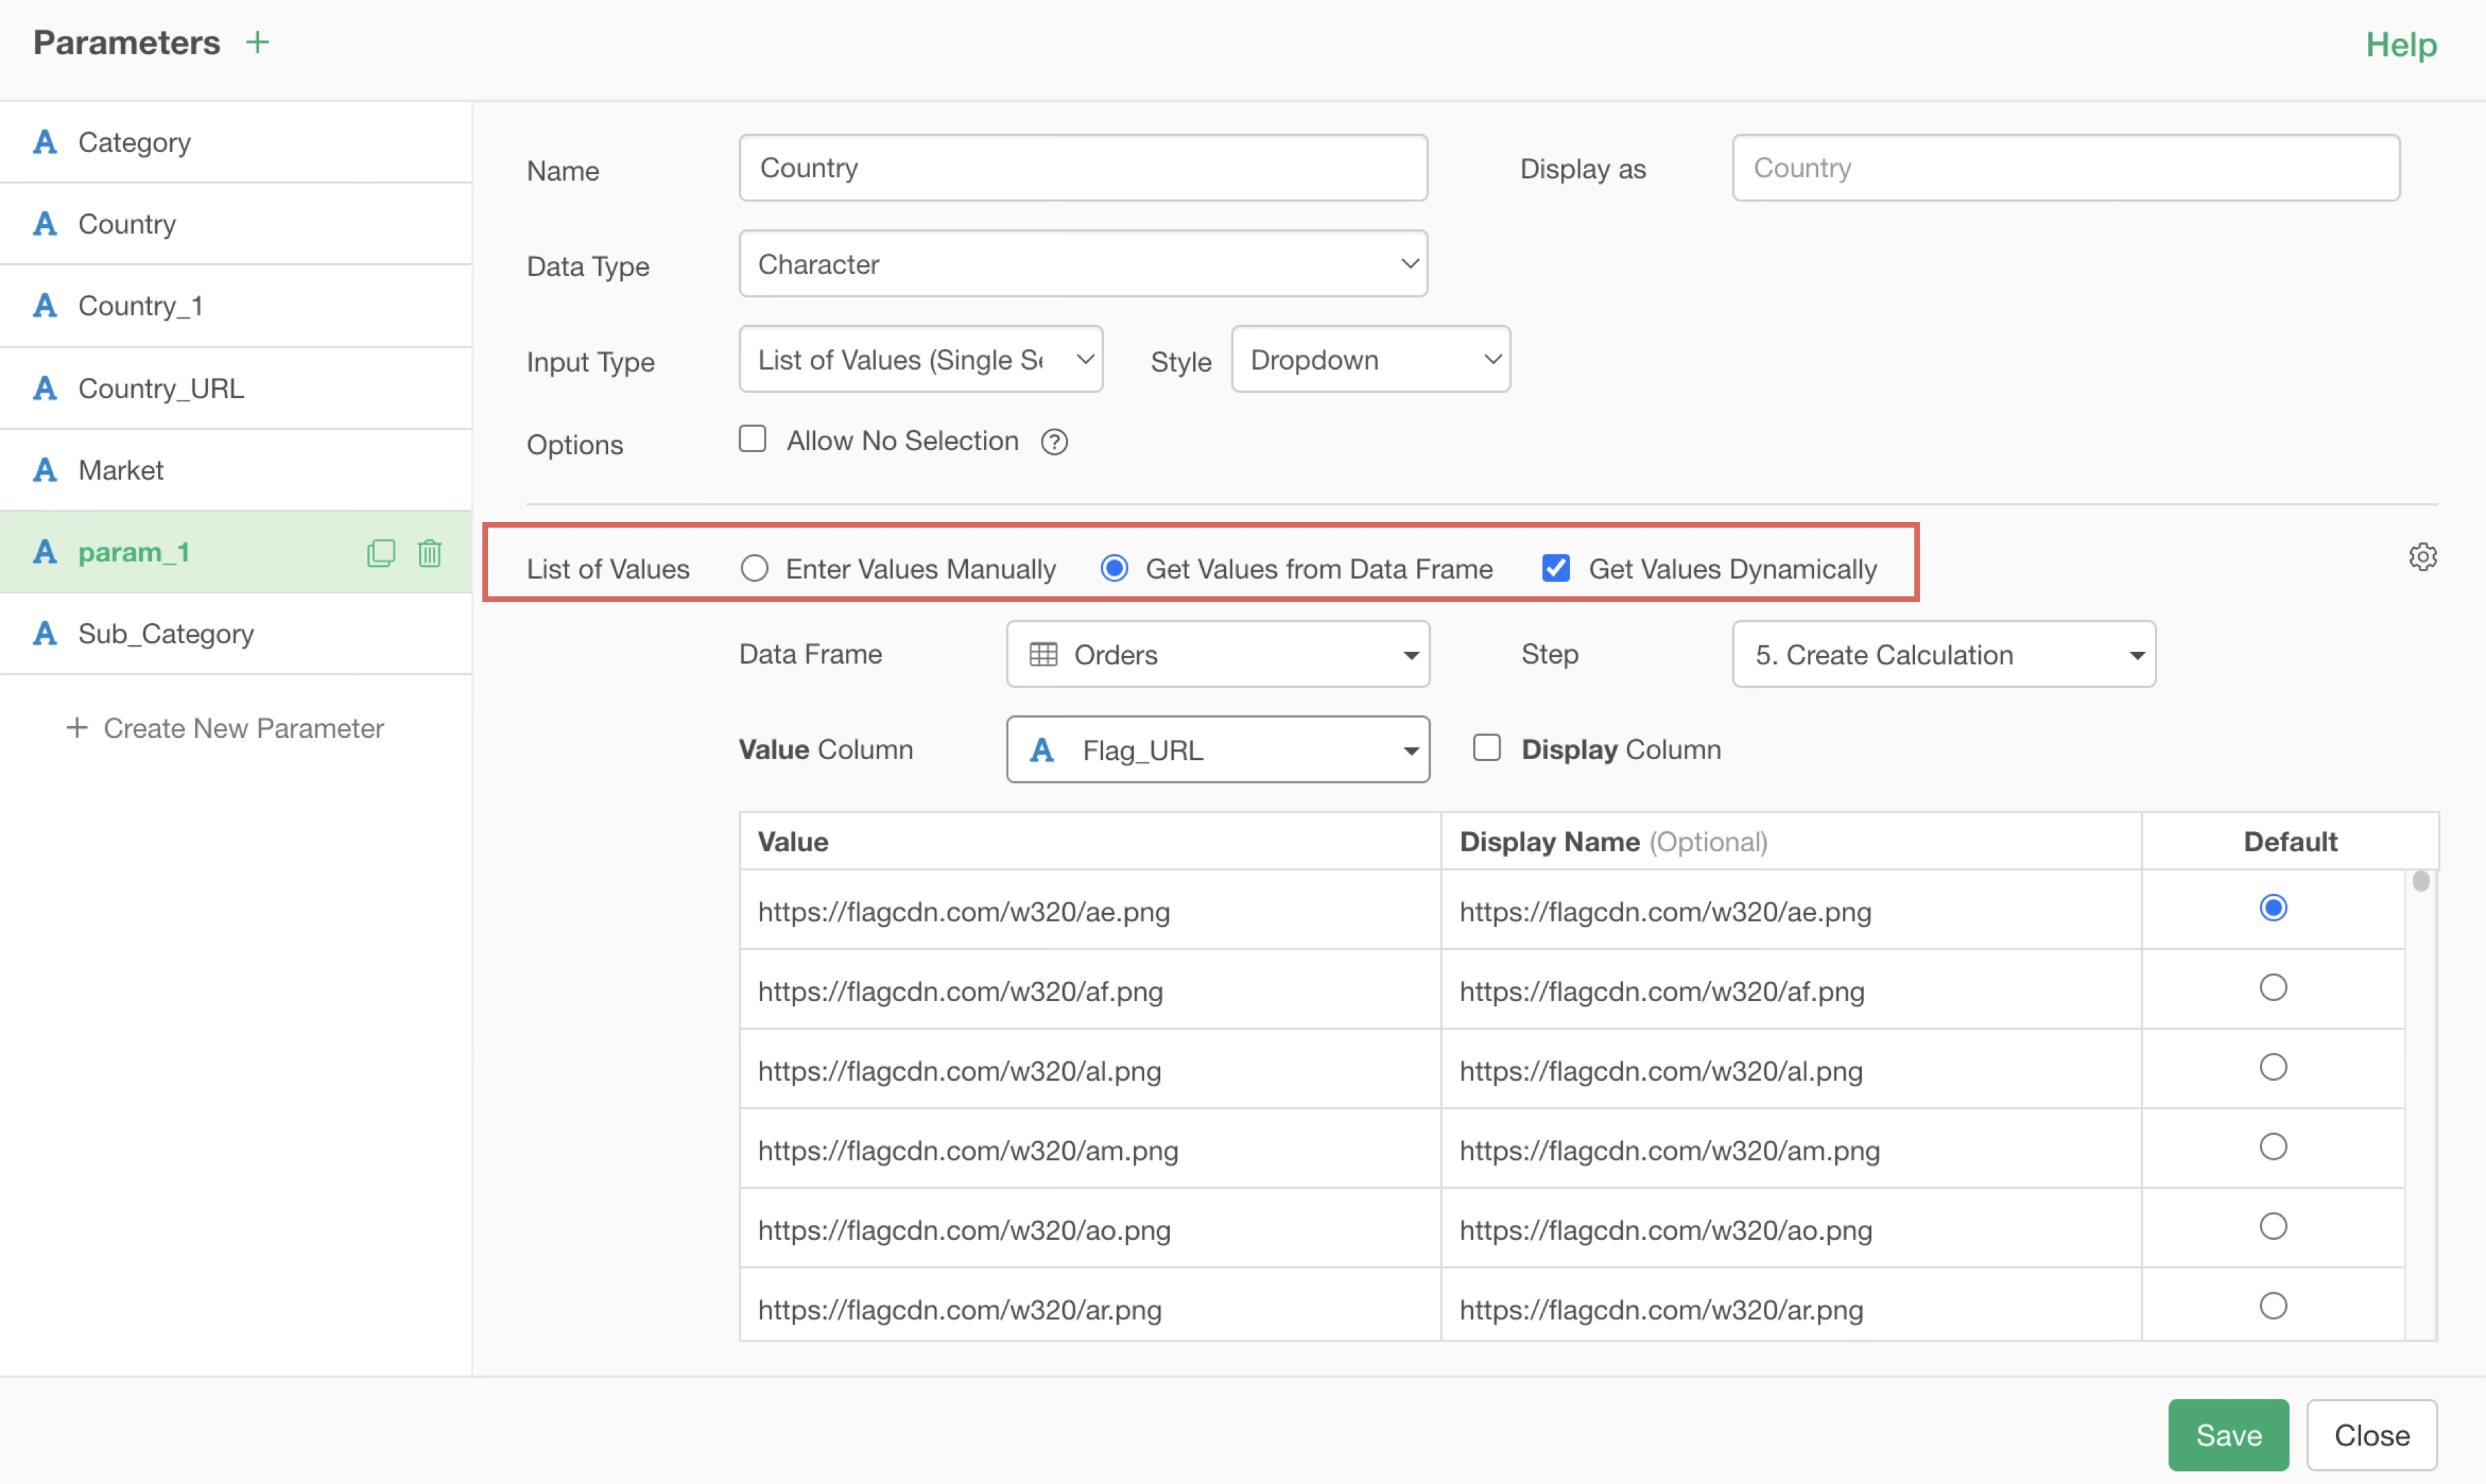
Select the data frame that contains the relevant URLs and the step you want to get values.
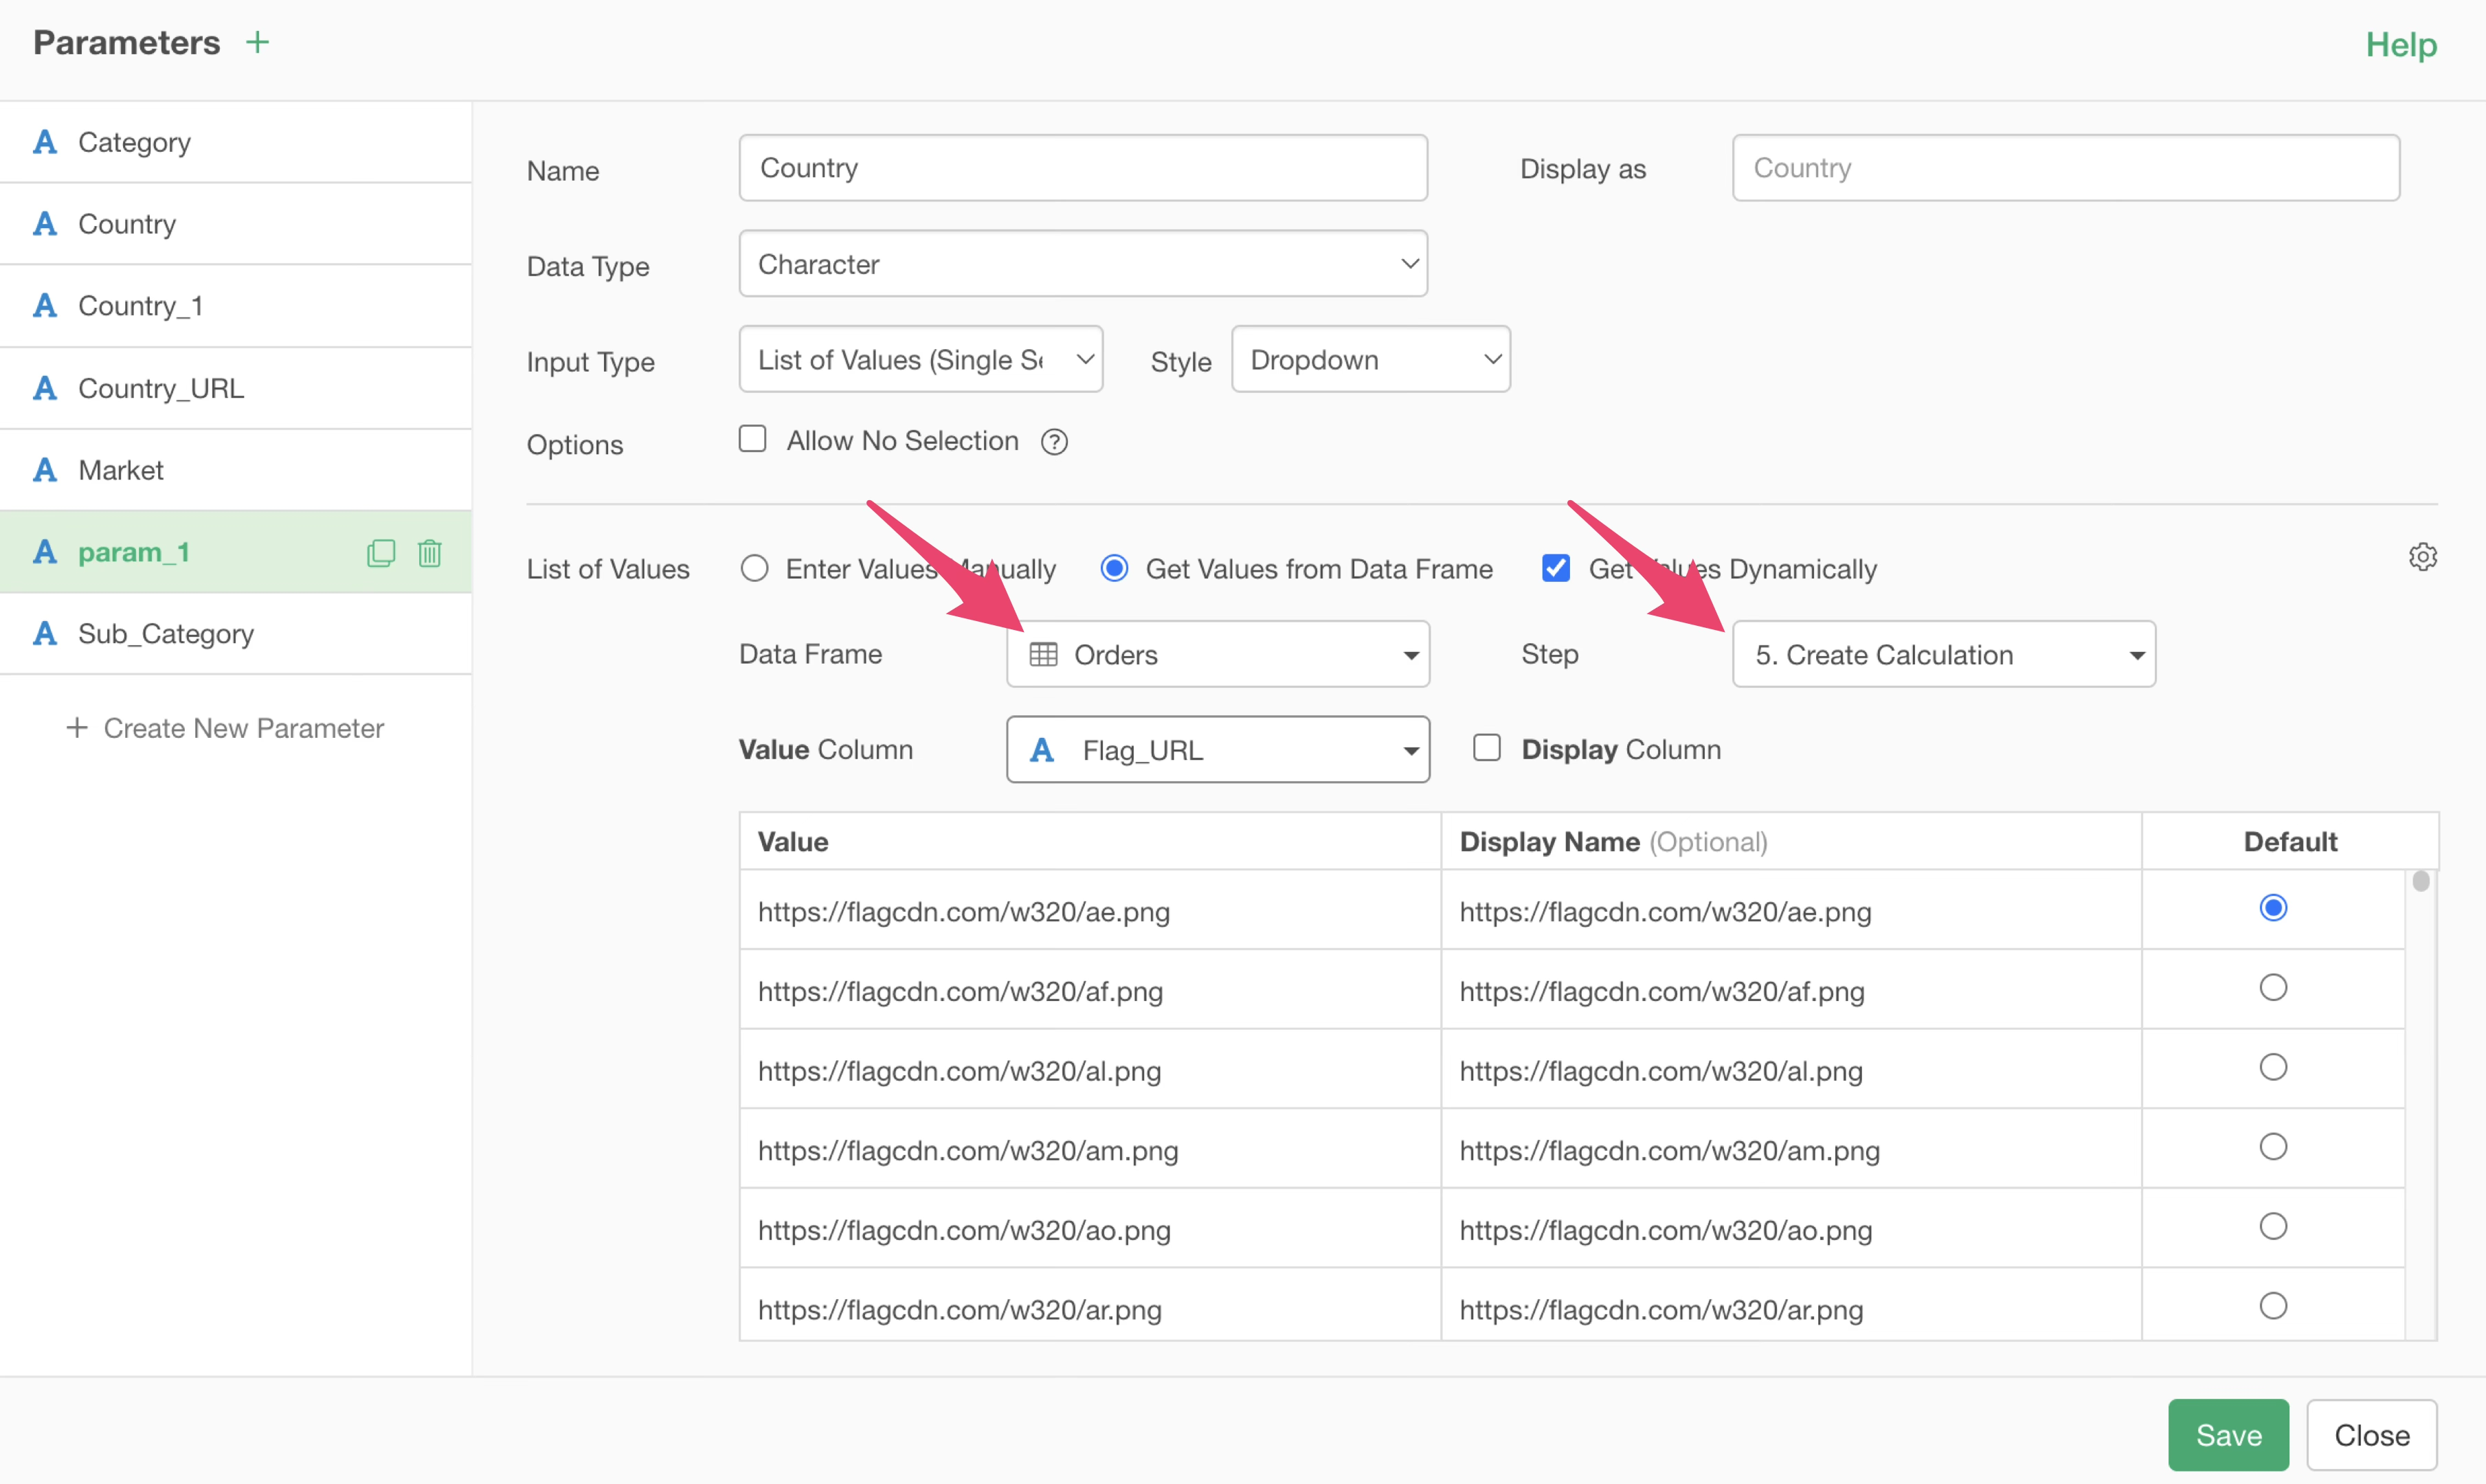
For the Value Column, select the URL column.
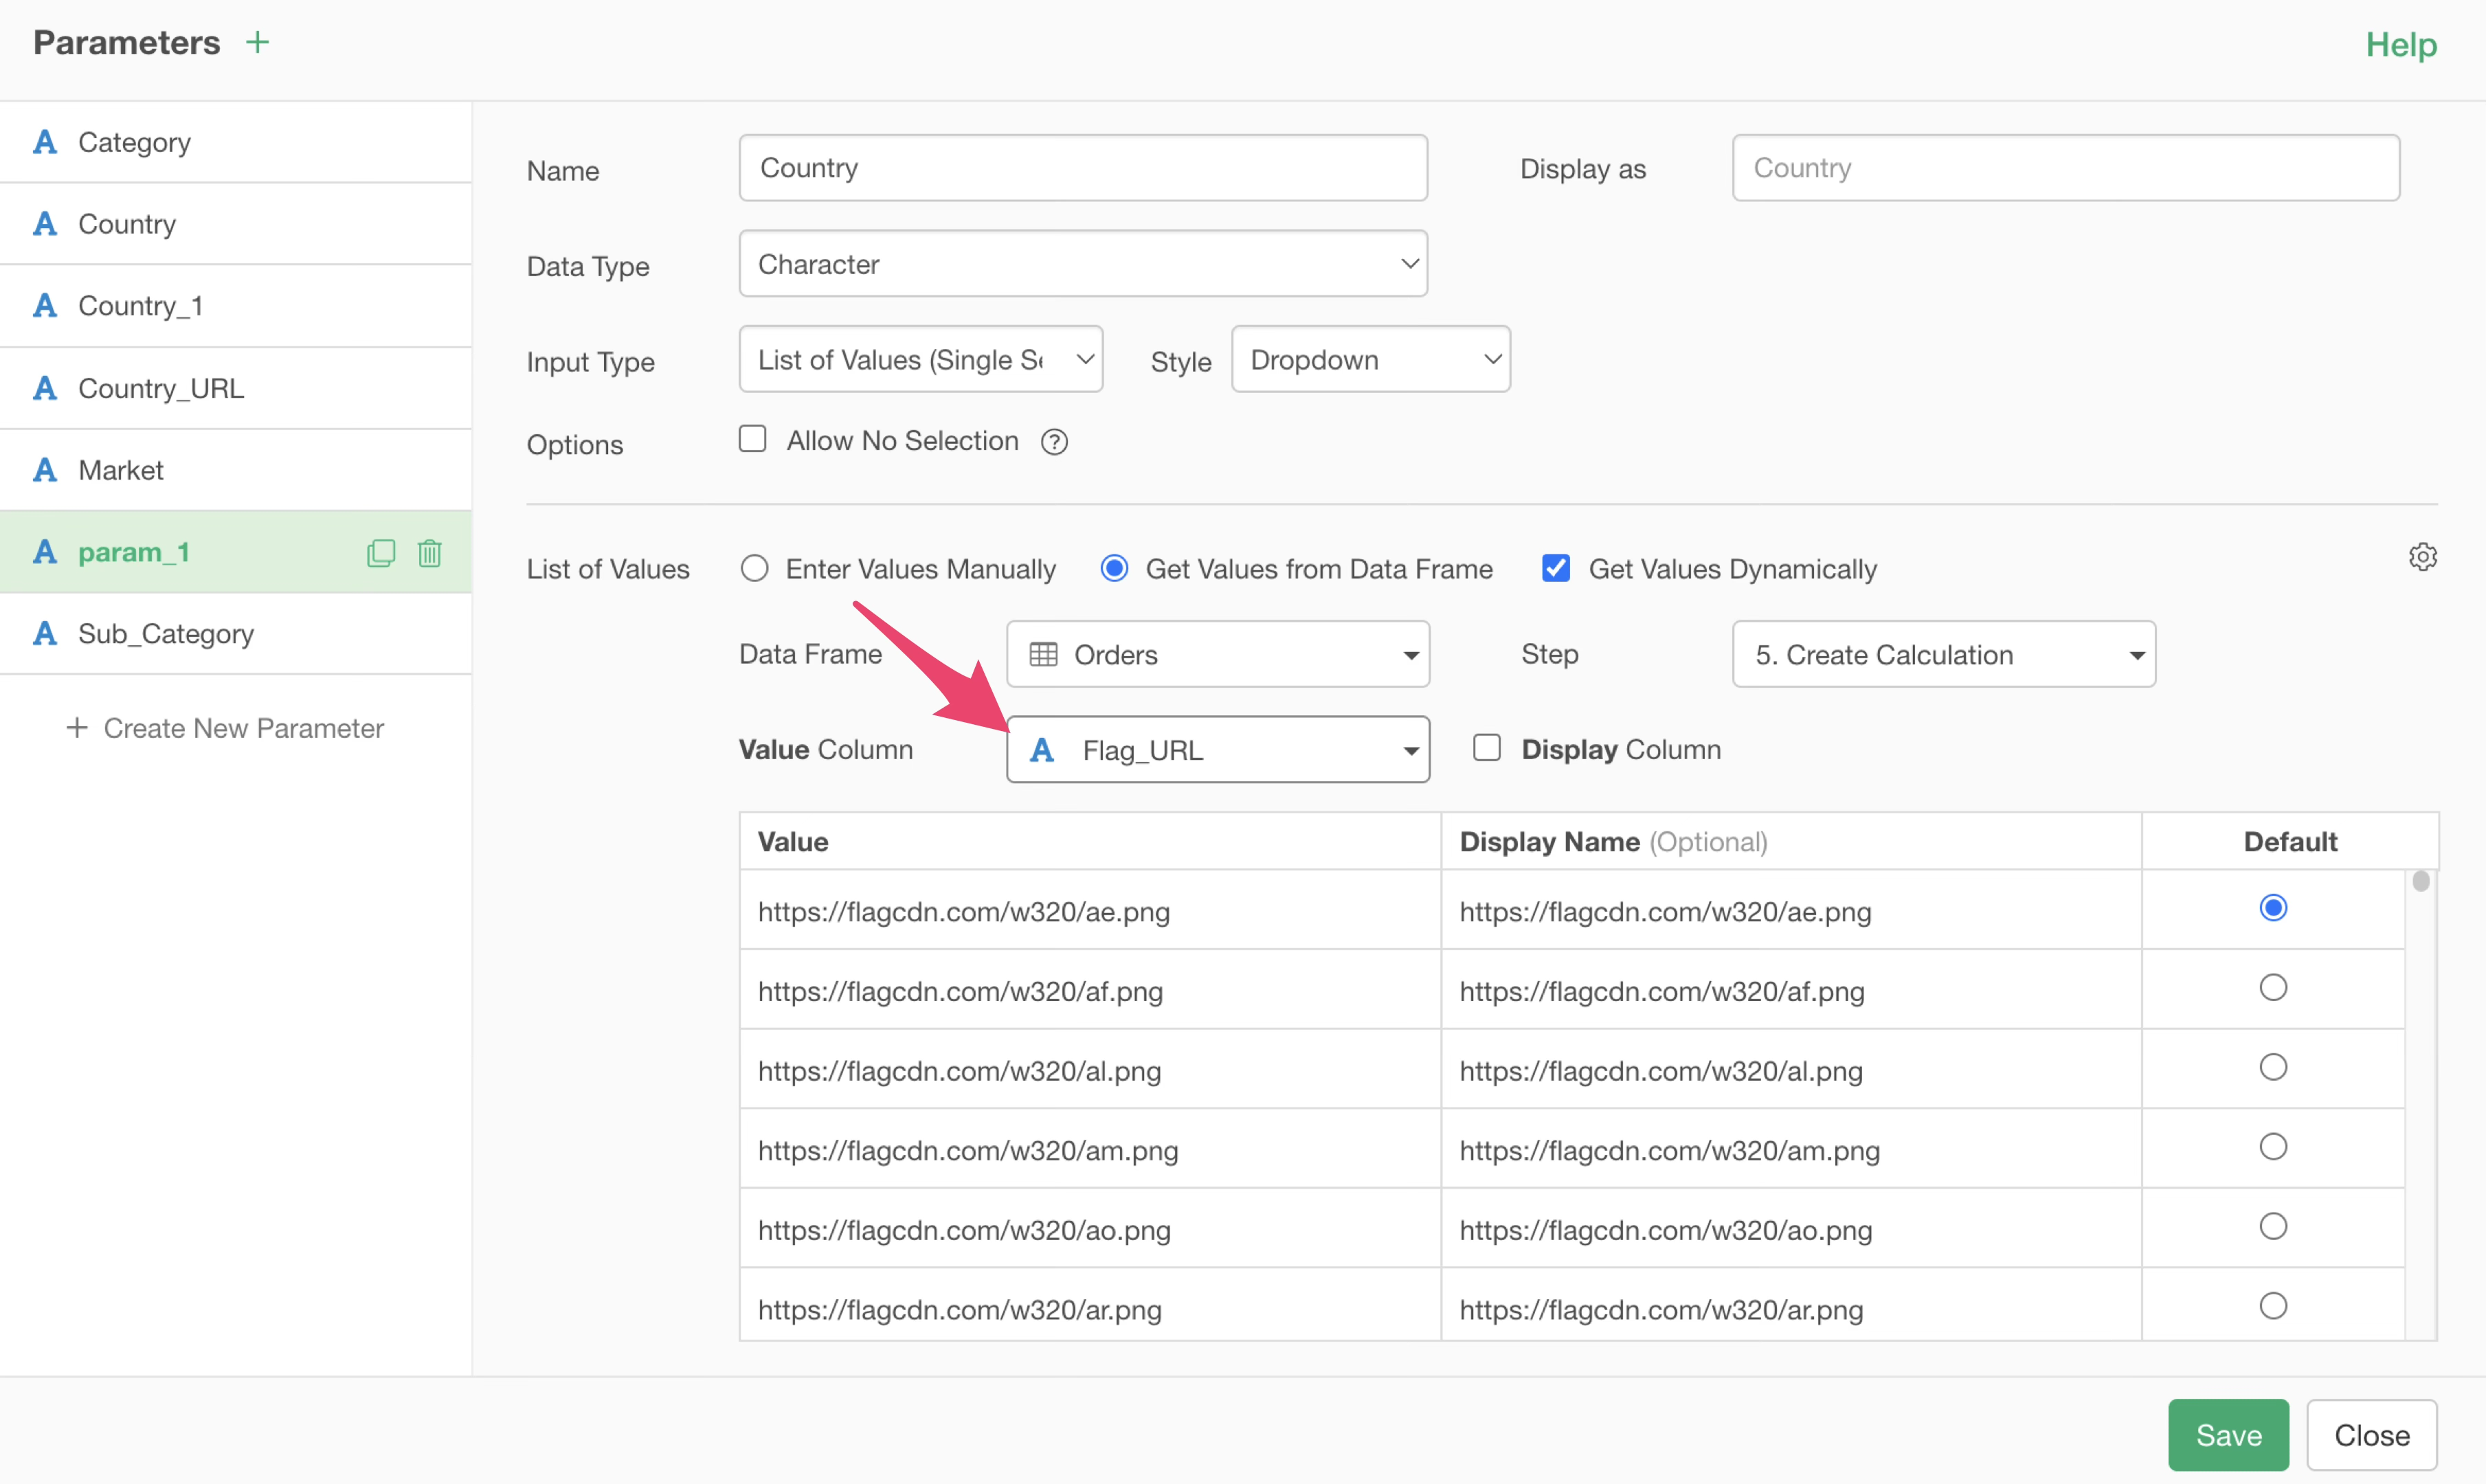
At this stage, the value and the display name are identical, so the parameter’s list of values would just be a list of URLs.
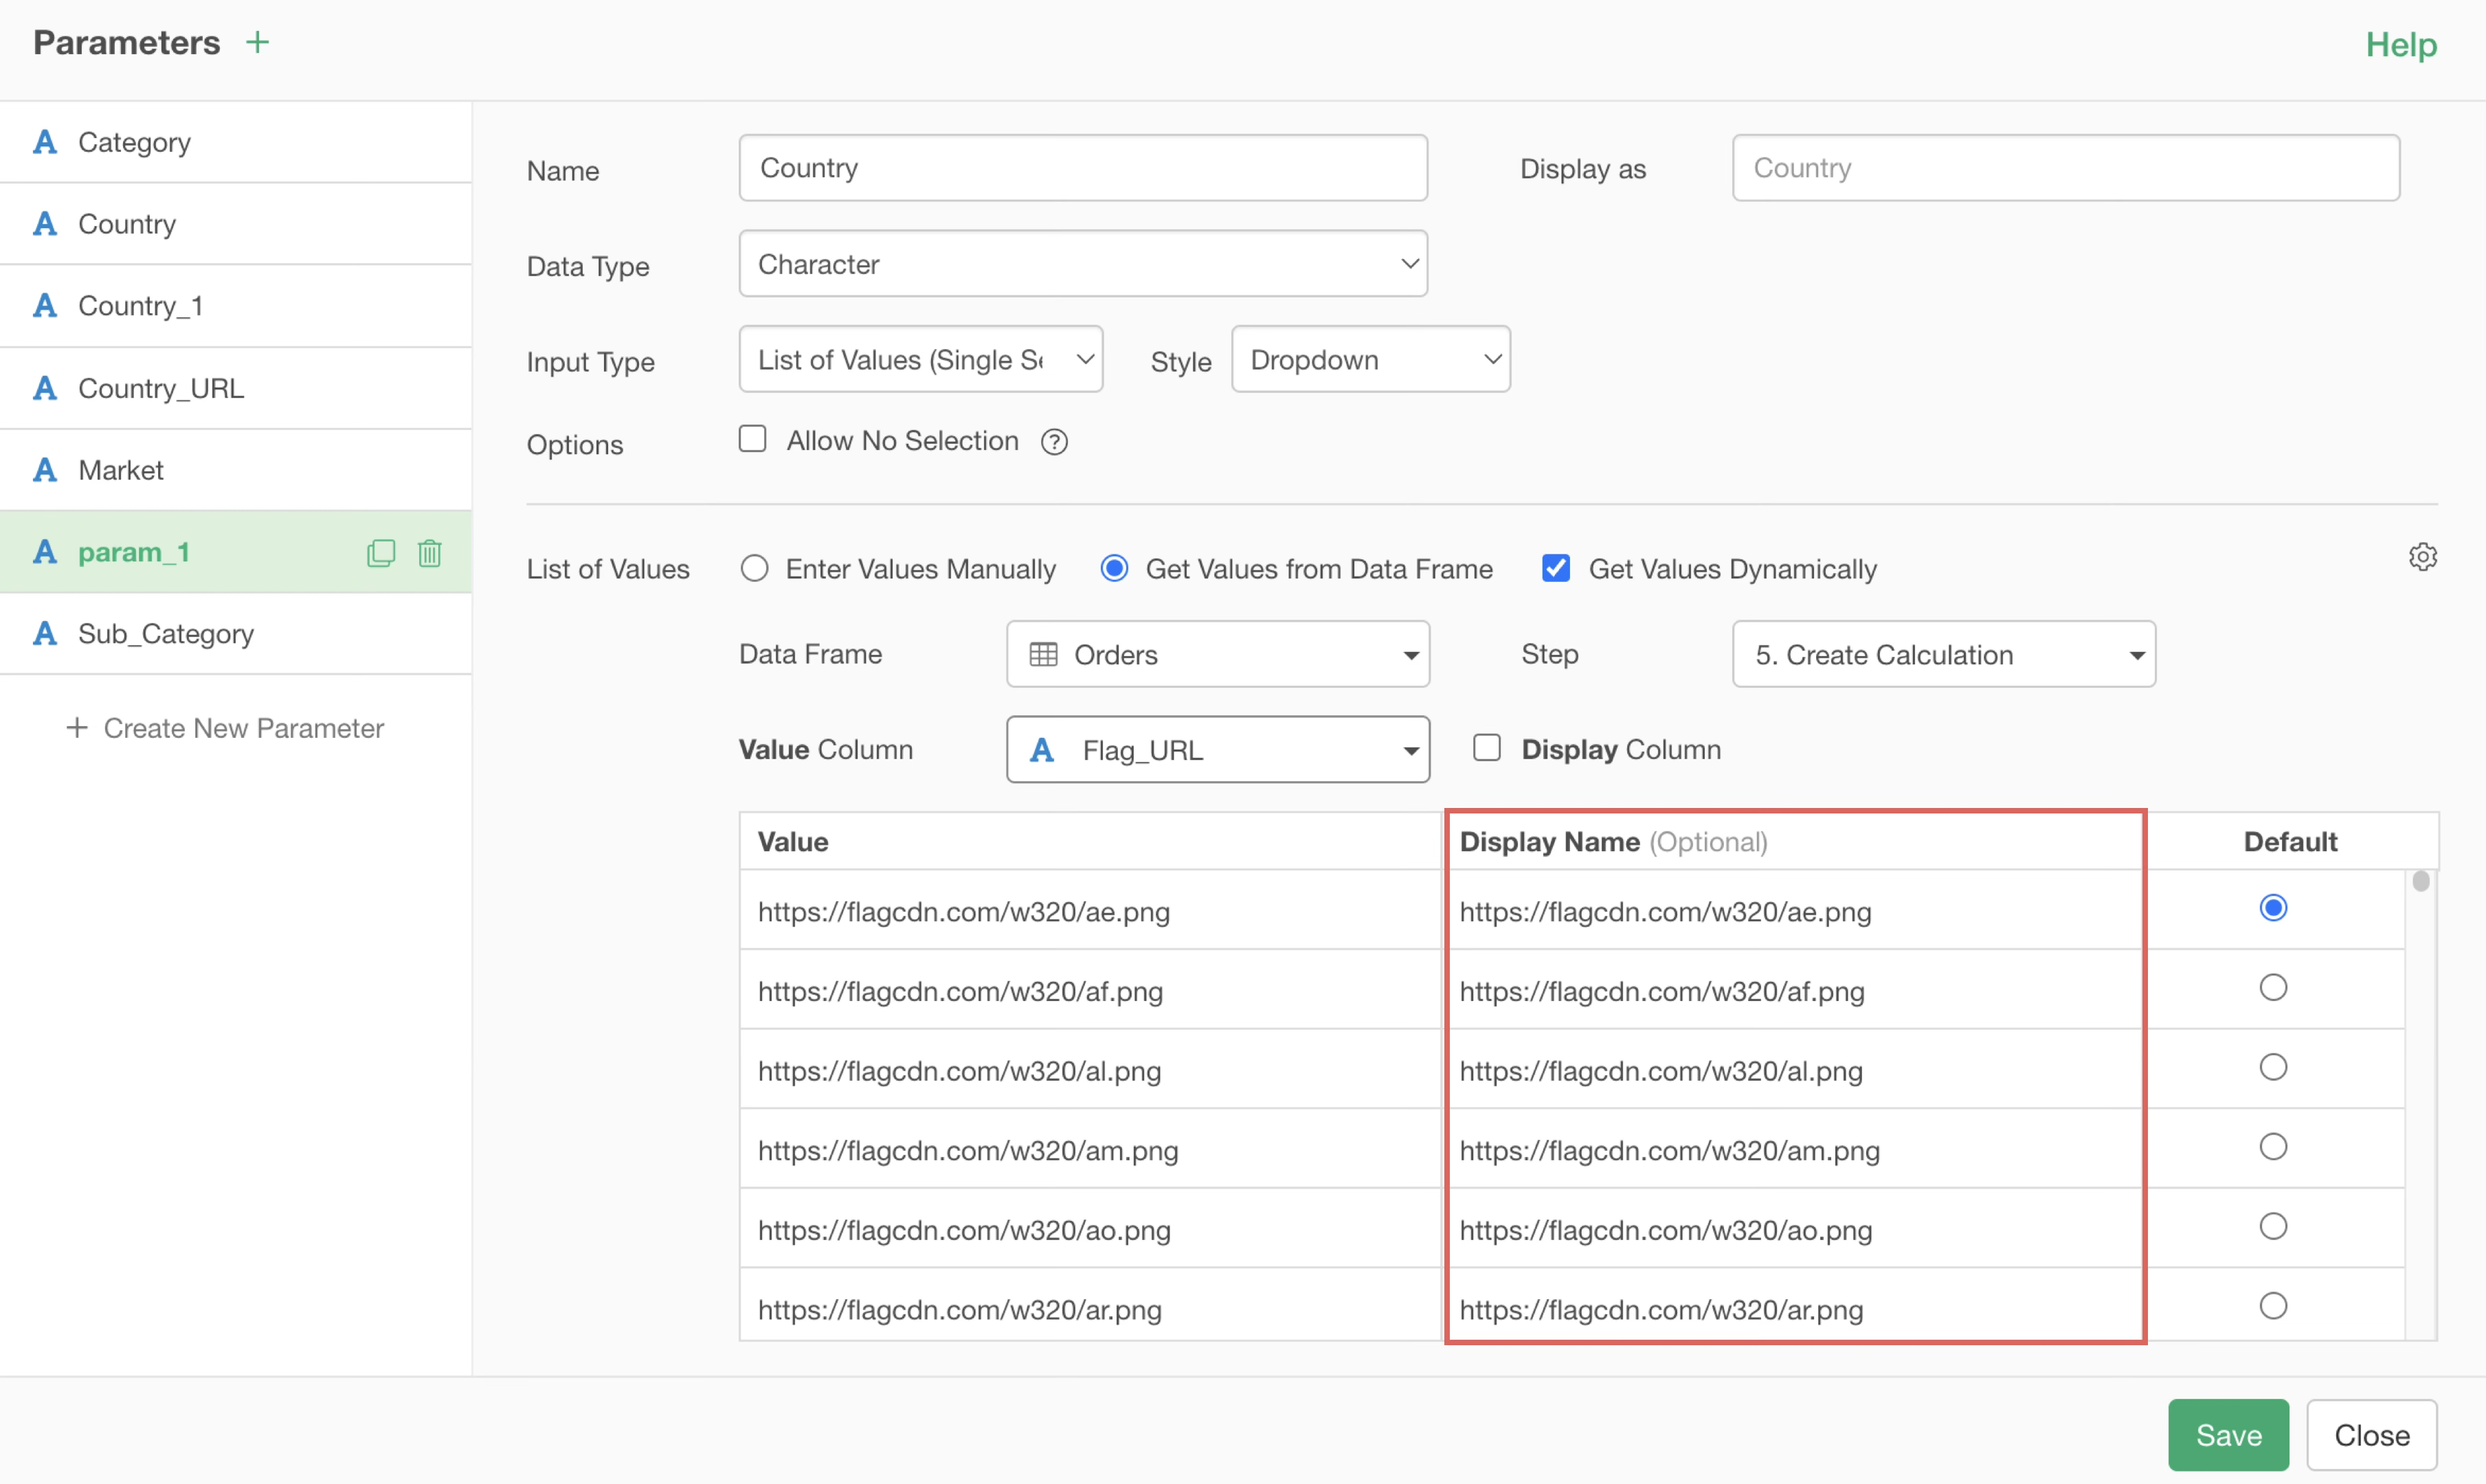
In such cases, enable the “Display Name Column” option.
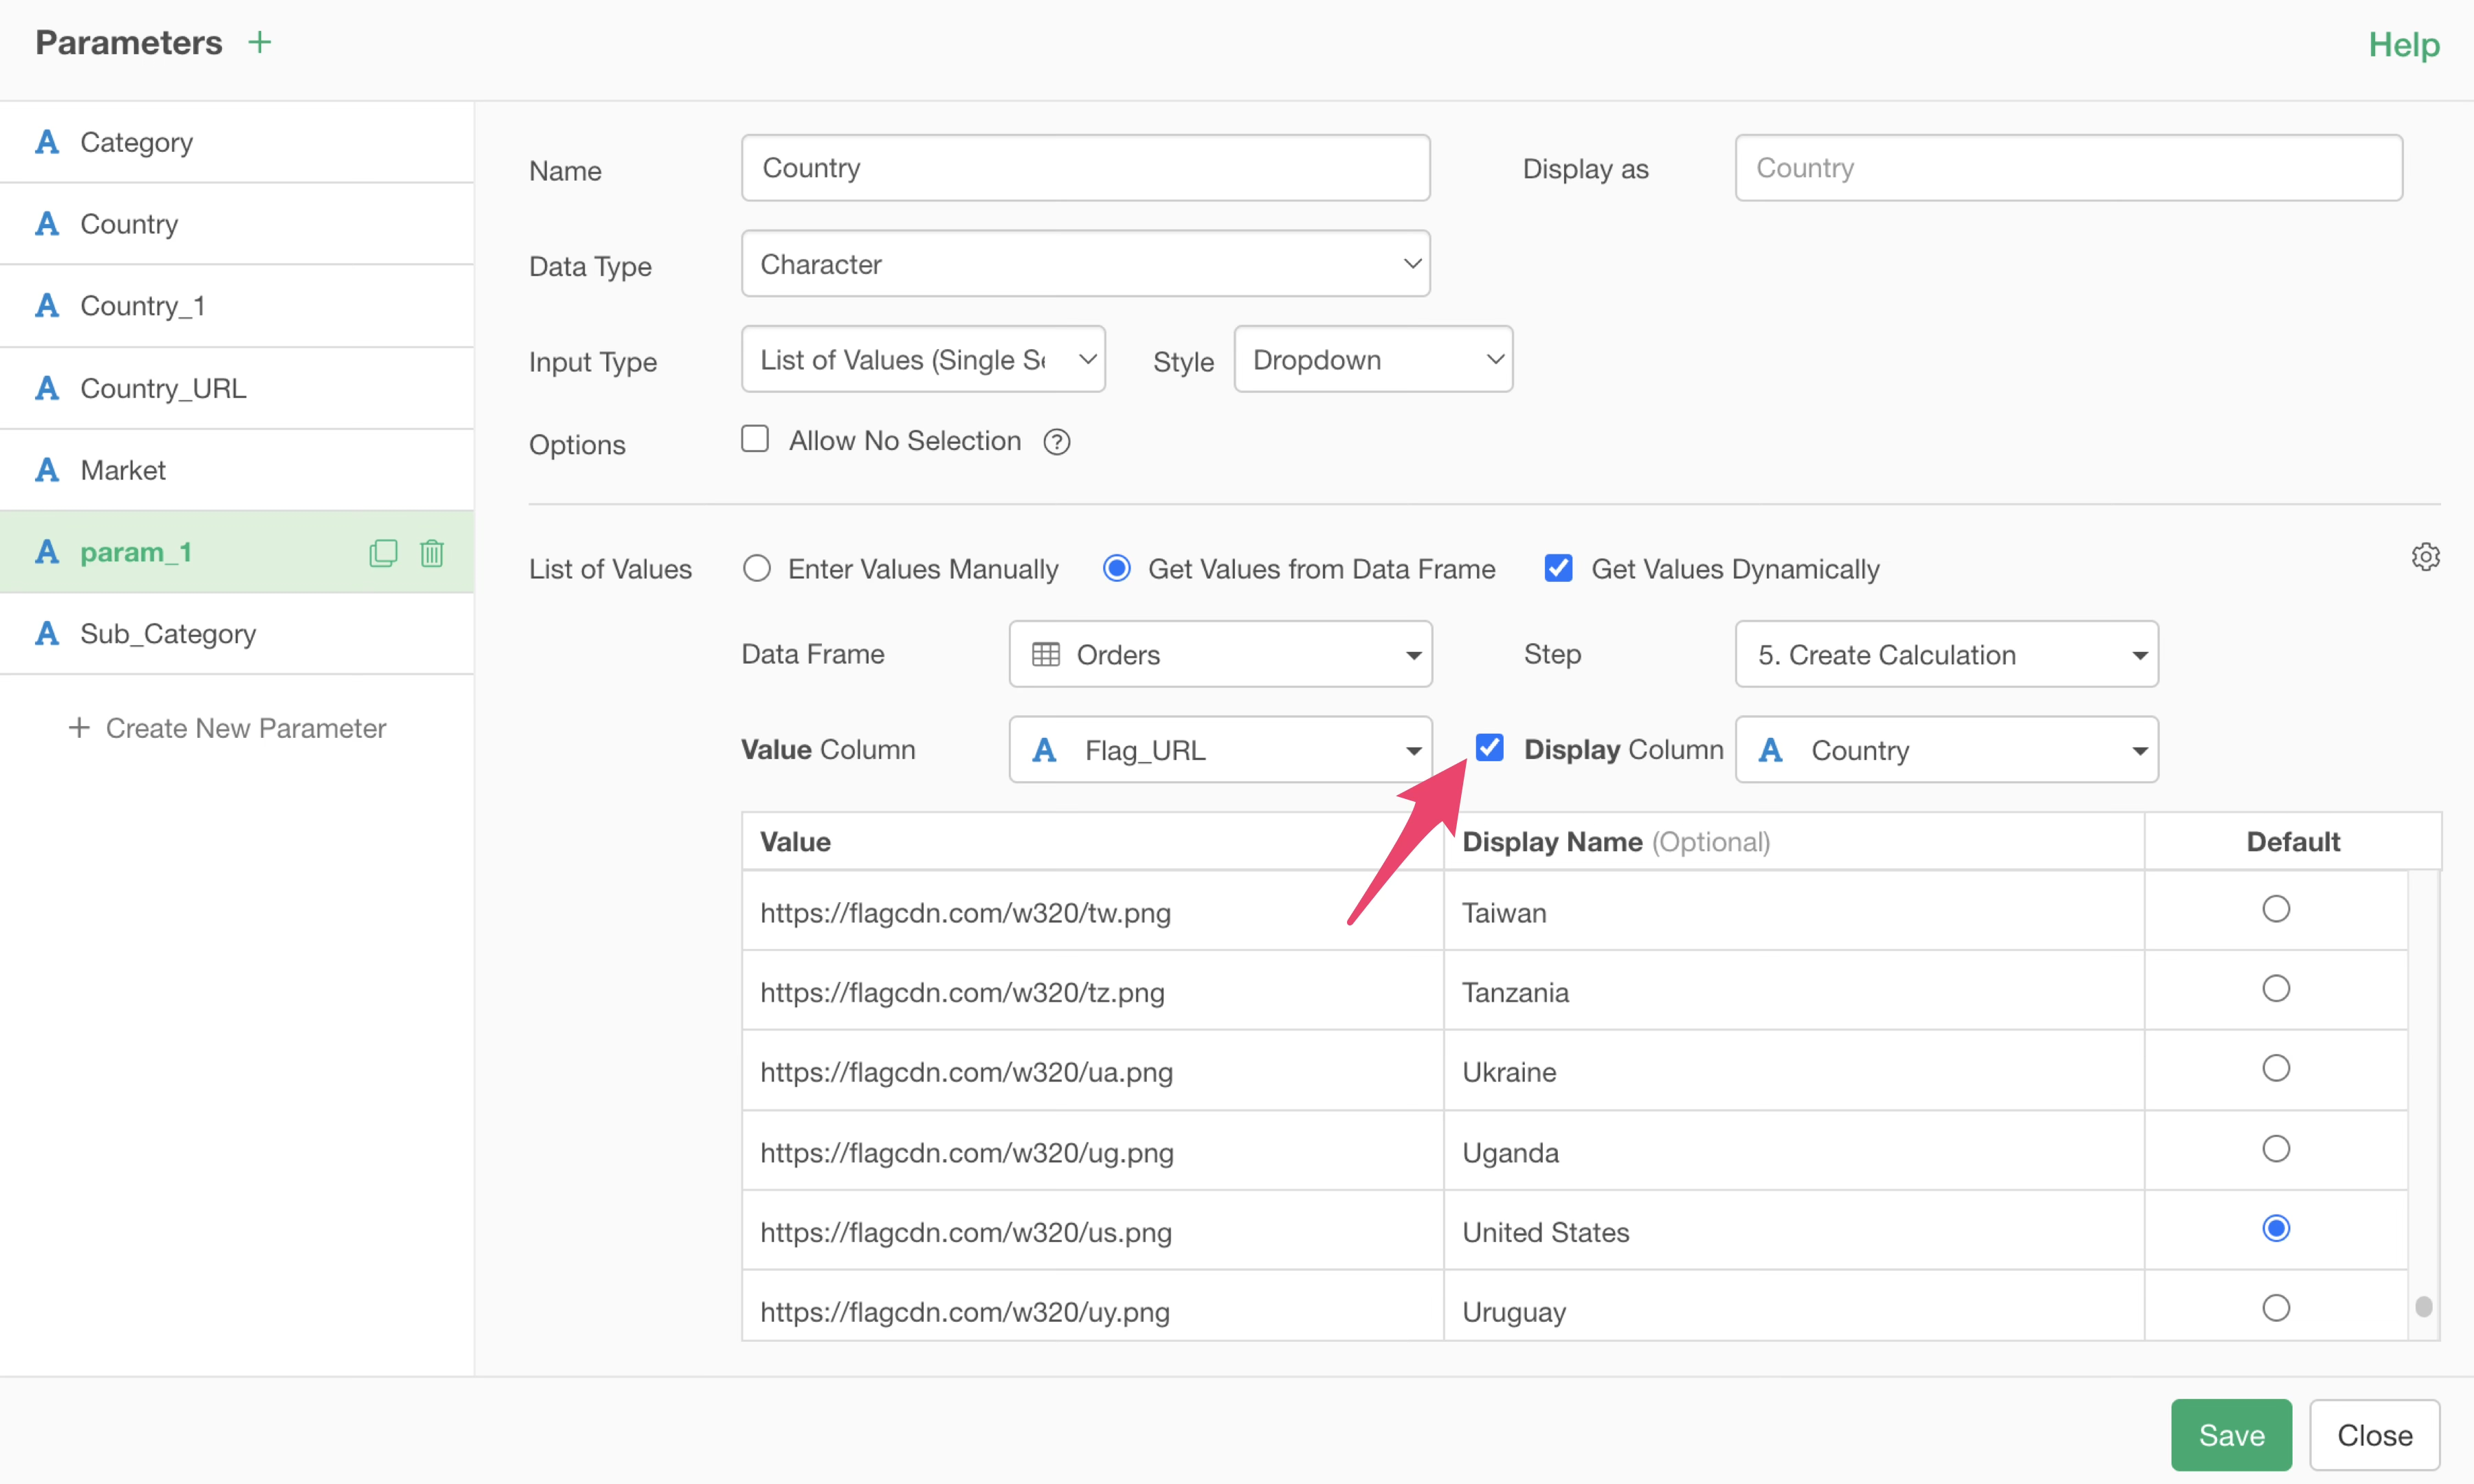
Using the Display Name Column option allows you to manage the actual substituted value and the displayed name separately.
Specifically, the values specified in the Display Name Column will be what appears in the parameter’s list of values.
Therefore, select the “Country” column for this.
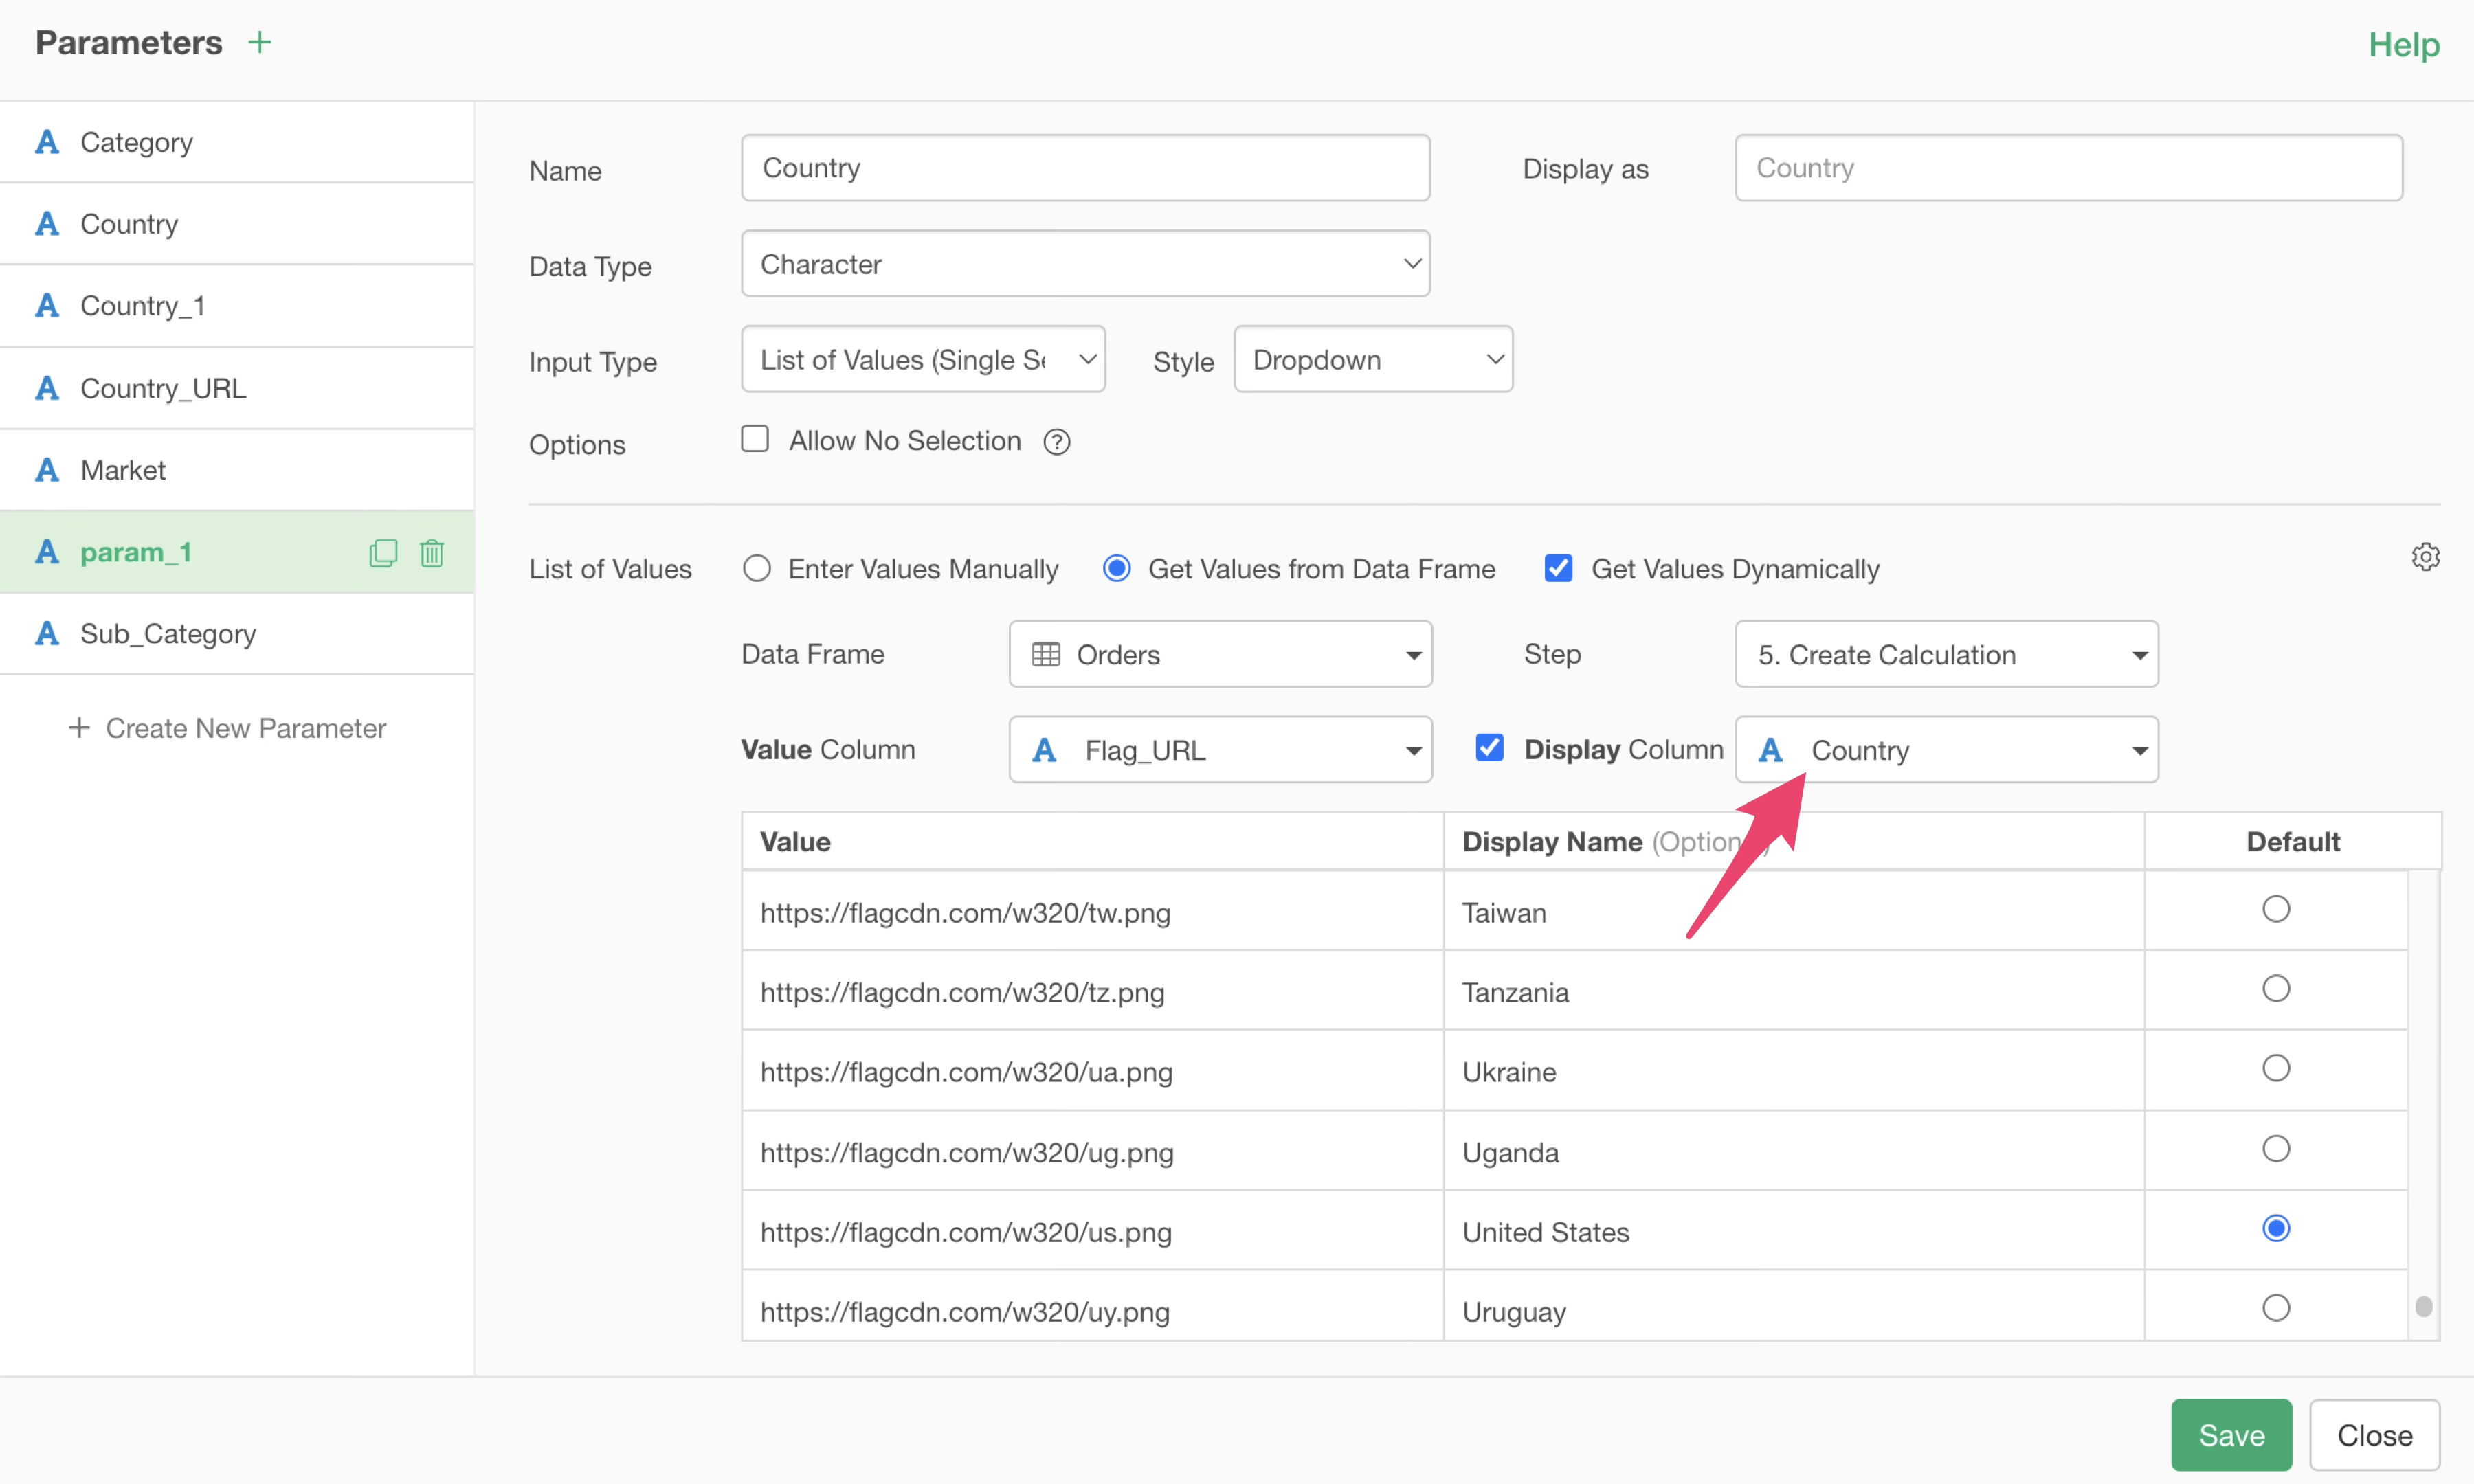
By doing this, the country information is shown as the display name, while the actual value remains the URL.
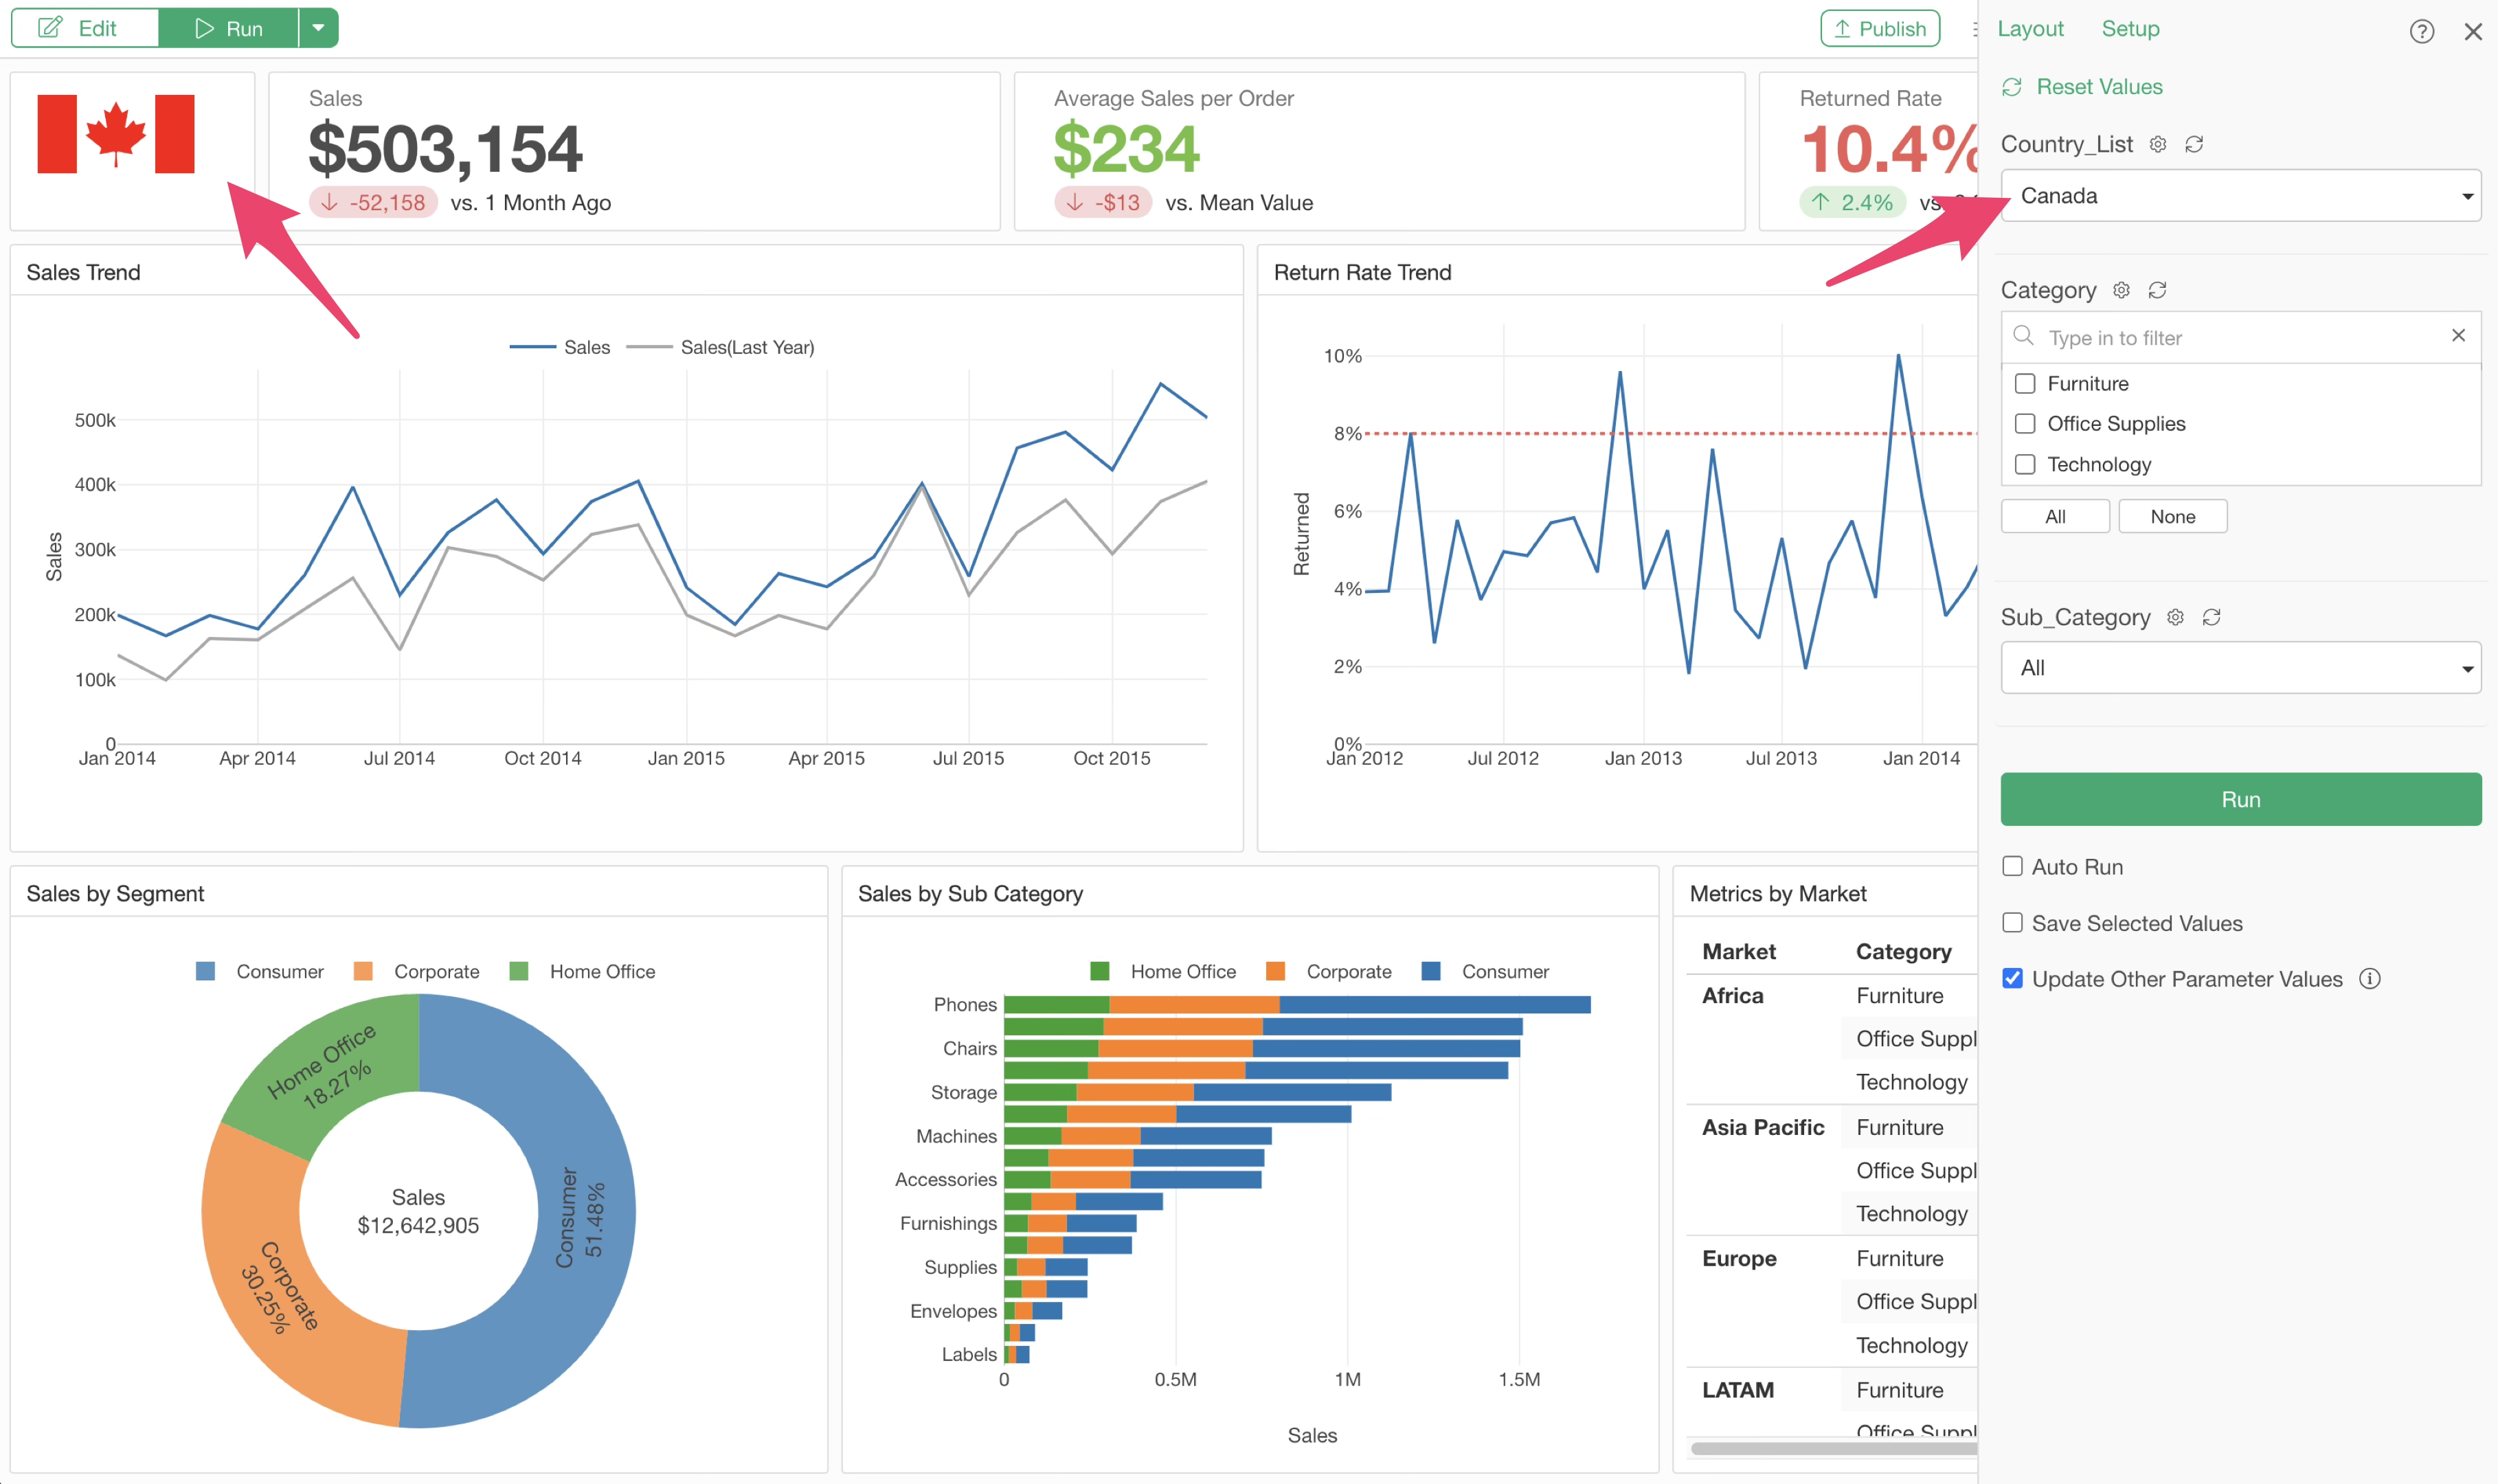
With this configuration, you can dynamically change the URL by selecting a country instead of specifying the URL itself.
You have now set up a parameter that allows you to select URLs included in the data by country name.
By specifying the parameter in the text panel as before, you can change the URL by changing the country name.
Dynamically Replacing Part of a URL with a Parameter
The methods introduced so far involved either specifying the URL directly or selecting a category value corresponding to a URL.
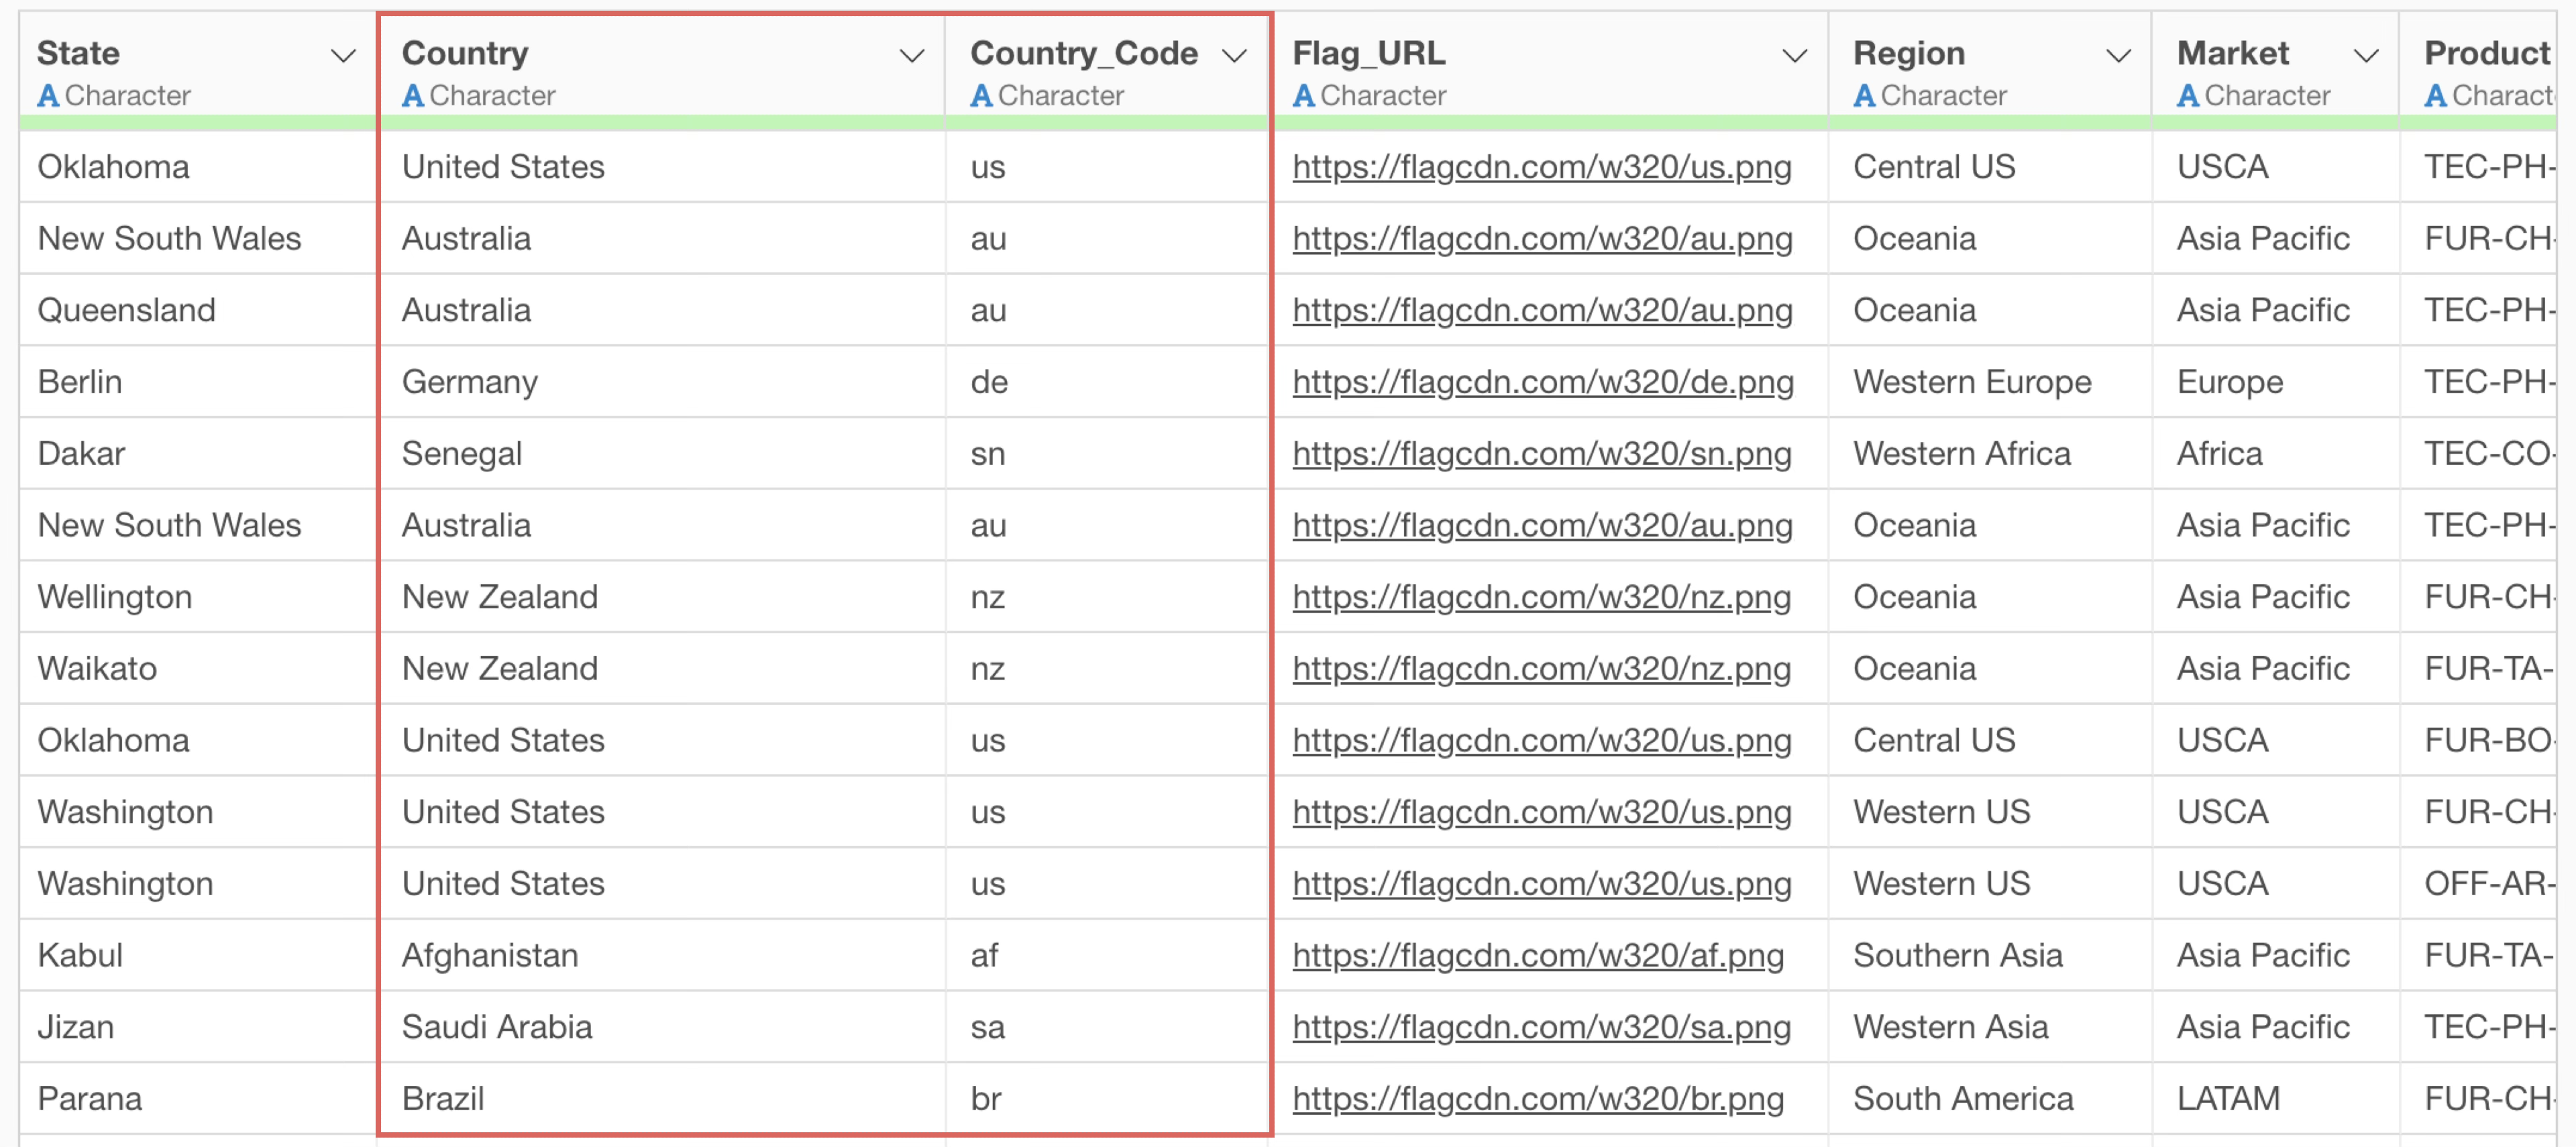
Actually, the flag URLs used this time have a structure where a two-letter country code is always included in the URL; changing that part dynamically changes the URL.

In such cases, you might want the country information to be dynamically inserted into the URL when a country is selected.
This need can be met by preparing a country code column in advance.
Specifically, open the three-line menu at the top left of the project menu and open the parameter settings dialog.
Click the “Create New Parameter” button and select an arbitrary name and display name.
Select “Character” for the Data Type and use “List of Values (Single Selection).”
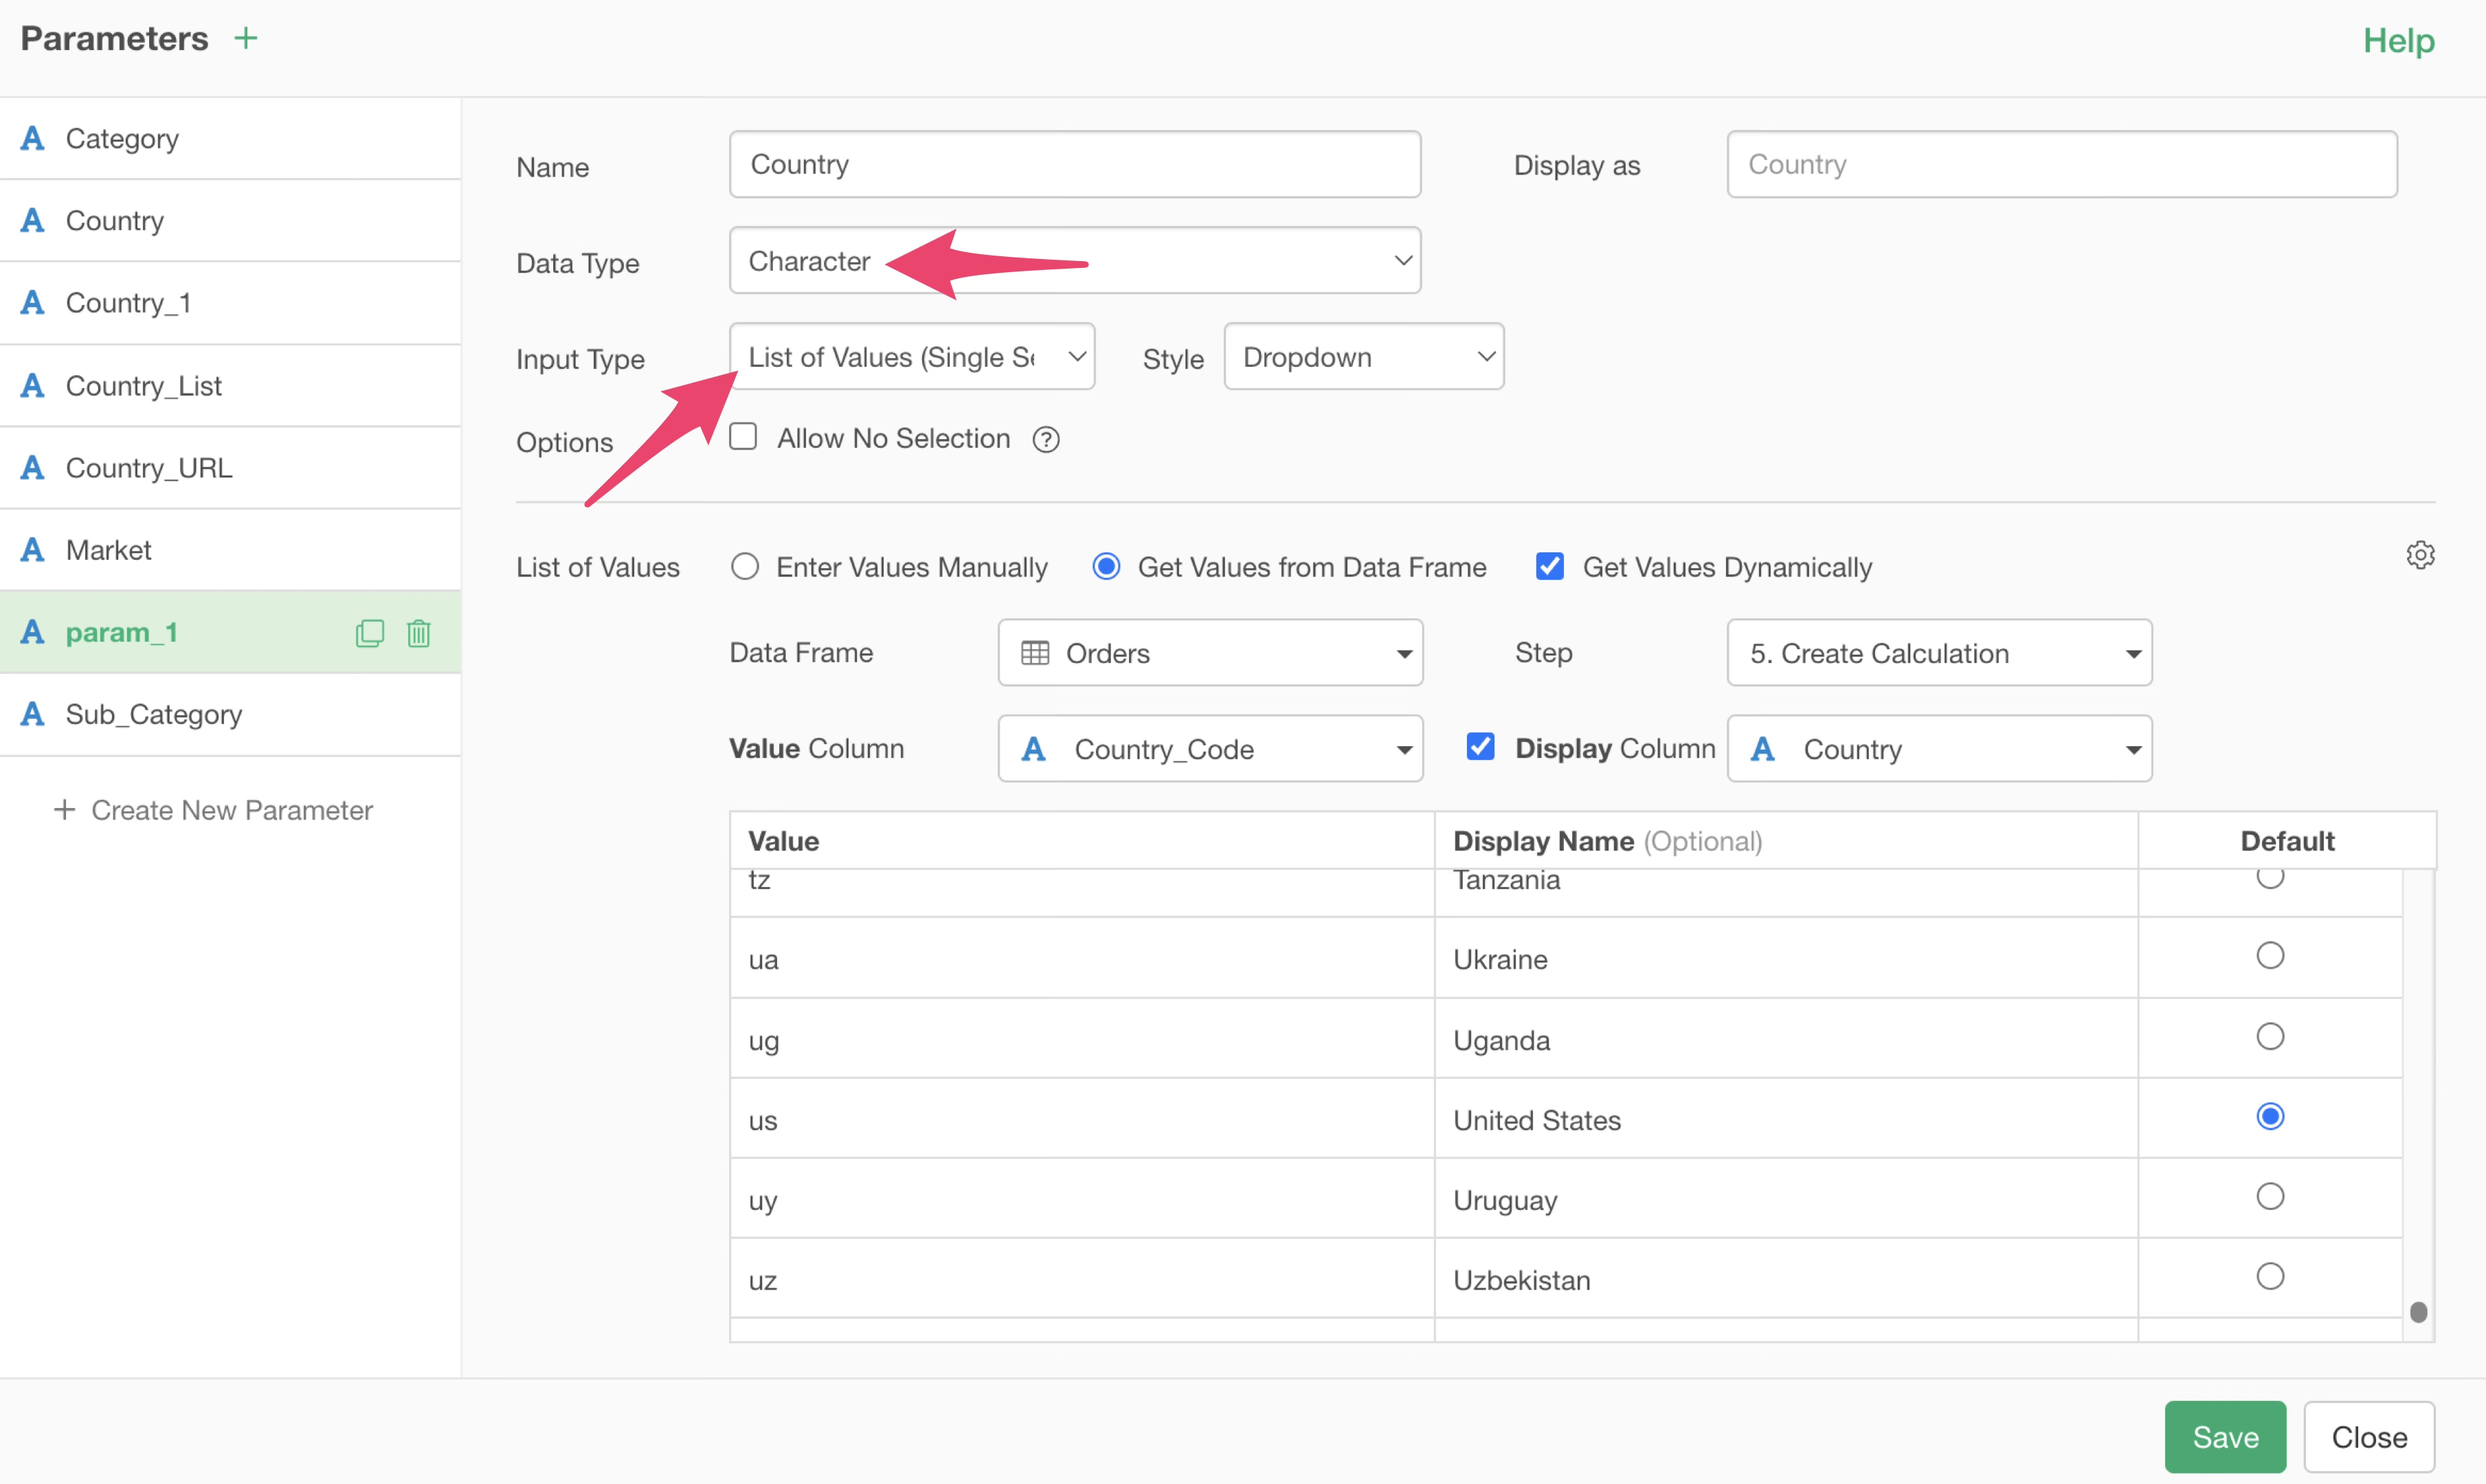
As before, uncheck the “Support No Selection” option.
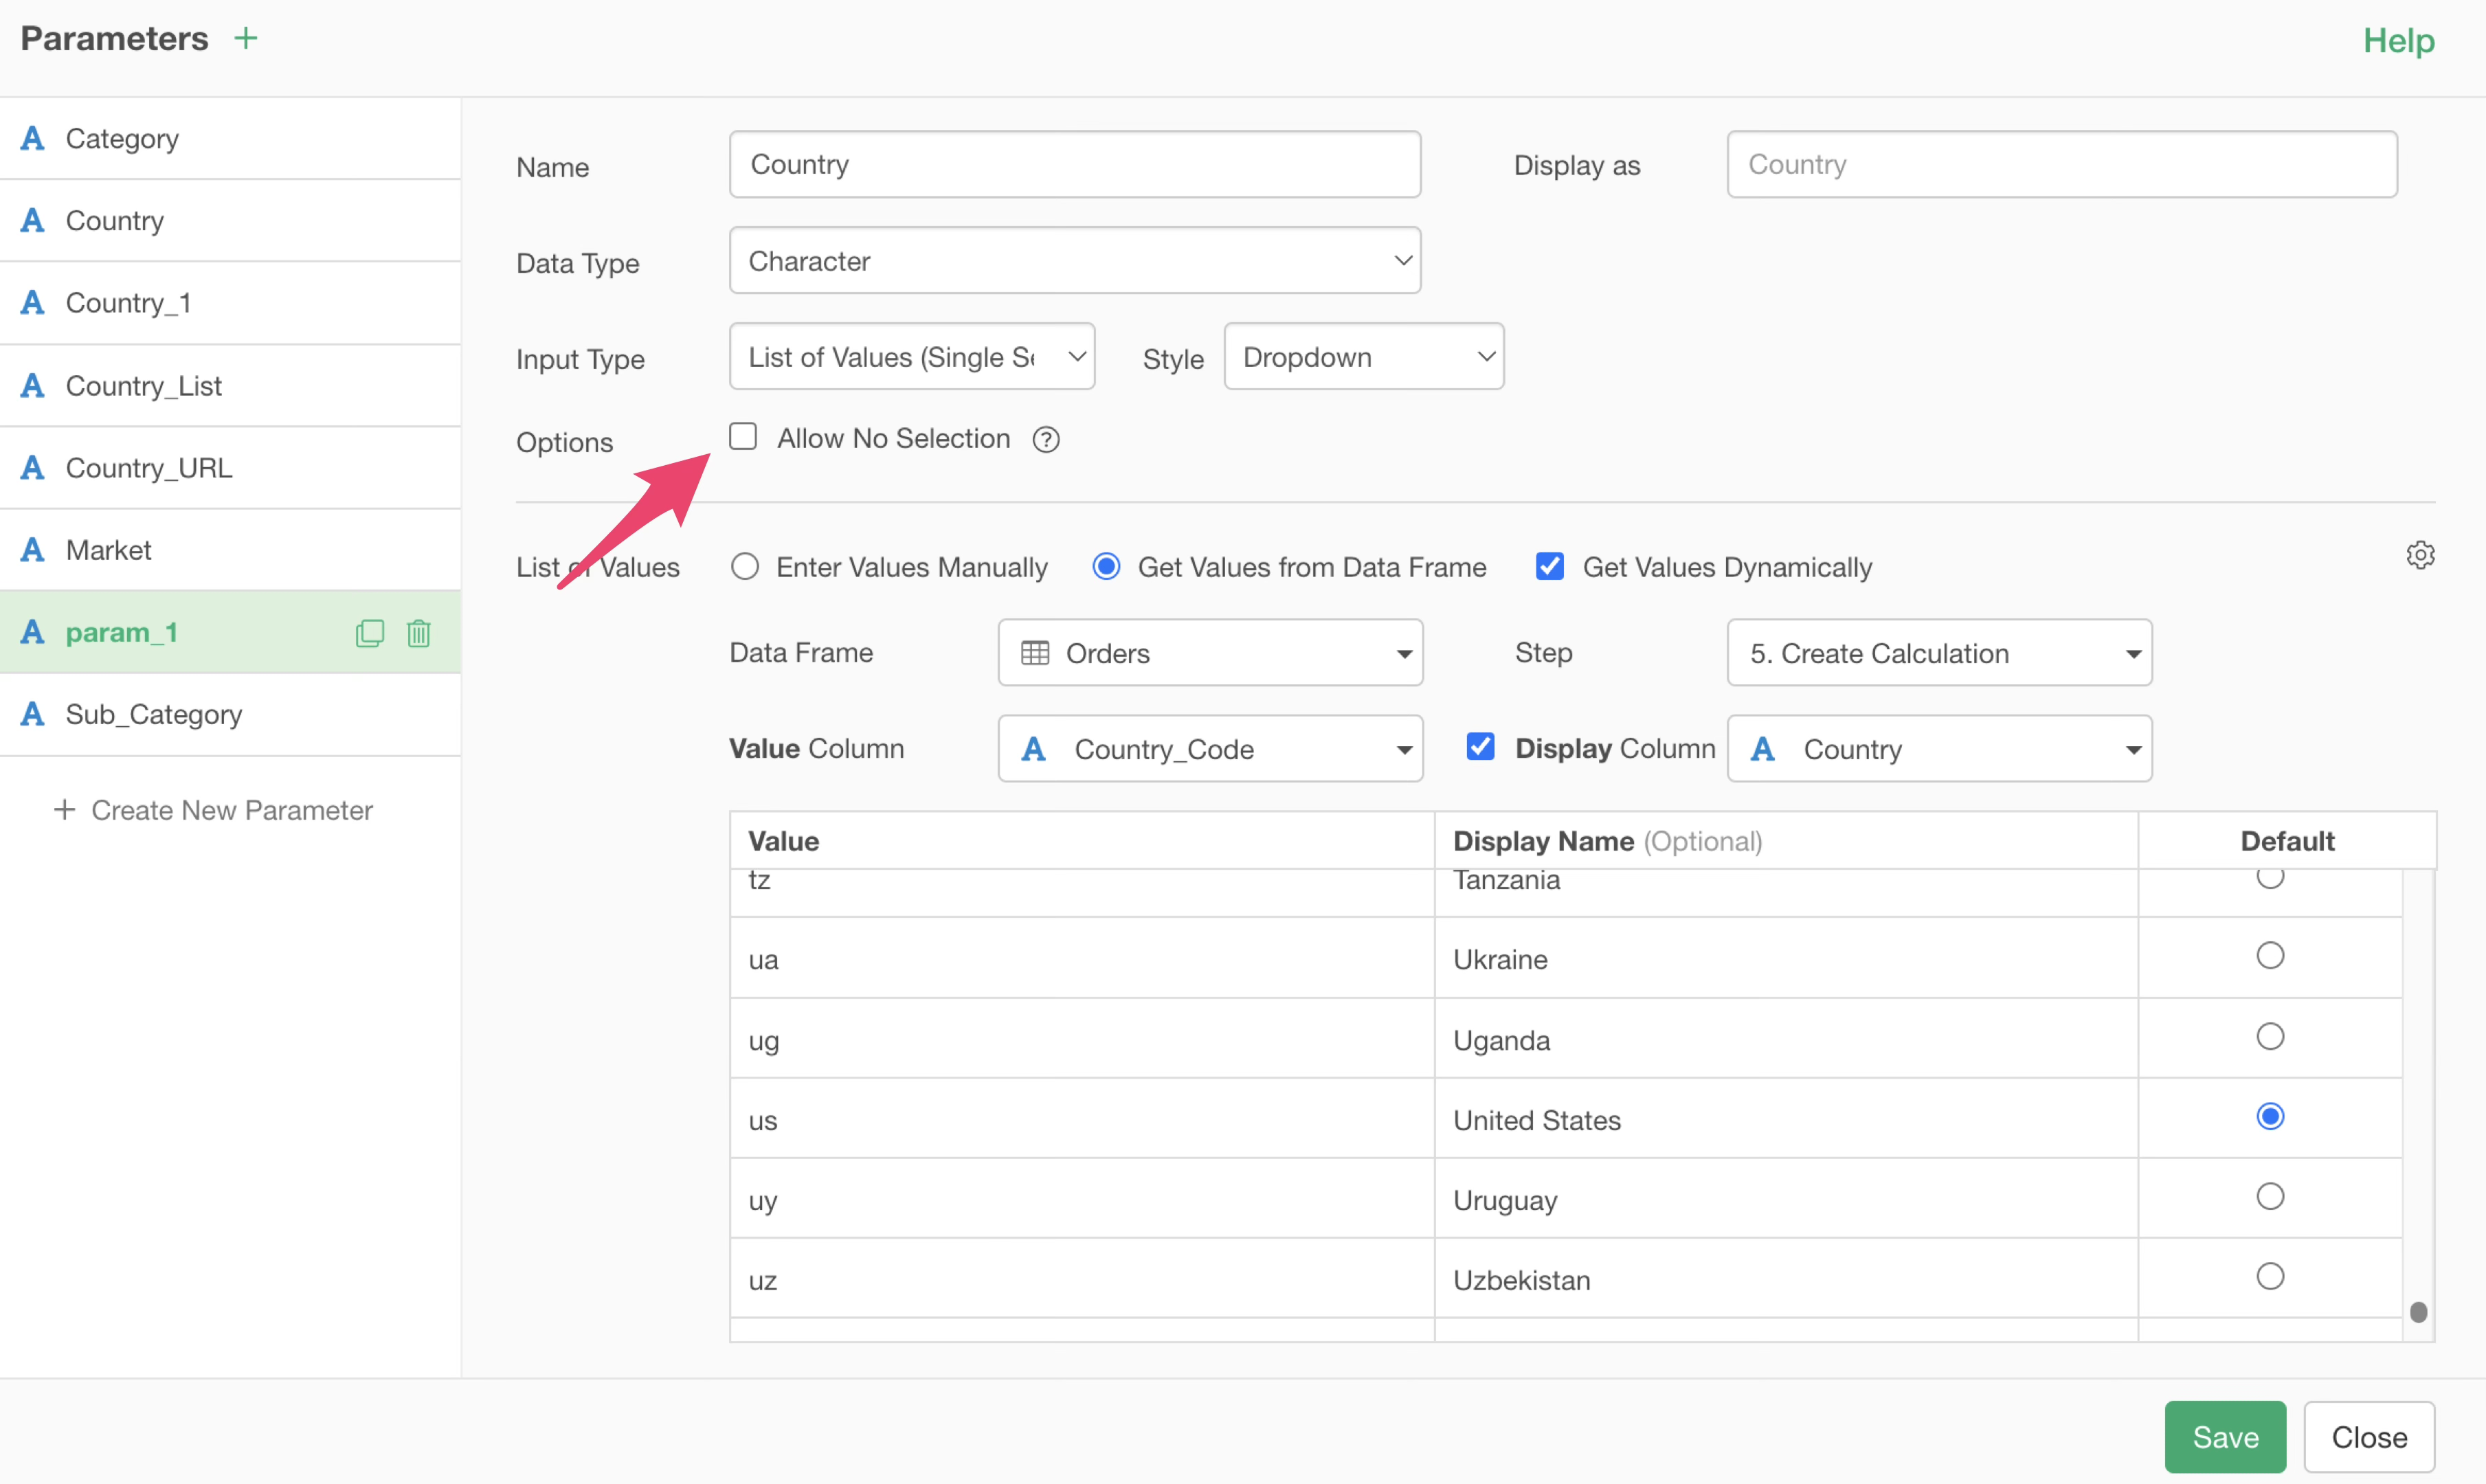
Select “Get Values from Data Frame” and check “Get Values Dynamically.”
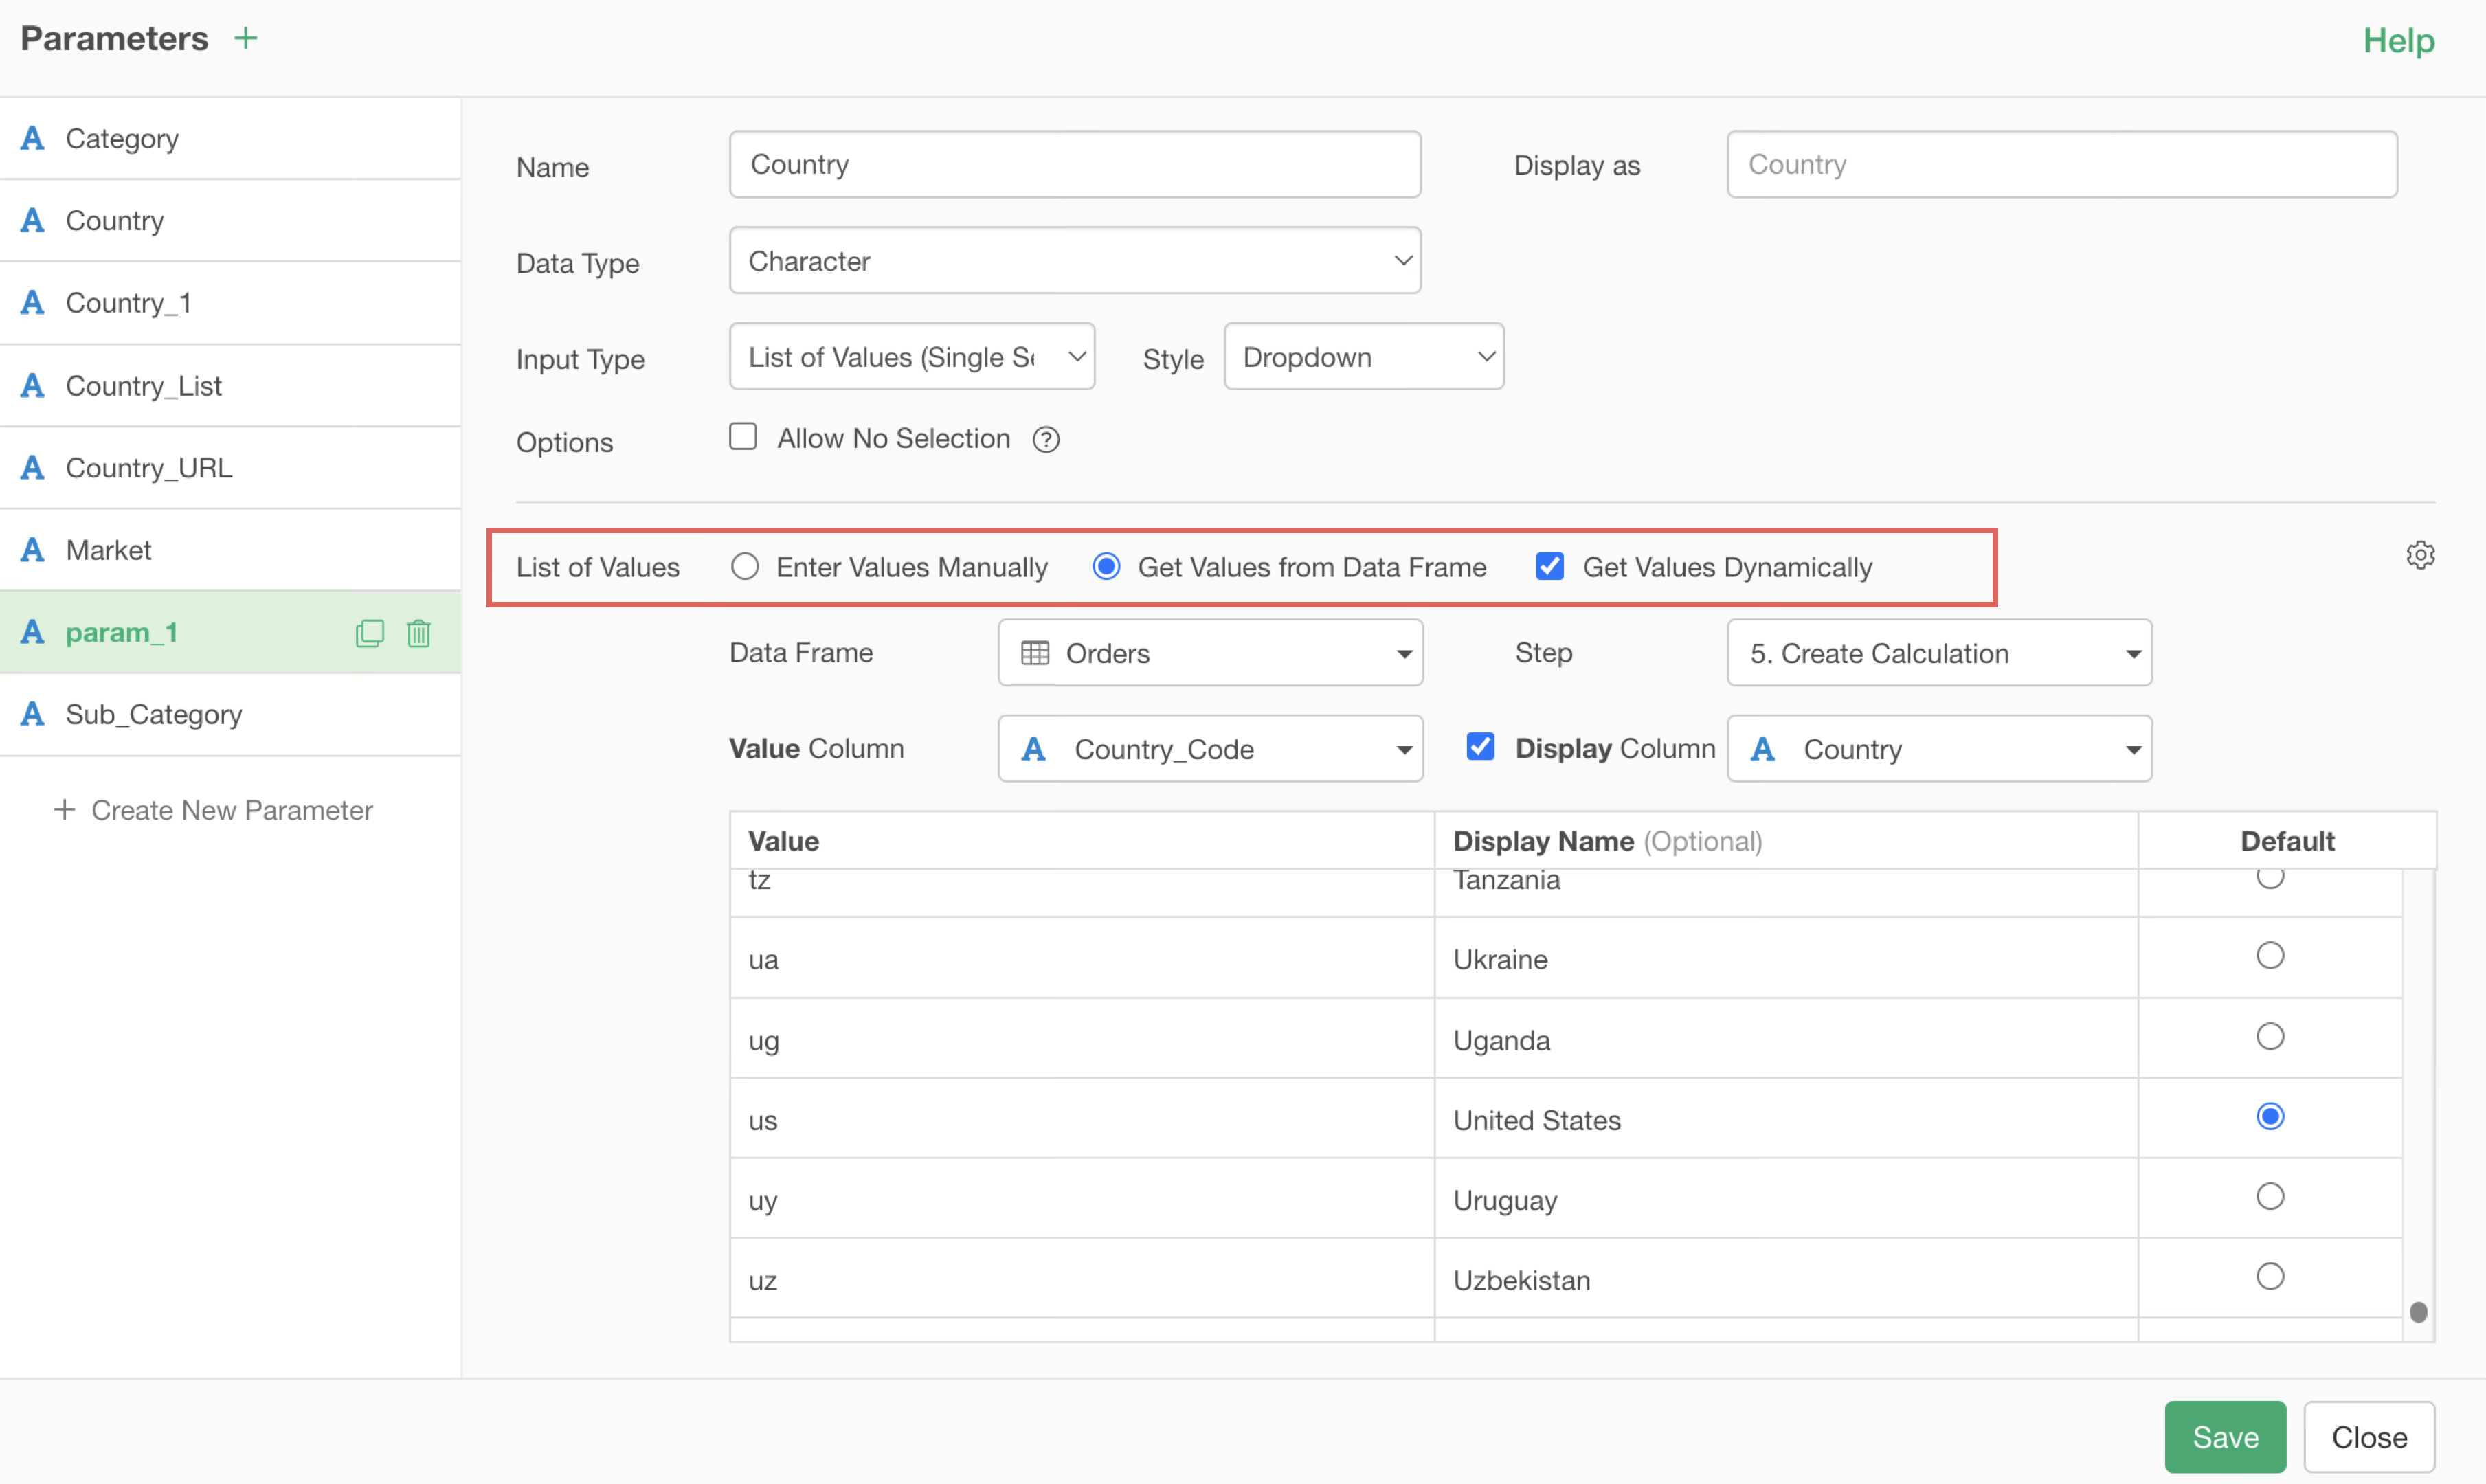
Select the data frame containing the relevant URLs, choose the “Country Code” column for the Value Column, and the “Country” column for the Display Name Column, then save.
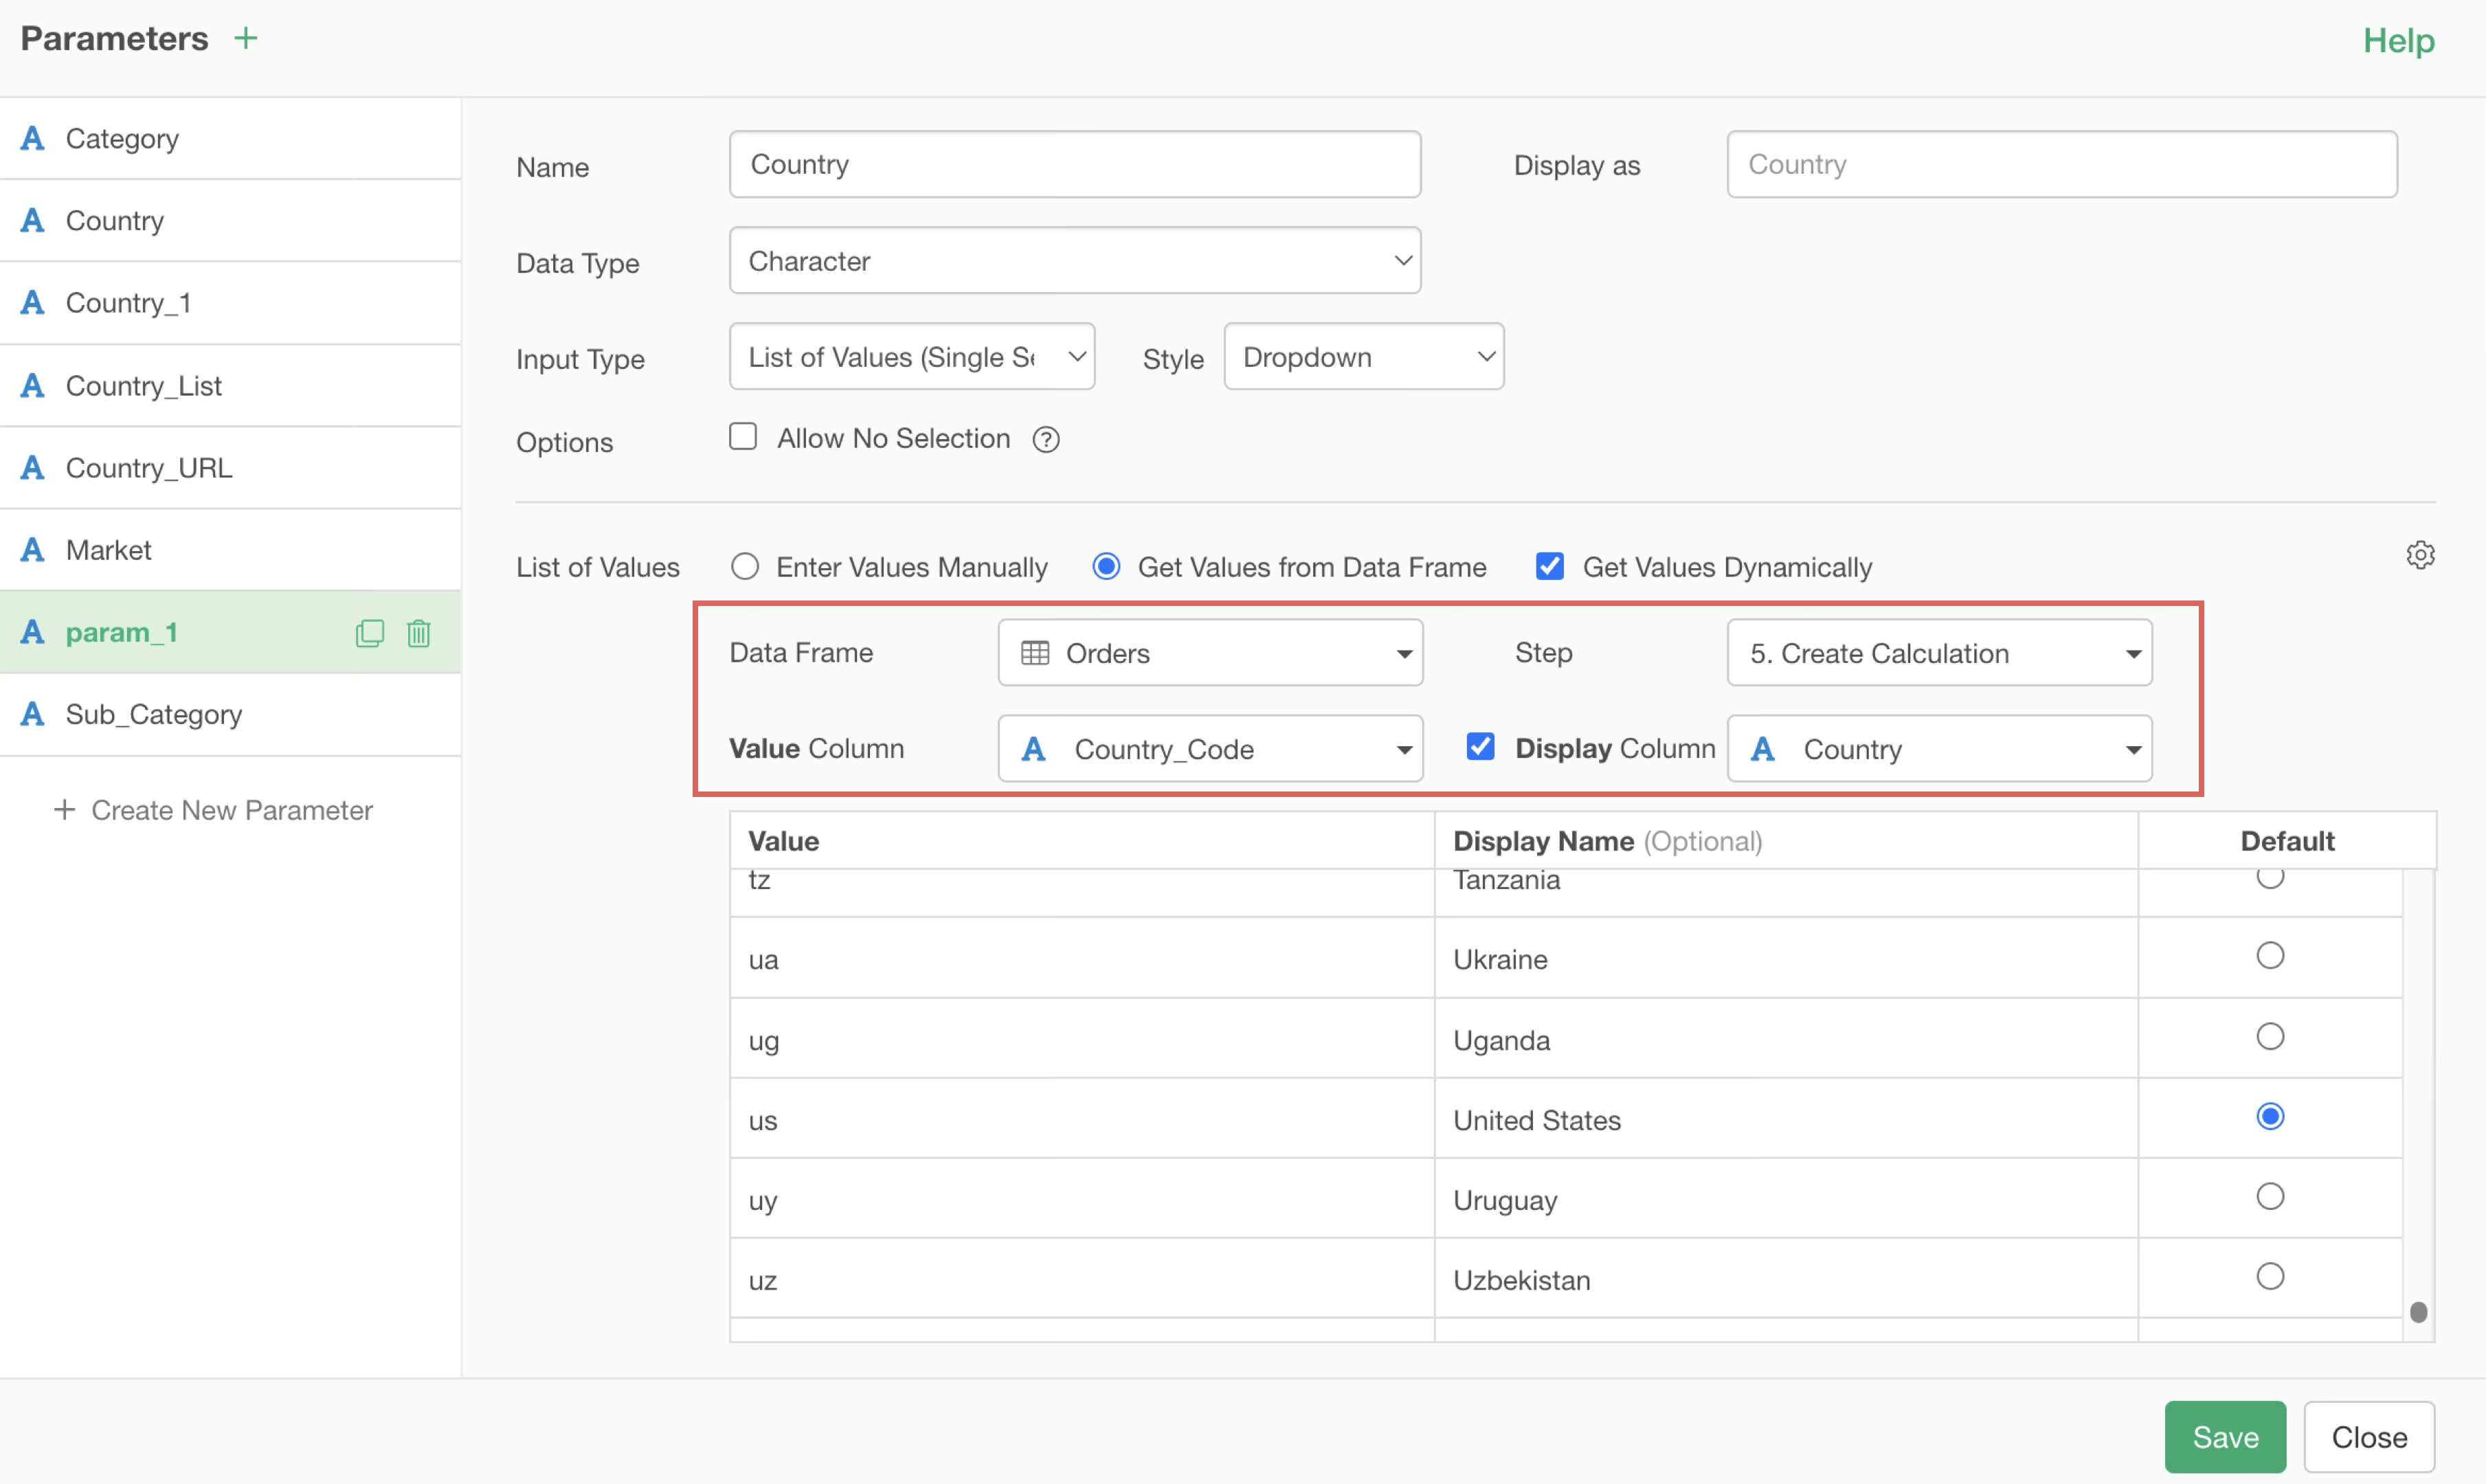
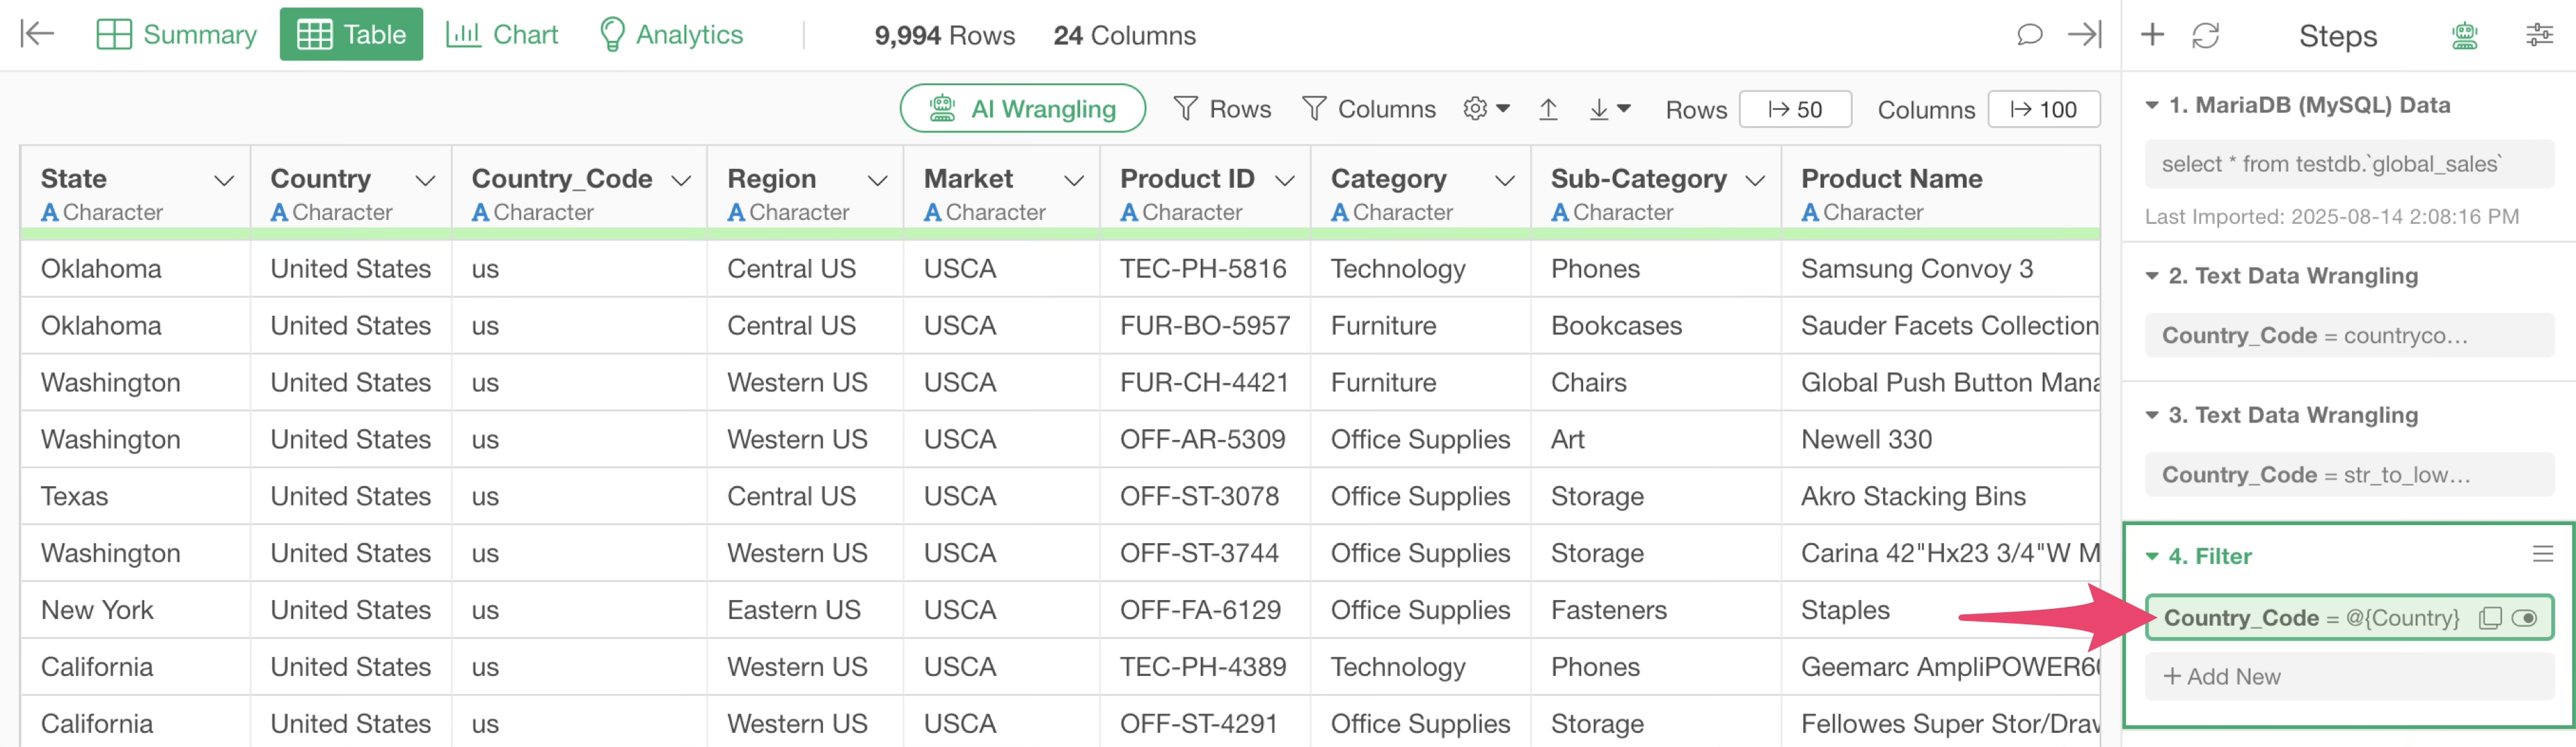
Next, use this parameter to filter the data.
From the “Country_Code” column header menu, select “Filter” and then “Is”
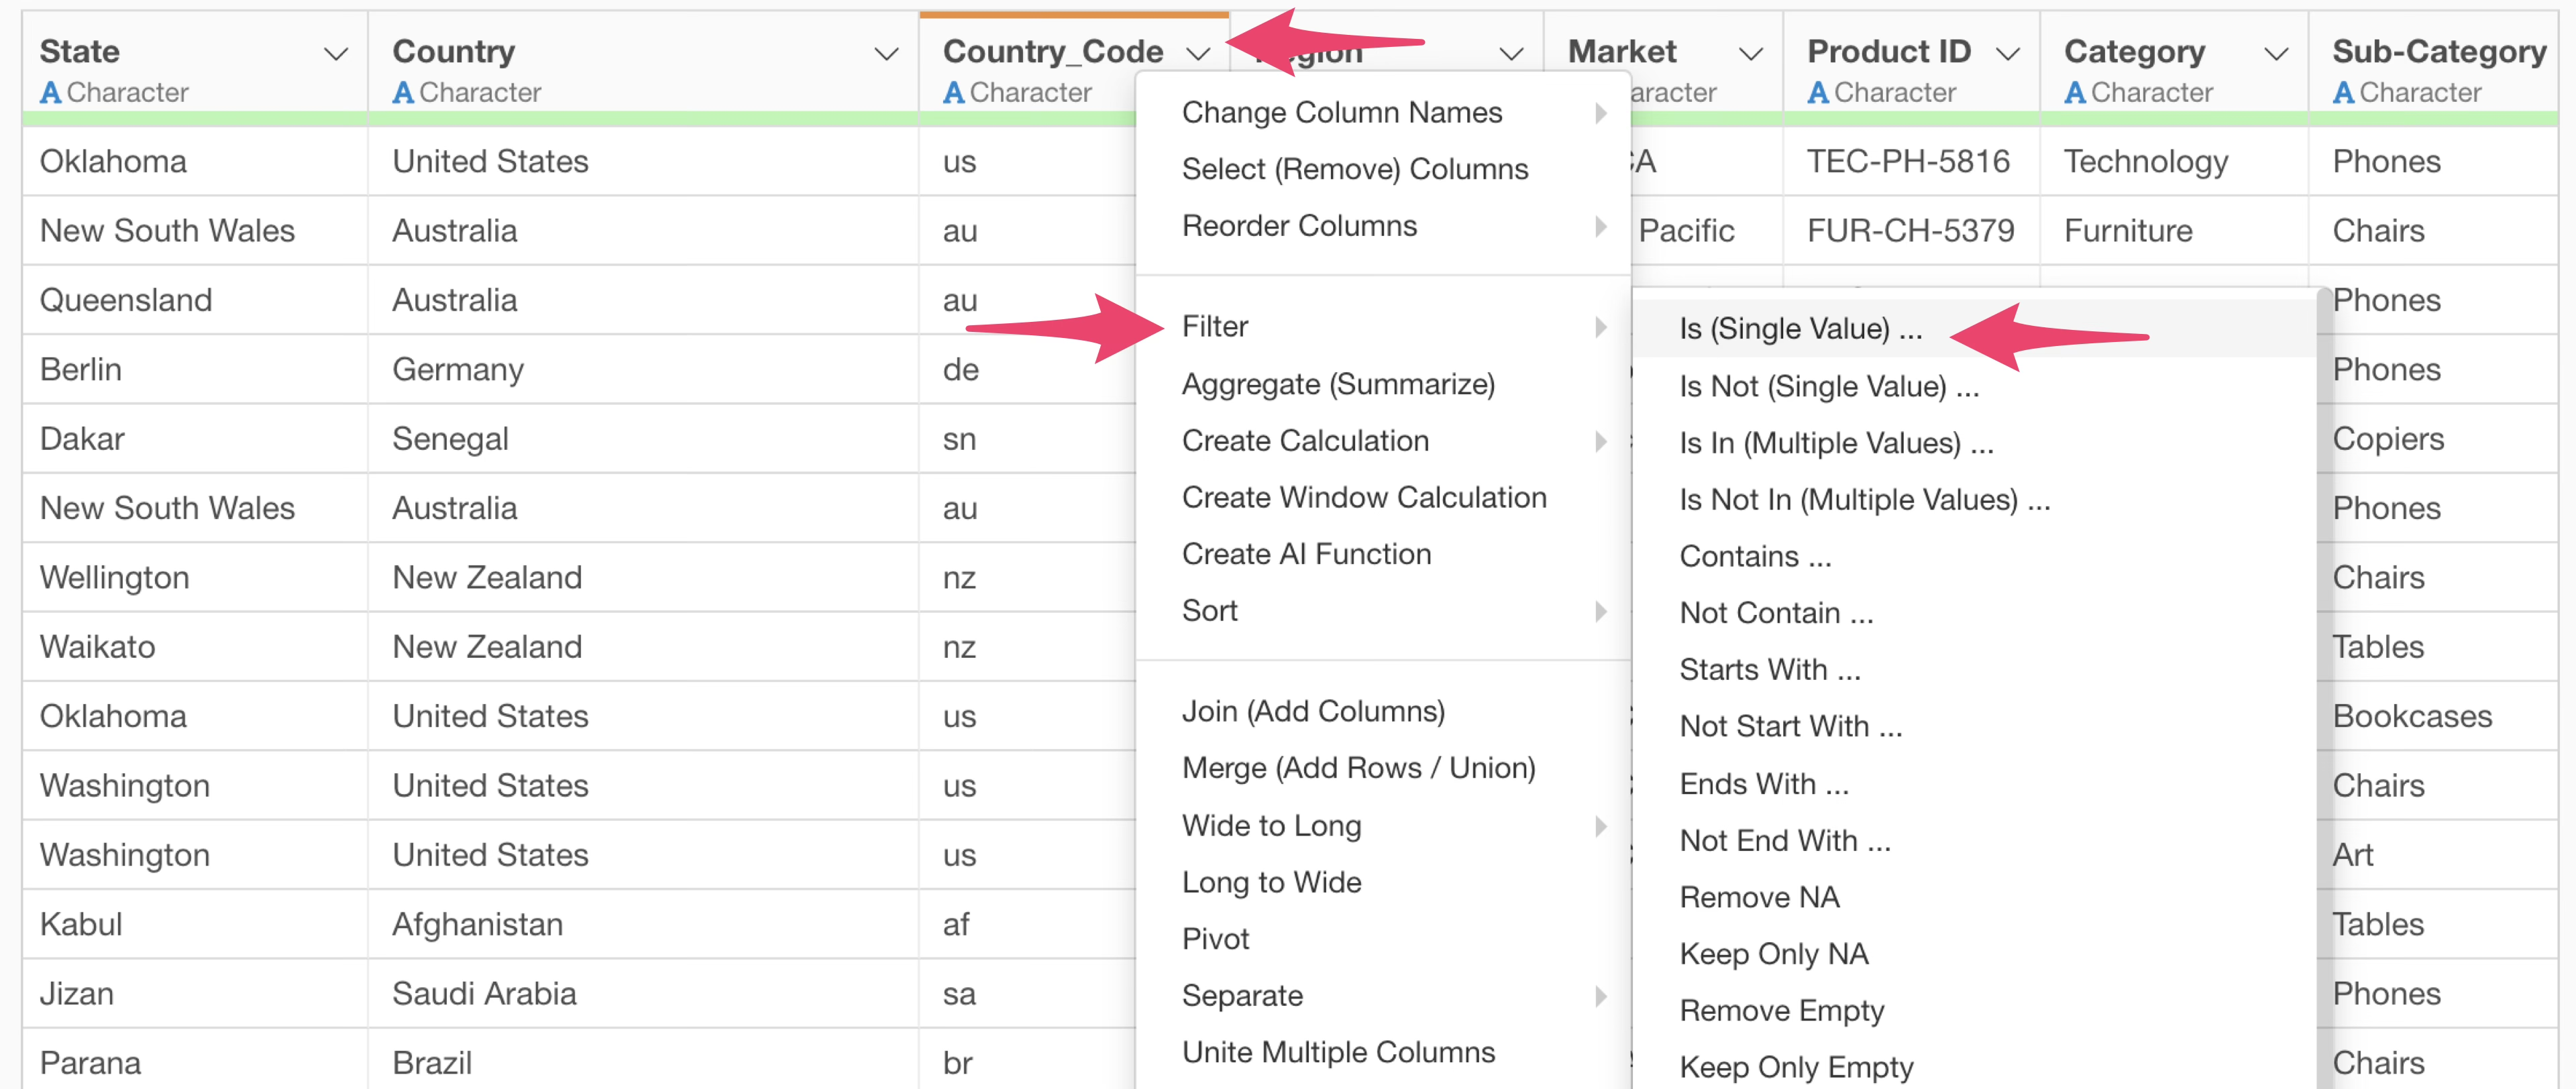
When the filter dialog appears, check “Parameter,” specify the “Country” parameter created earlier, and run it.
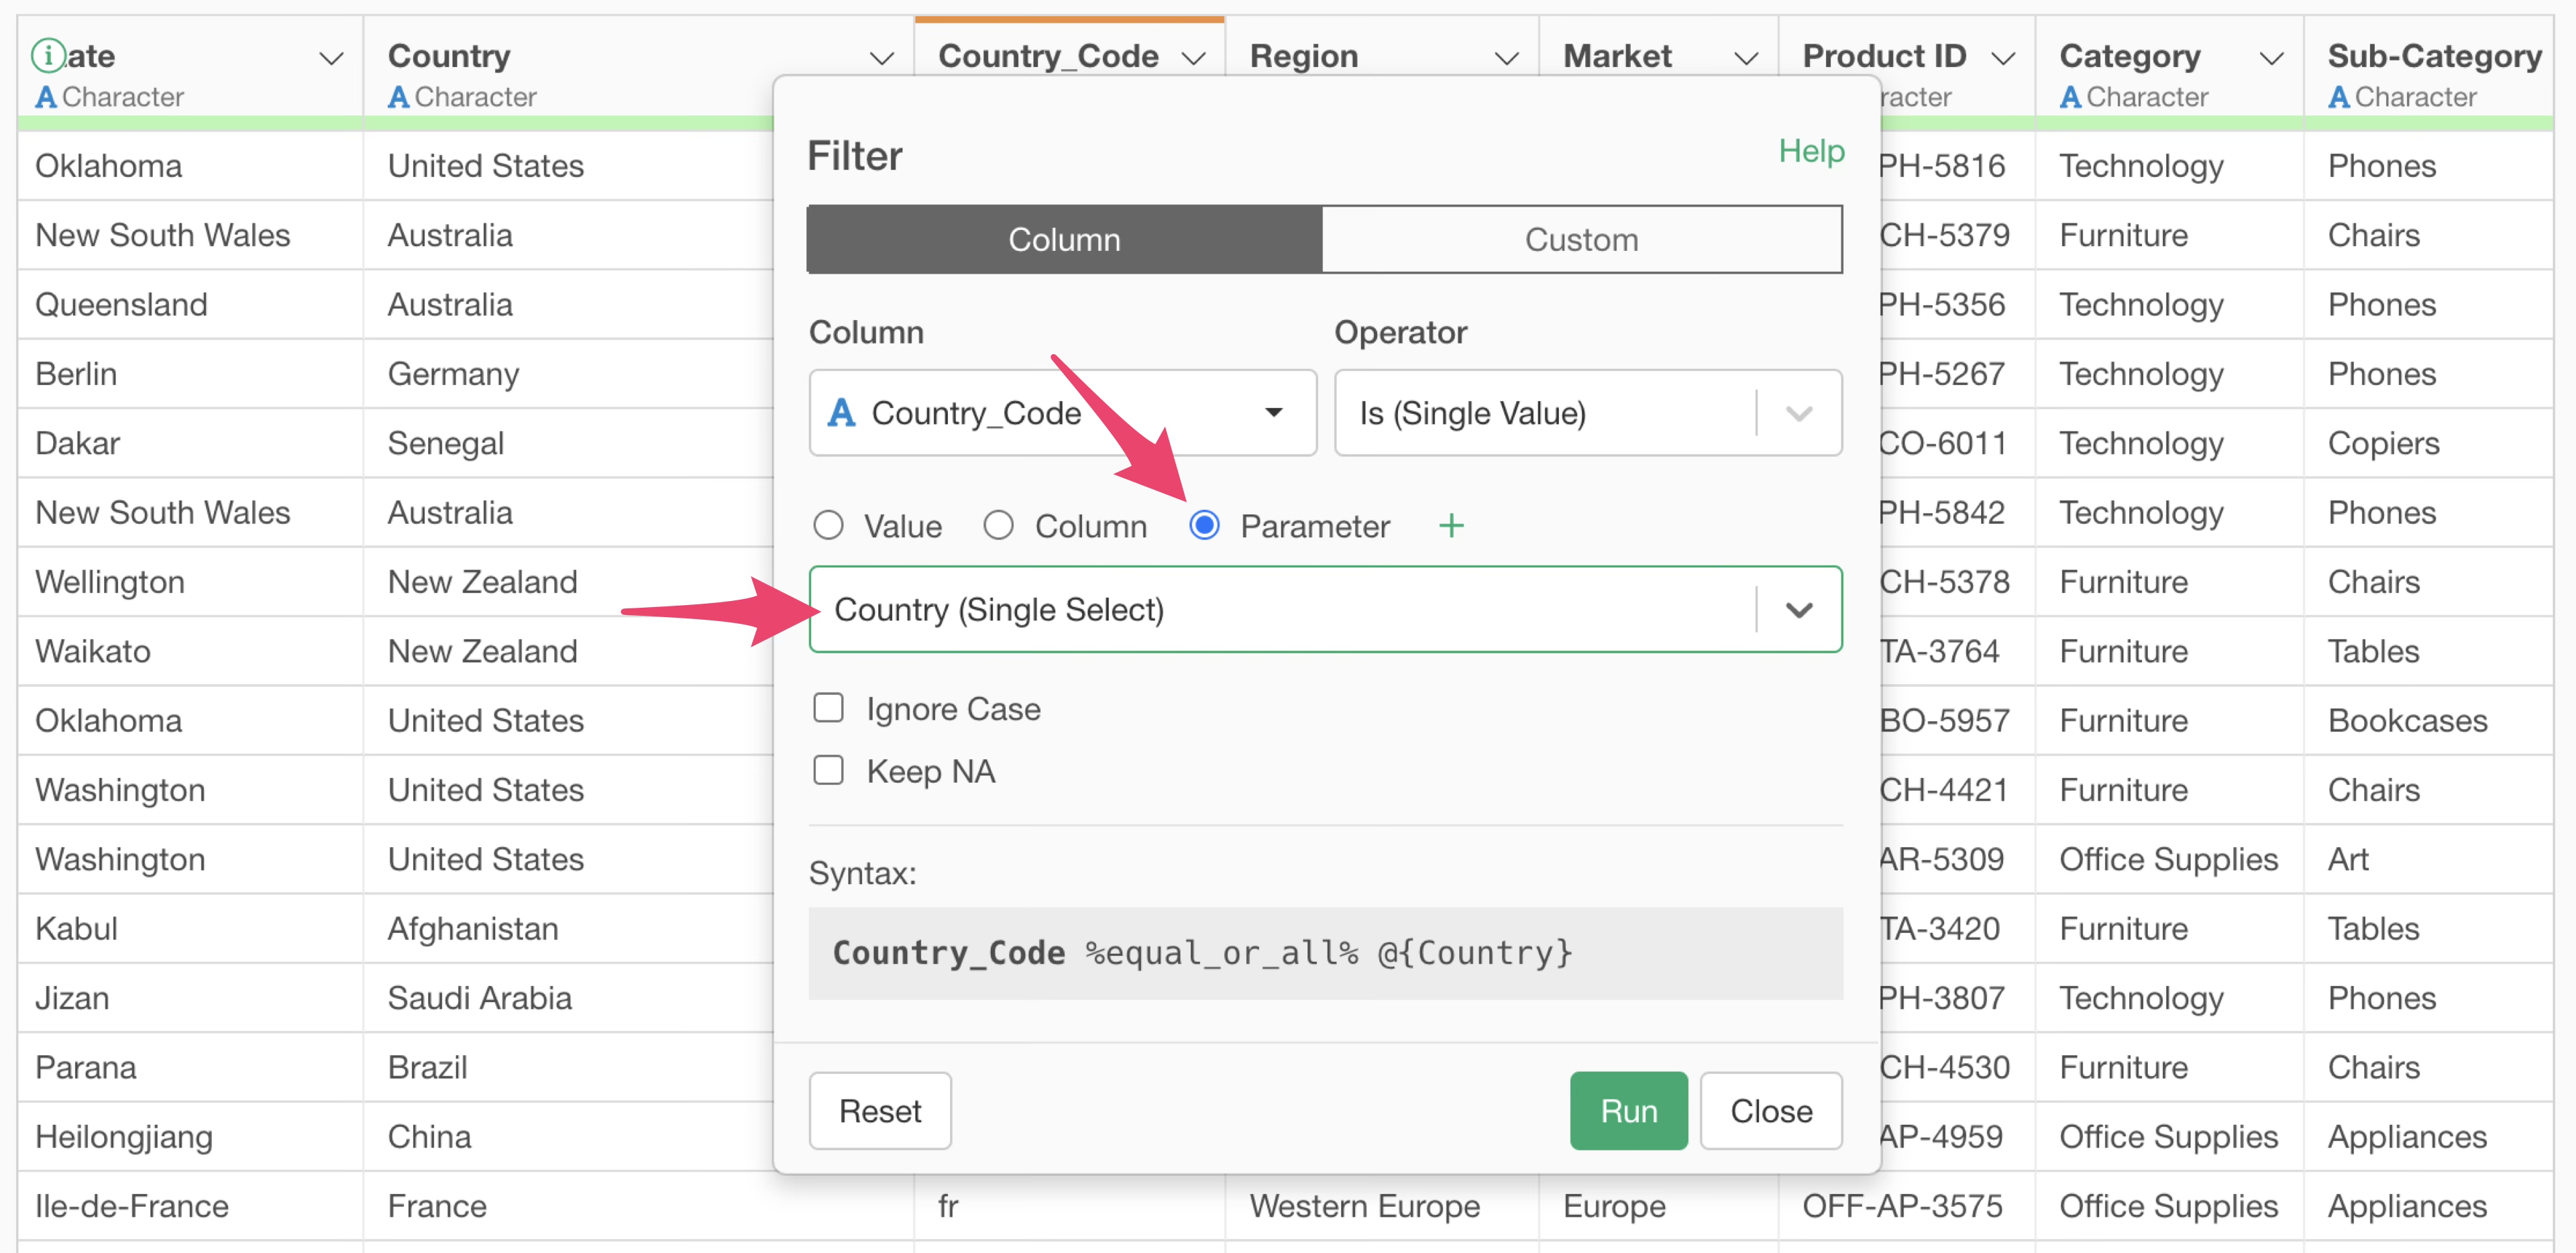
You have now added a step to filter the data based on the country code.
Next, return to the dashboard and set up the parameter in the text panel.
As mentioned, since these flag URLs have a two-letter country code in a specific location, enter the following code within an inline R code block:
r paste0(‘<img style=“width:100px” src=“https://flagcdn.com/w320/‘, @Country,’.png”>’)
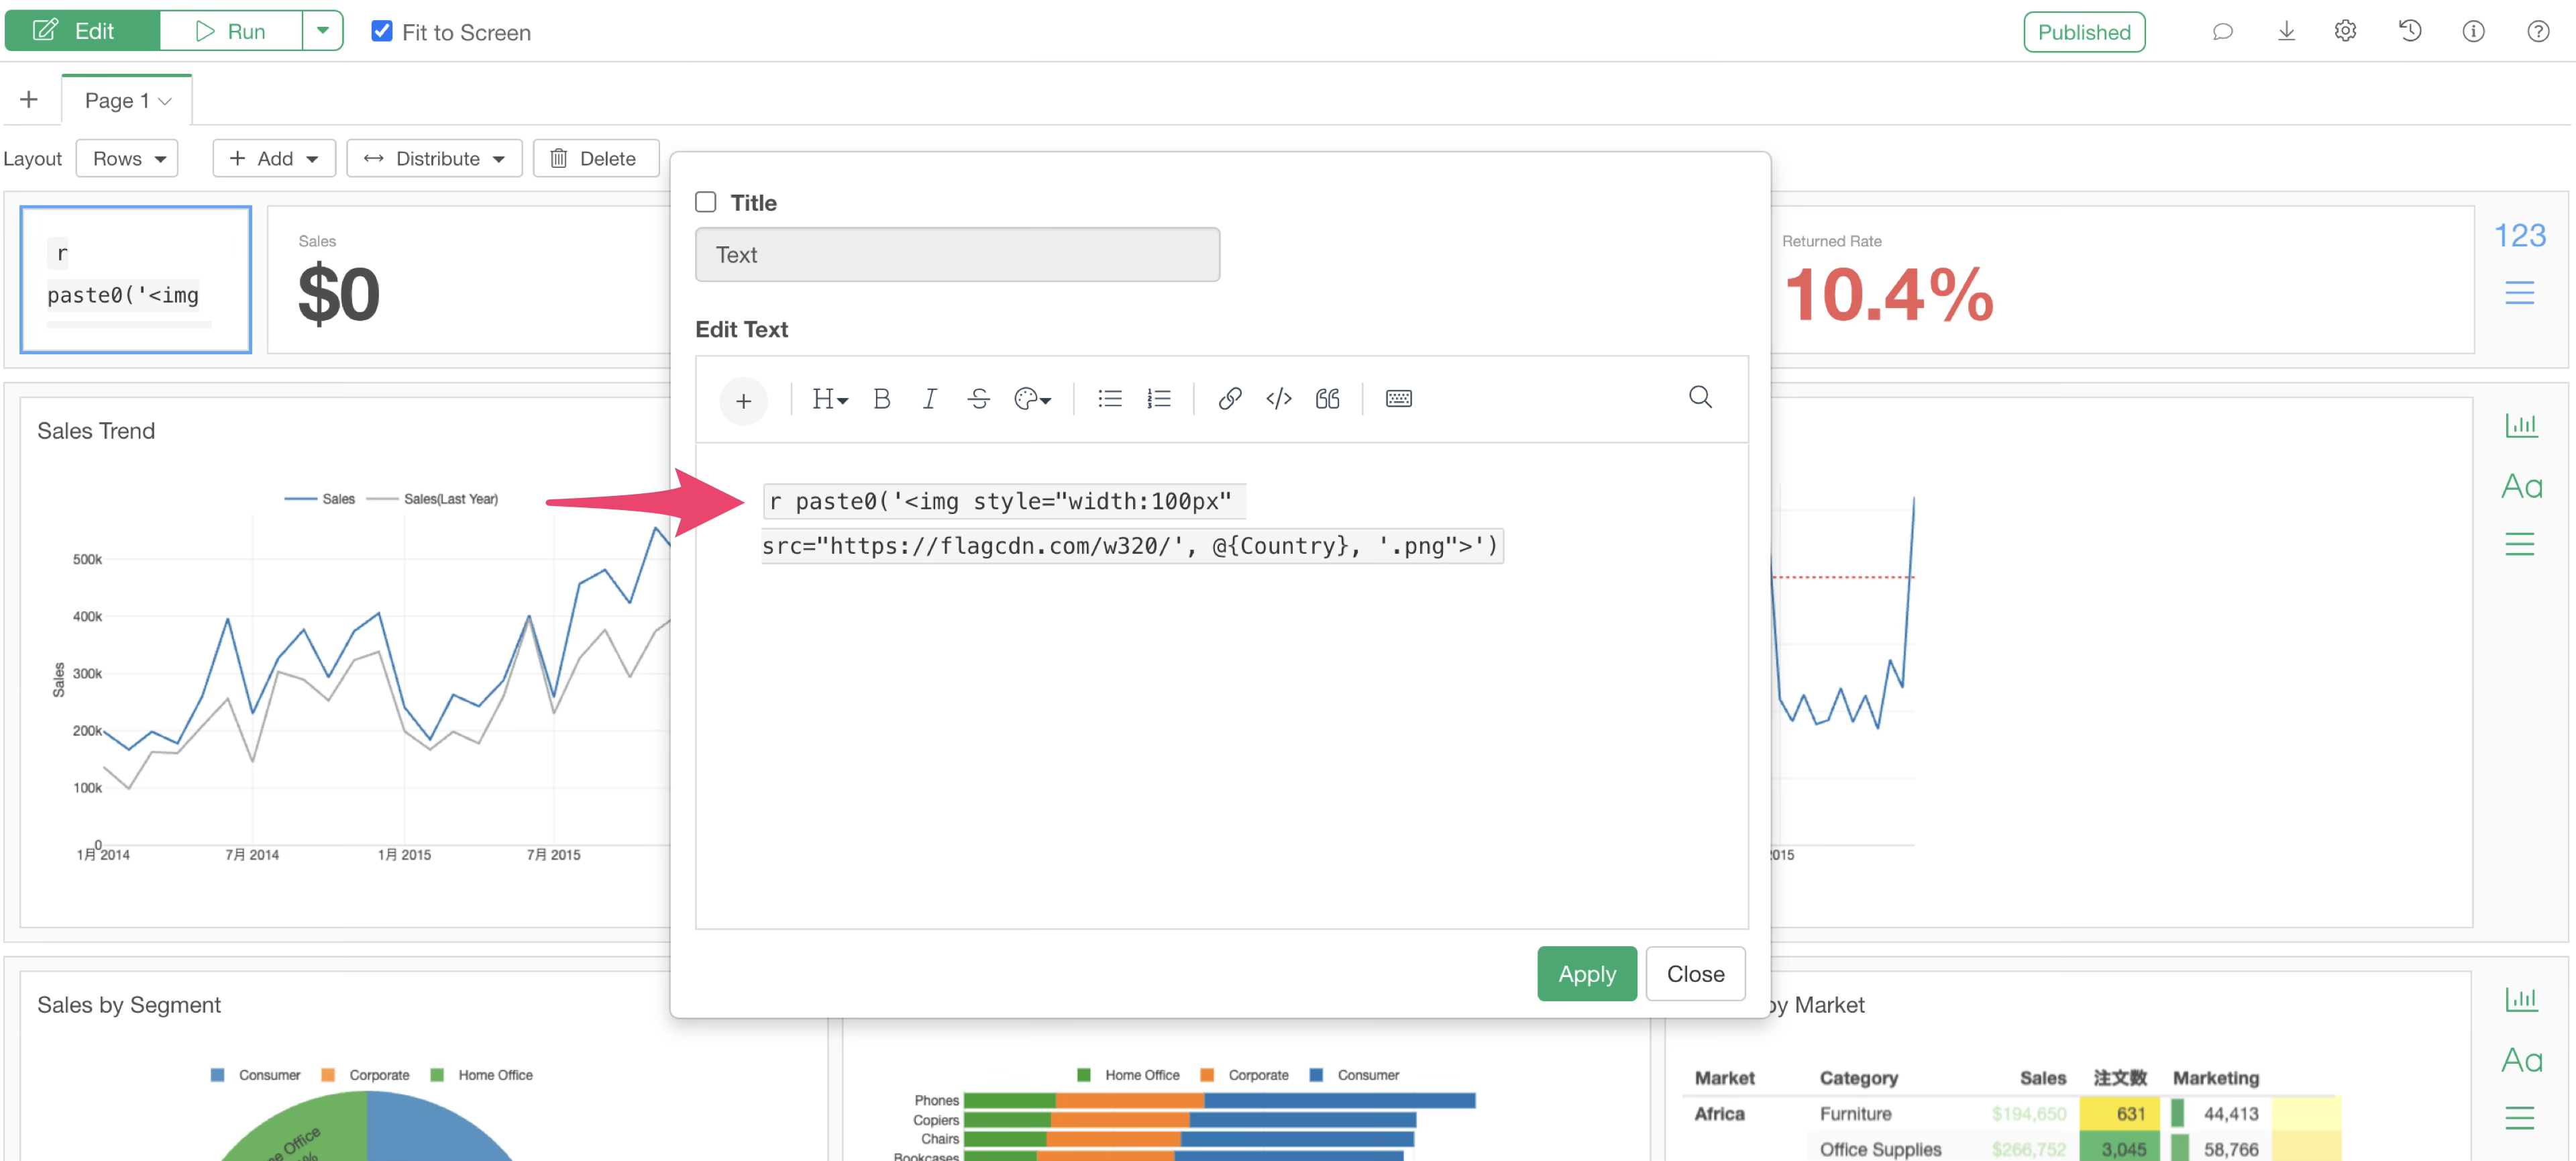
In the code above, the value specified by the parameter is substituted into one part of the URL, which has been broken into three pieces.
Finally, run the dashboard and display the parameter pane; the country parameter will be shown.
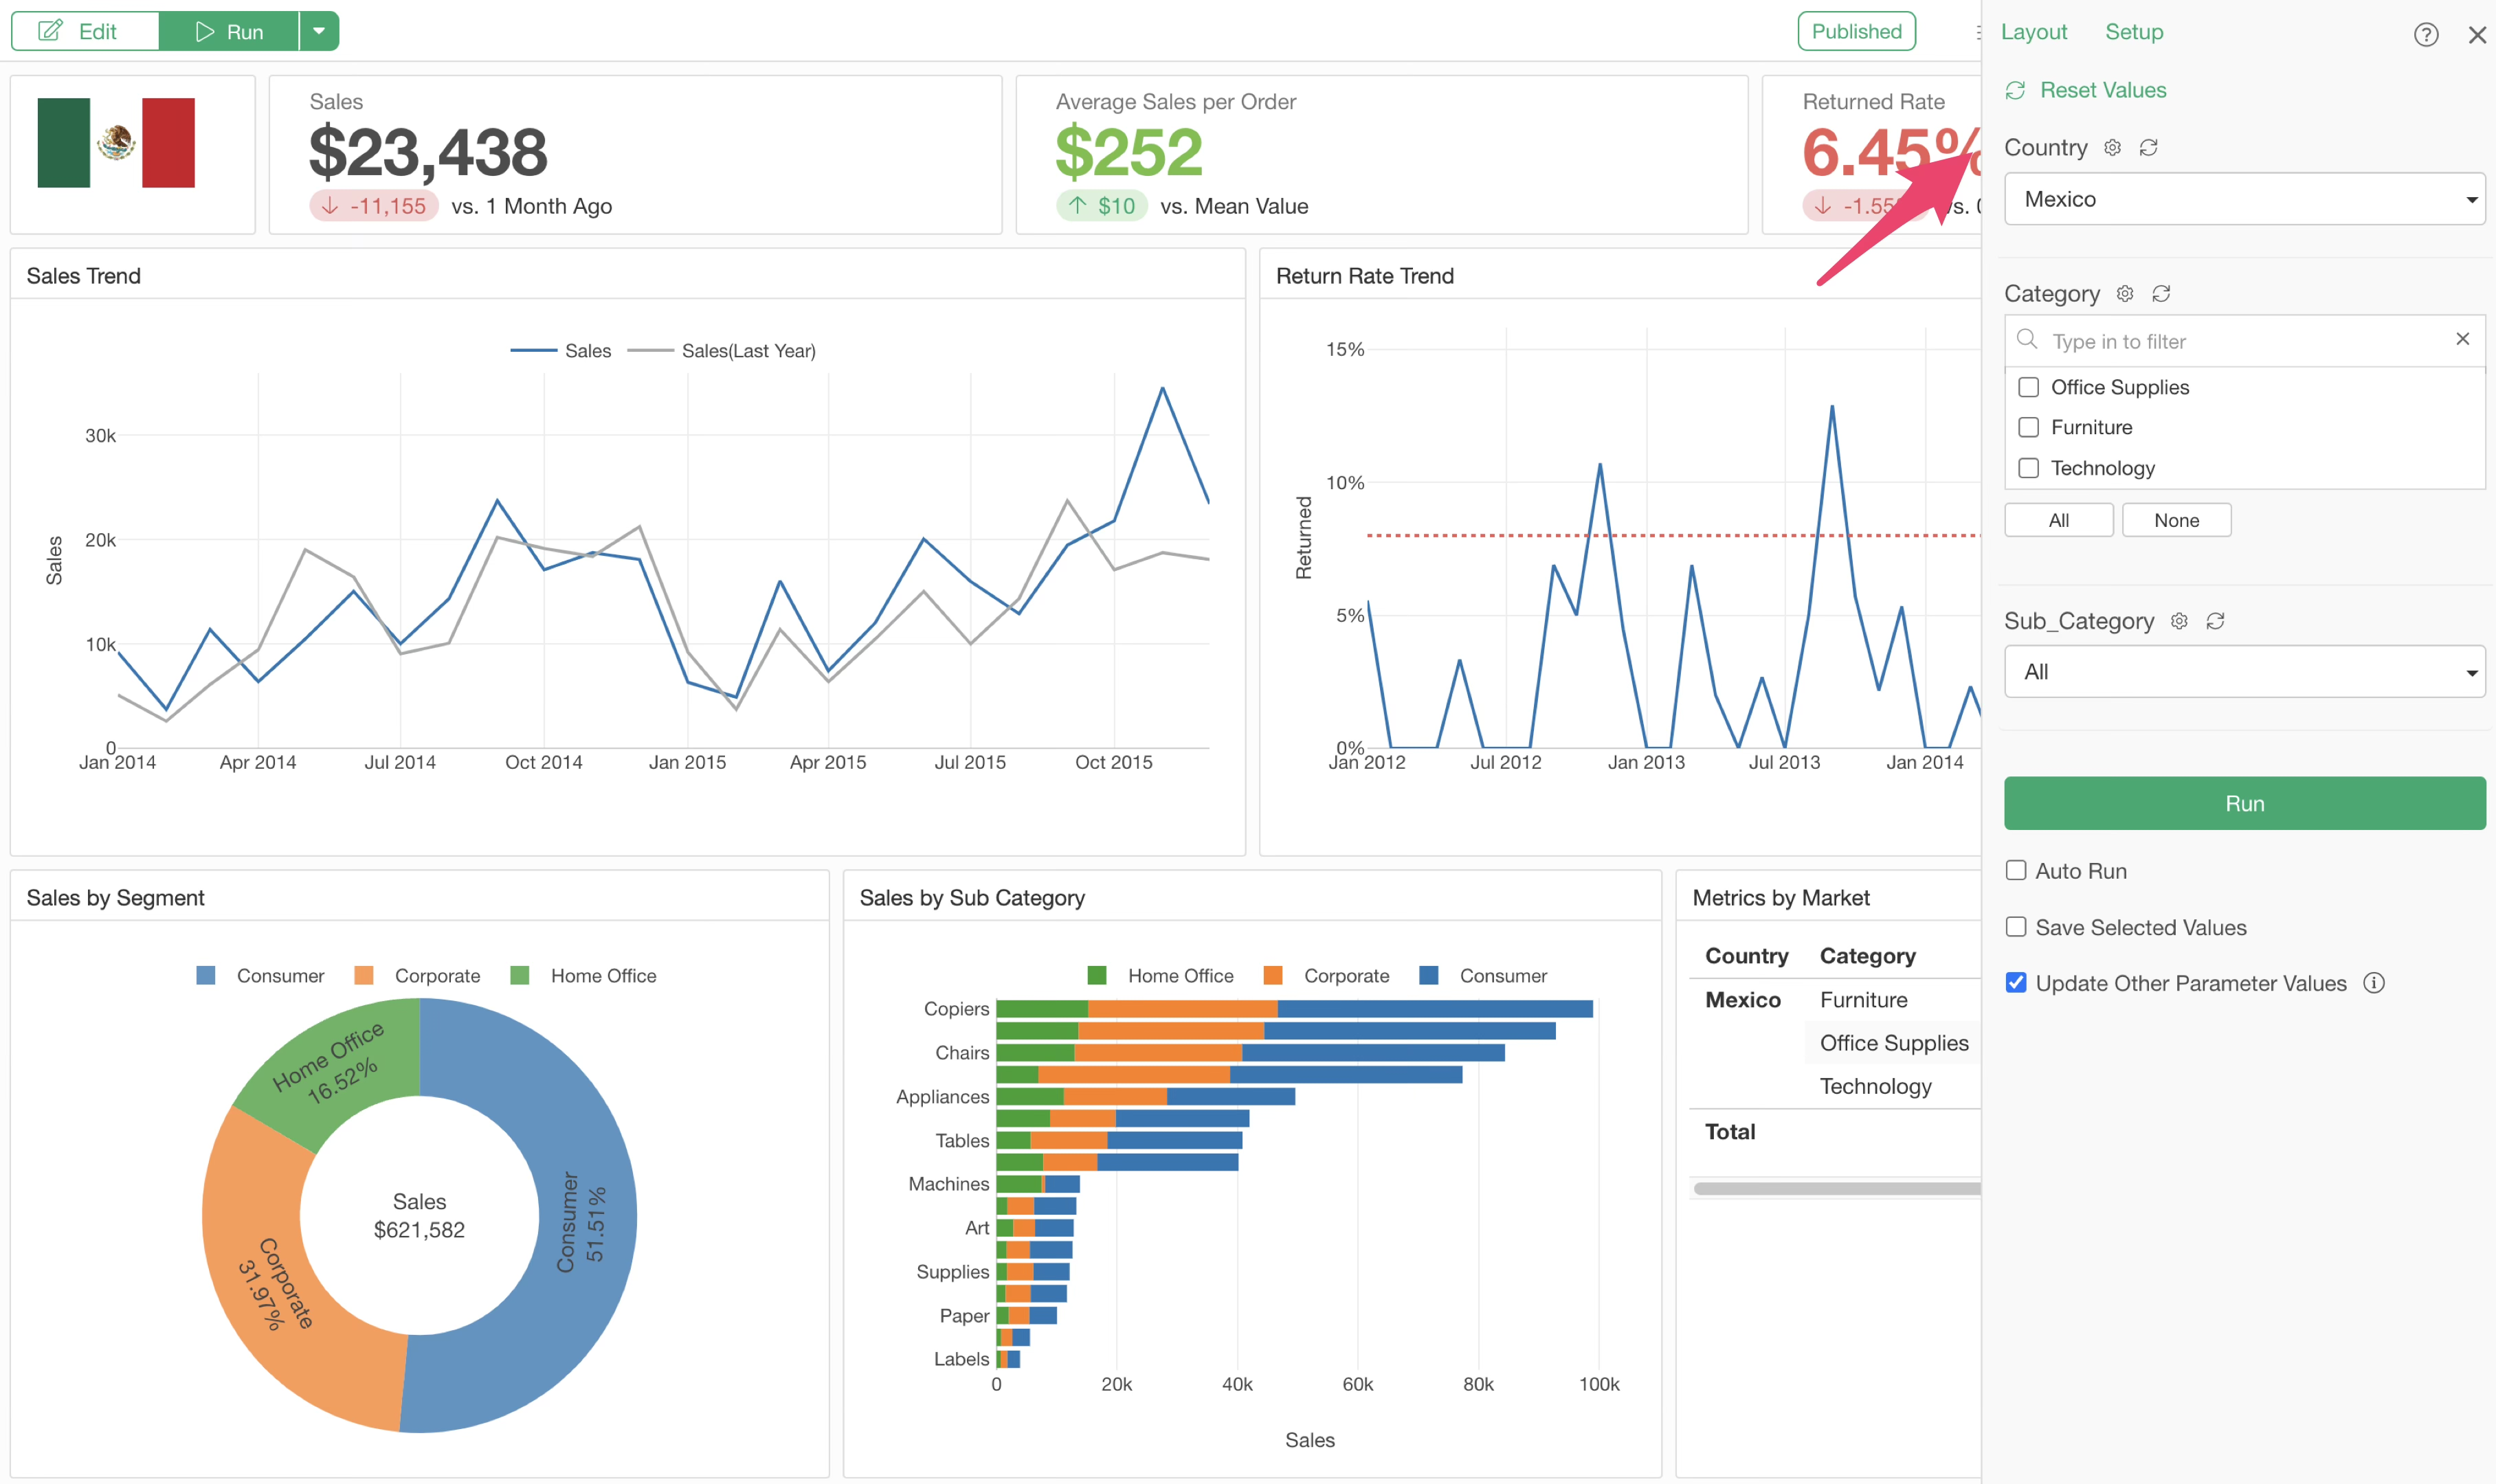
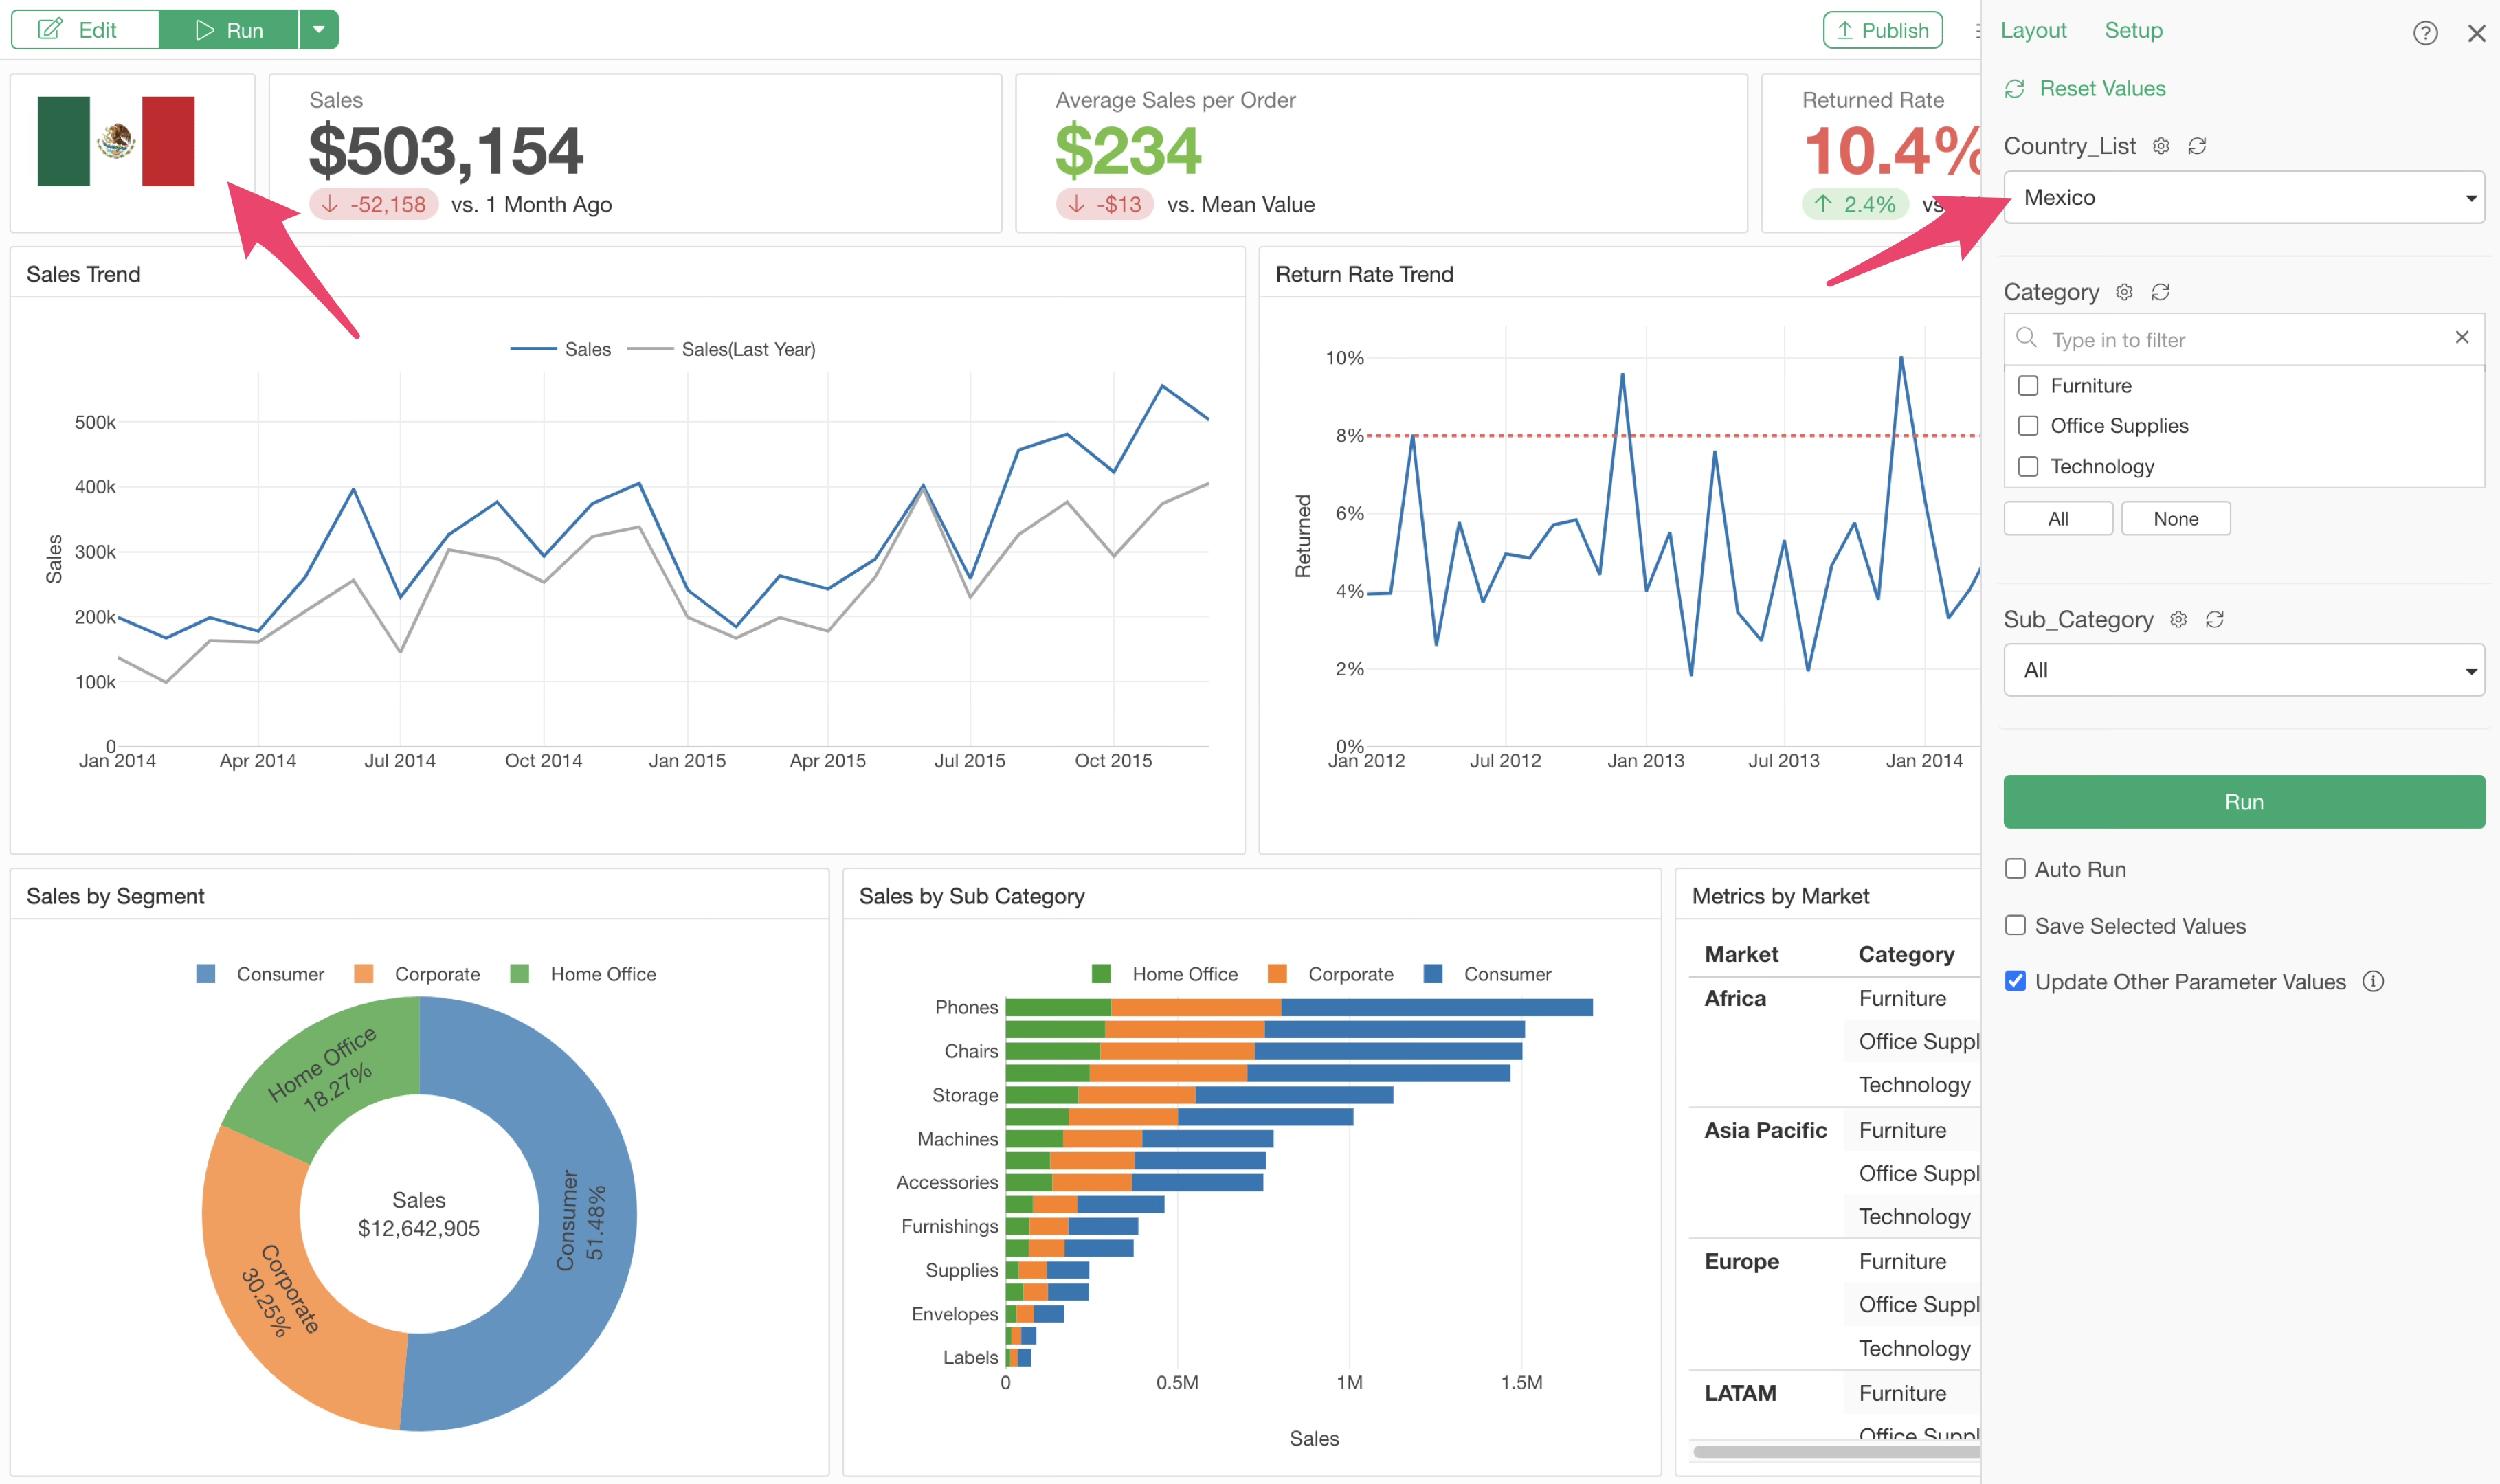
Changing the country parameter dynamically updates the two-letter country code information. As a result, the data is filtered and the URL is determined dynamically.
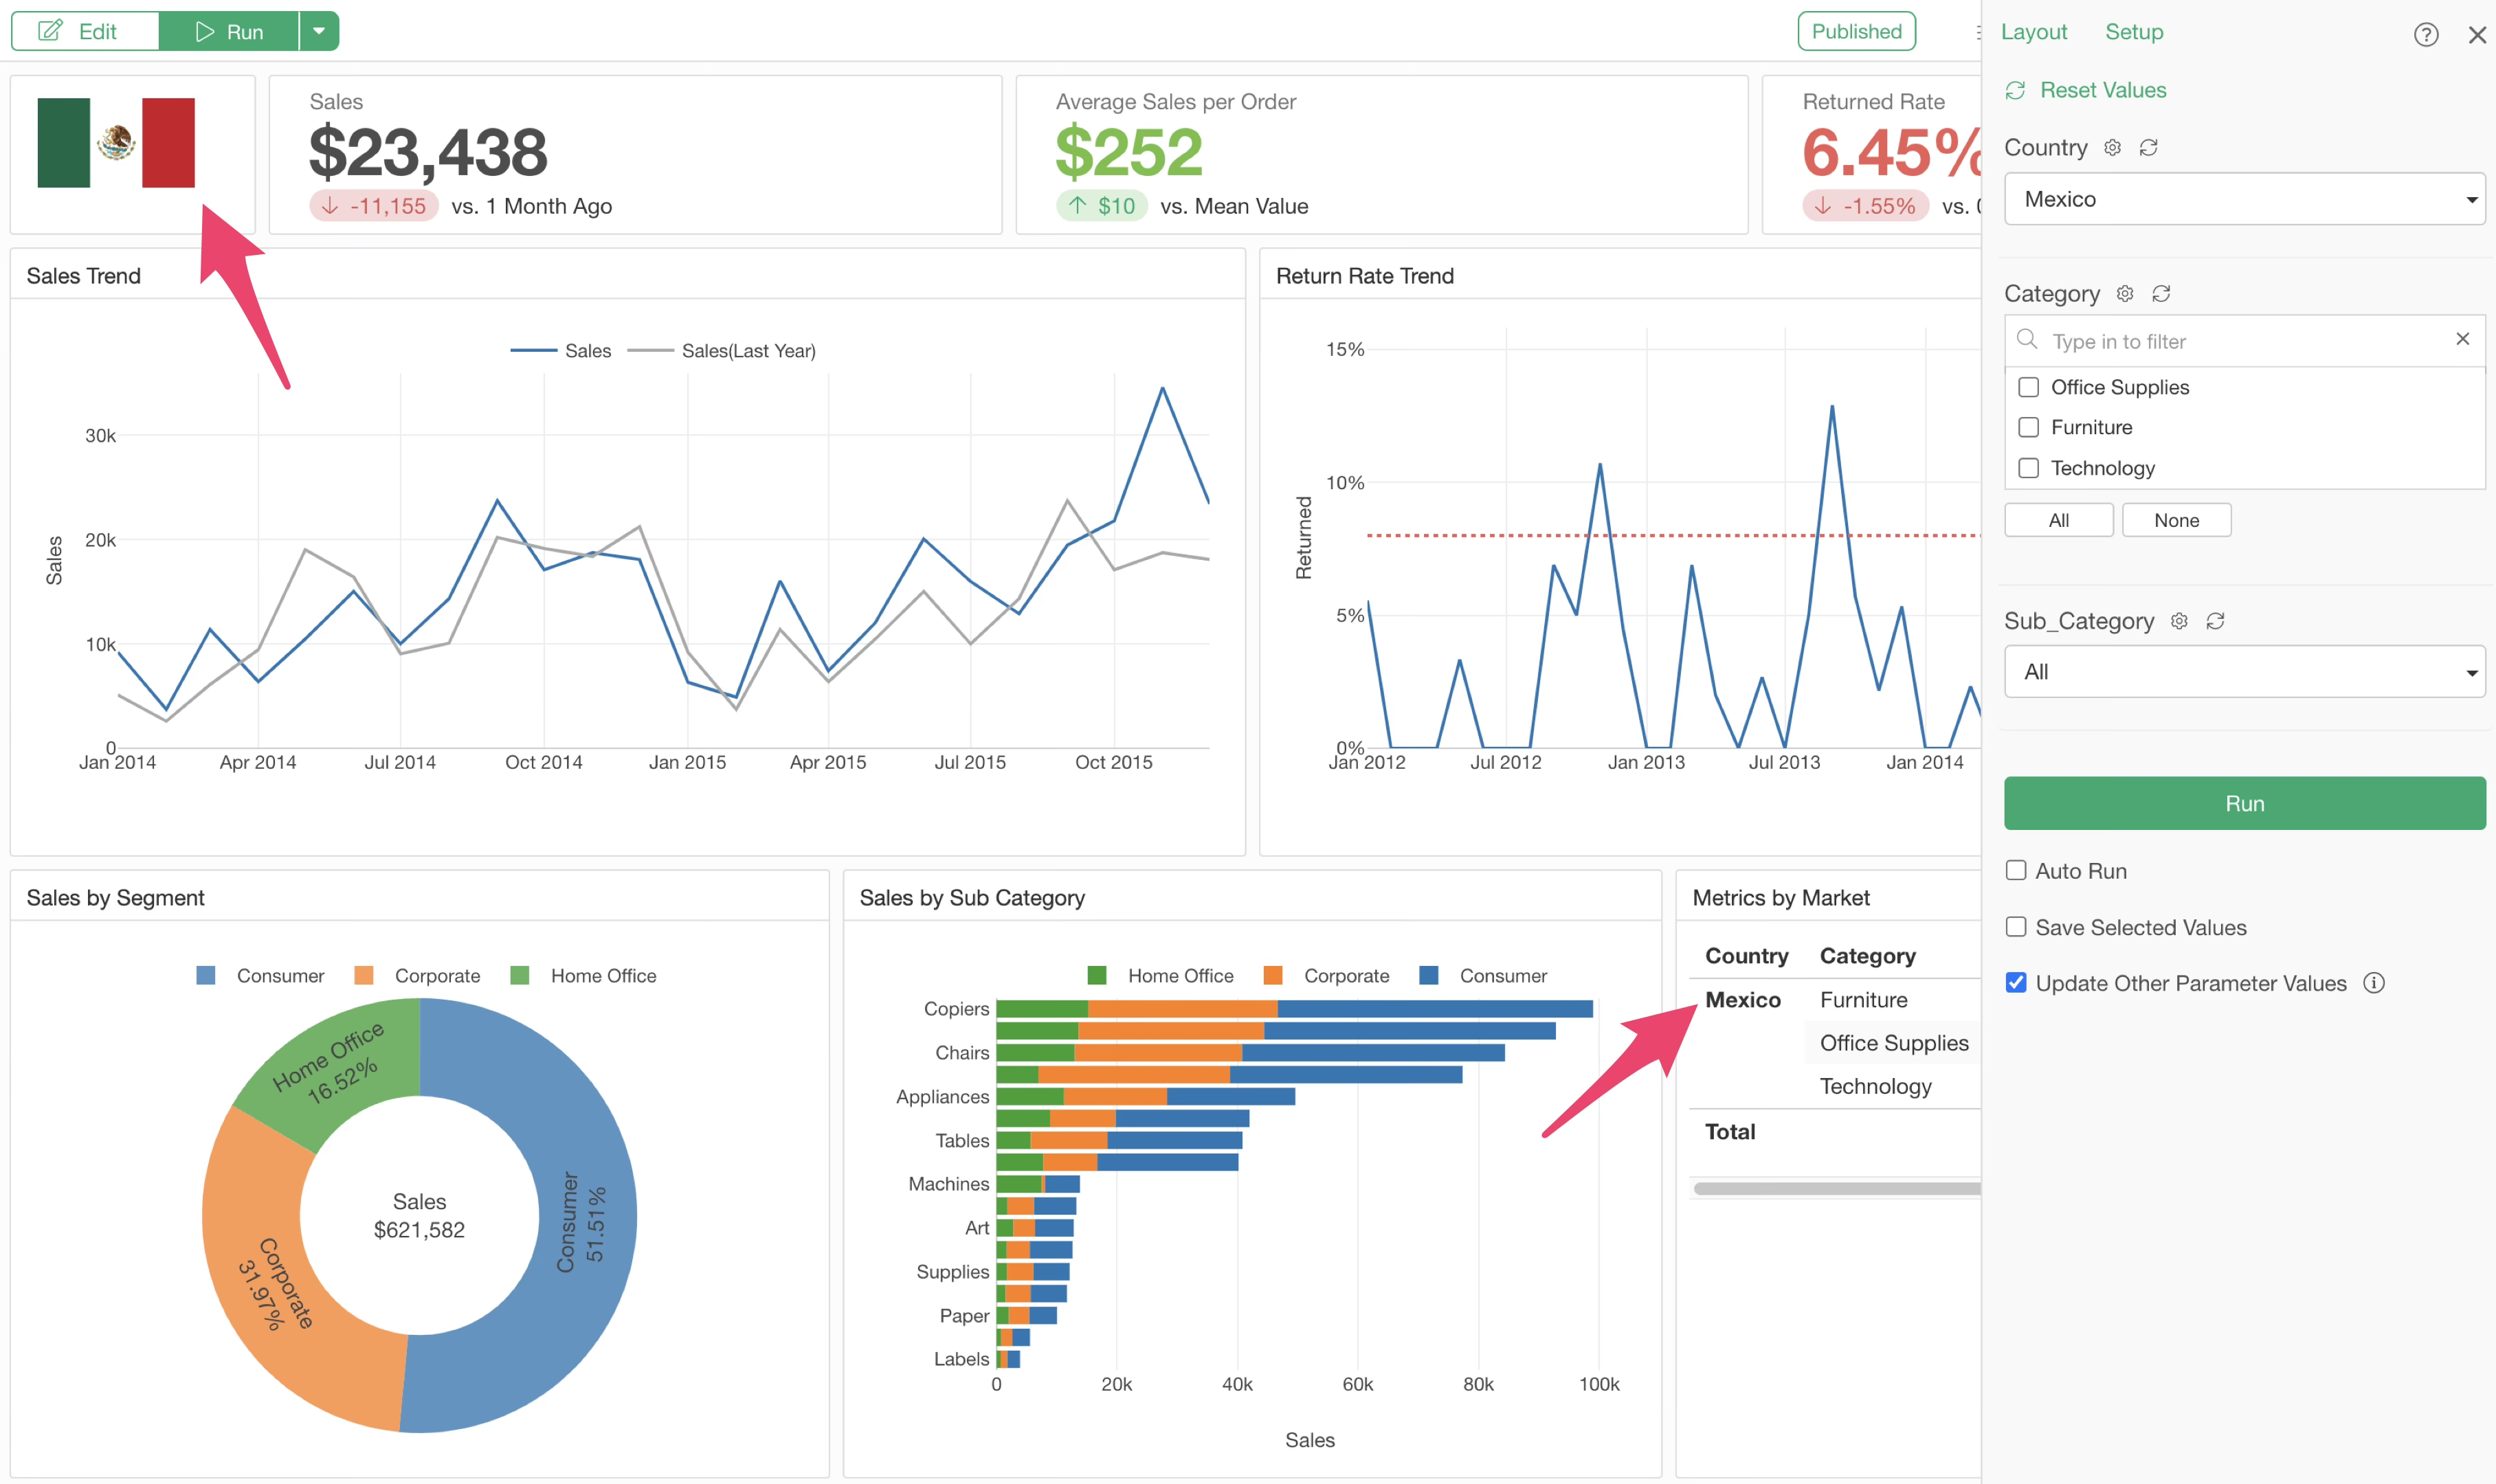
You have now created a dashboard where images and data are updated simultaneously with a single parameter change.