Introduction to Parameter in Exploratory
By using the Parameter in Exploratory, you can make your Dashboard, Note, Chart, and Data more interactive. Once you publish such contents to Exploratory Server your teammates can interact with your contents with the Parameter.
Exploratory’s Parameter feture is very unique. Not only you can create various types of Parameters, but also you can use it in the various places such as SQL queries in the Data Source step, Calculations, and of course, Filter.
By changing the Parameter values, you can update the underlying data pipeline and expect the output to be regenerated with the updated data.
Dashboard

Chart

Data

How to Create & Update Parameters?
You can create and update Parameters in the Parameter Setup dialog.

Open Parameter Setup Dialog
You can access this dialog from the following places.
- Project Menu
- Filter
- SQL
- Parameter Pane
Project Menu

Filter Dialog

SQL Editor

Parameter Pane
Click the Parameter button to open the Parameter Pane.

And click ‘Create Parameter’ button.

Select Data Type
Creating the Parameter is pretty straightforward, but there are different configuration options depending on the data type of the parameter you are going to create. Hence, the most important part of creating the Parameter is to select the right data type.

If you are creating a parameter that is going to be used with a Character data type column then you want to select ‘Character’ data type.
For example, let’s say you are creating a a parameter to be used along with the ‘Market’ column, and the ‘Market’ column is Character data type.

Then, you want to select ‘Character’ data type for the parameter.
Select Input Type
There are a few options for the Input Type.

For the Character data type Parameter, the important point is to select either List of Values (Single Select) or List of Values (Multi Select).
If you’re creating a Parameter for the Filter, then this decision is driven by which the Filter Operator you’re going to use.

In the above example, the Filter Operator is ‘Is In (Multiple Values)’, hence you want to select ‘List of Values (Multi Select)’ as the Input Type.
You can select the Presentation Style of the Parameter.

Here’s how it looks with ‘Dropdown’.

The list shows up only when you click the Parameter itself.
And here’s how it looks with ‘List’.

The list is embedded as part of the Parameter Pane.
List of Values
When you select ‘List of Values’ type of the Input Type you want to set the values by manually entering the possible values with ‘Enter Values Manually’ option.

But, this is a bit cumbersome especially when you have many values. Also, it can become a maintenance nightmare because you need to manually add/delete the values when the underlying data has been changed.
This is when you want to use ‘Get Values from Data Frame’ option. With this option, you can select a data frame, most likely the data frame you are creating the parameter for, and select a column that contains the possible values for the dropdown list.

As you know, a data frame can have multiple data wrangling steps.

Therefore, you want to select a specific step where you want to get the list of the values.

Most often, you want to select the ‘Last Step’ of the data frame, which is the default. But, sometimes the column and the data you need might not exist at the last step because some of the middle steps have deleted or filtered them. In such cases, make sure to select the step that is appropriate for you needs.
Other Types of Parameters
There are other types of Parameters depending on the data type.

Take a look at each note for more details.
- How to Create a Parameters for Numeric Data
- How to Create a Parameters for Date or Date/Time Data
- How to Create a Parameters for Logical Data
What Can You Parameterize & How?
Once you have created parameters, then you can use them to parameterize various things in Exploratory, but the most common ones are:
- Filter
- Calculation
- SQL
Filter
When you create a Filter, instead of using the ‘Value’ option you can check the ‘Parameter’ option and select a parameter you have created to set the value.

This will make the Filter condition dynamically generated based on the selection of the Parameter value in the Parameter Pane.
Calculation
You can use ‘@{ }’ to specify a parameter name.

Just typing @ will list all the available parameters and
you can simply select the one you need.

SQL
You can use ‘@{ }’ to specify a parameter name.

Just typing @ will list all the available parameters and
you can simply select the one you need.

How to Use Parameters?
Once you have setup the Parameters at the right places, then all you need to do is to click on the Parameter button.
Let’s take a look at this Chart that is based on Salesforce app data.

Inside the Filter in the Salesforce data source dialog, there is ‘Close_Date’ parameter is used.

Other than this parameter in the data source step, there is no parameter used in the data wrangling step in order to generate the data.
So, if I click the Parameter button…

It will show only one Parameter - Closed Date - in the Parameter Pane.
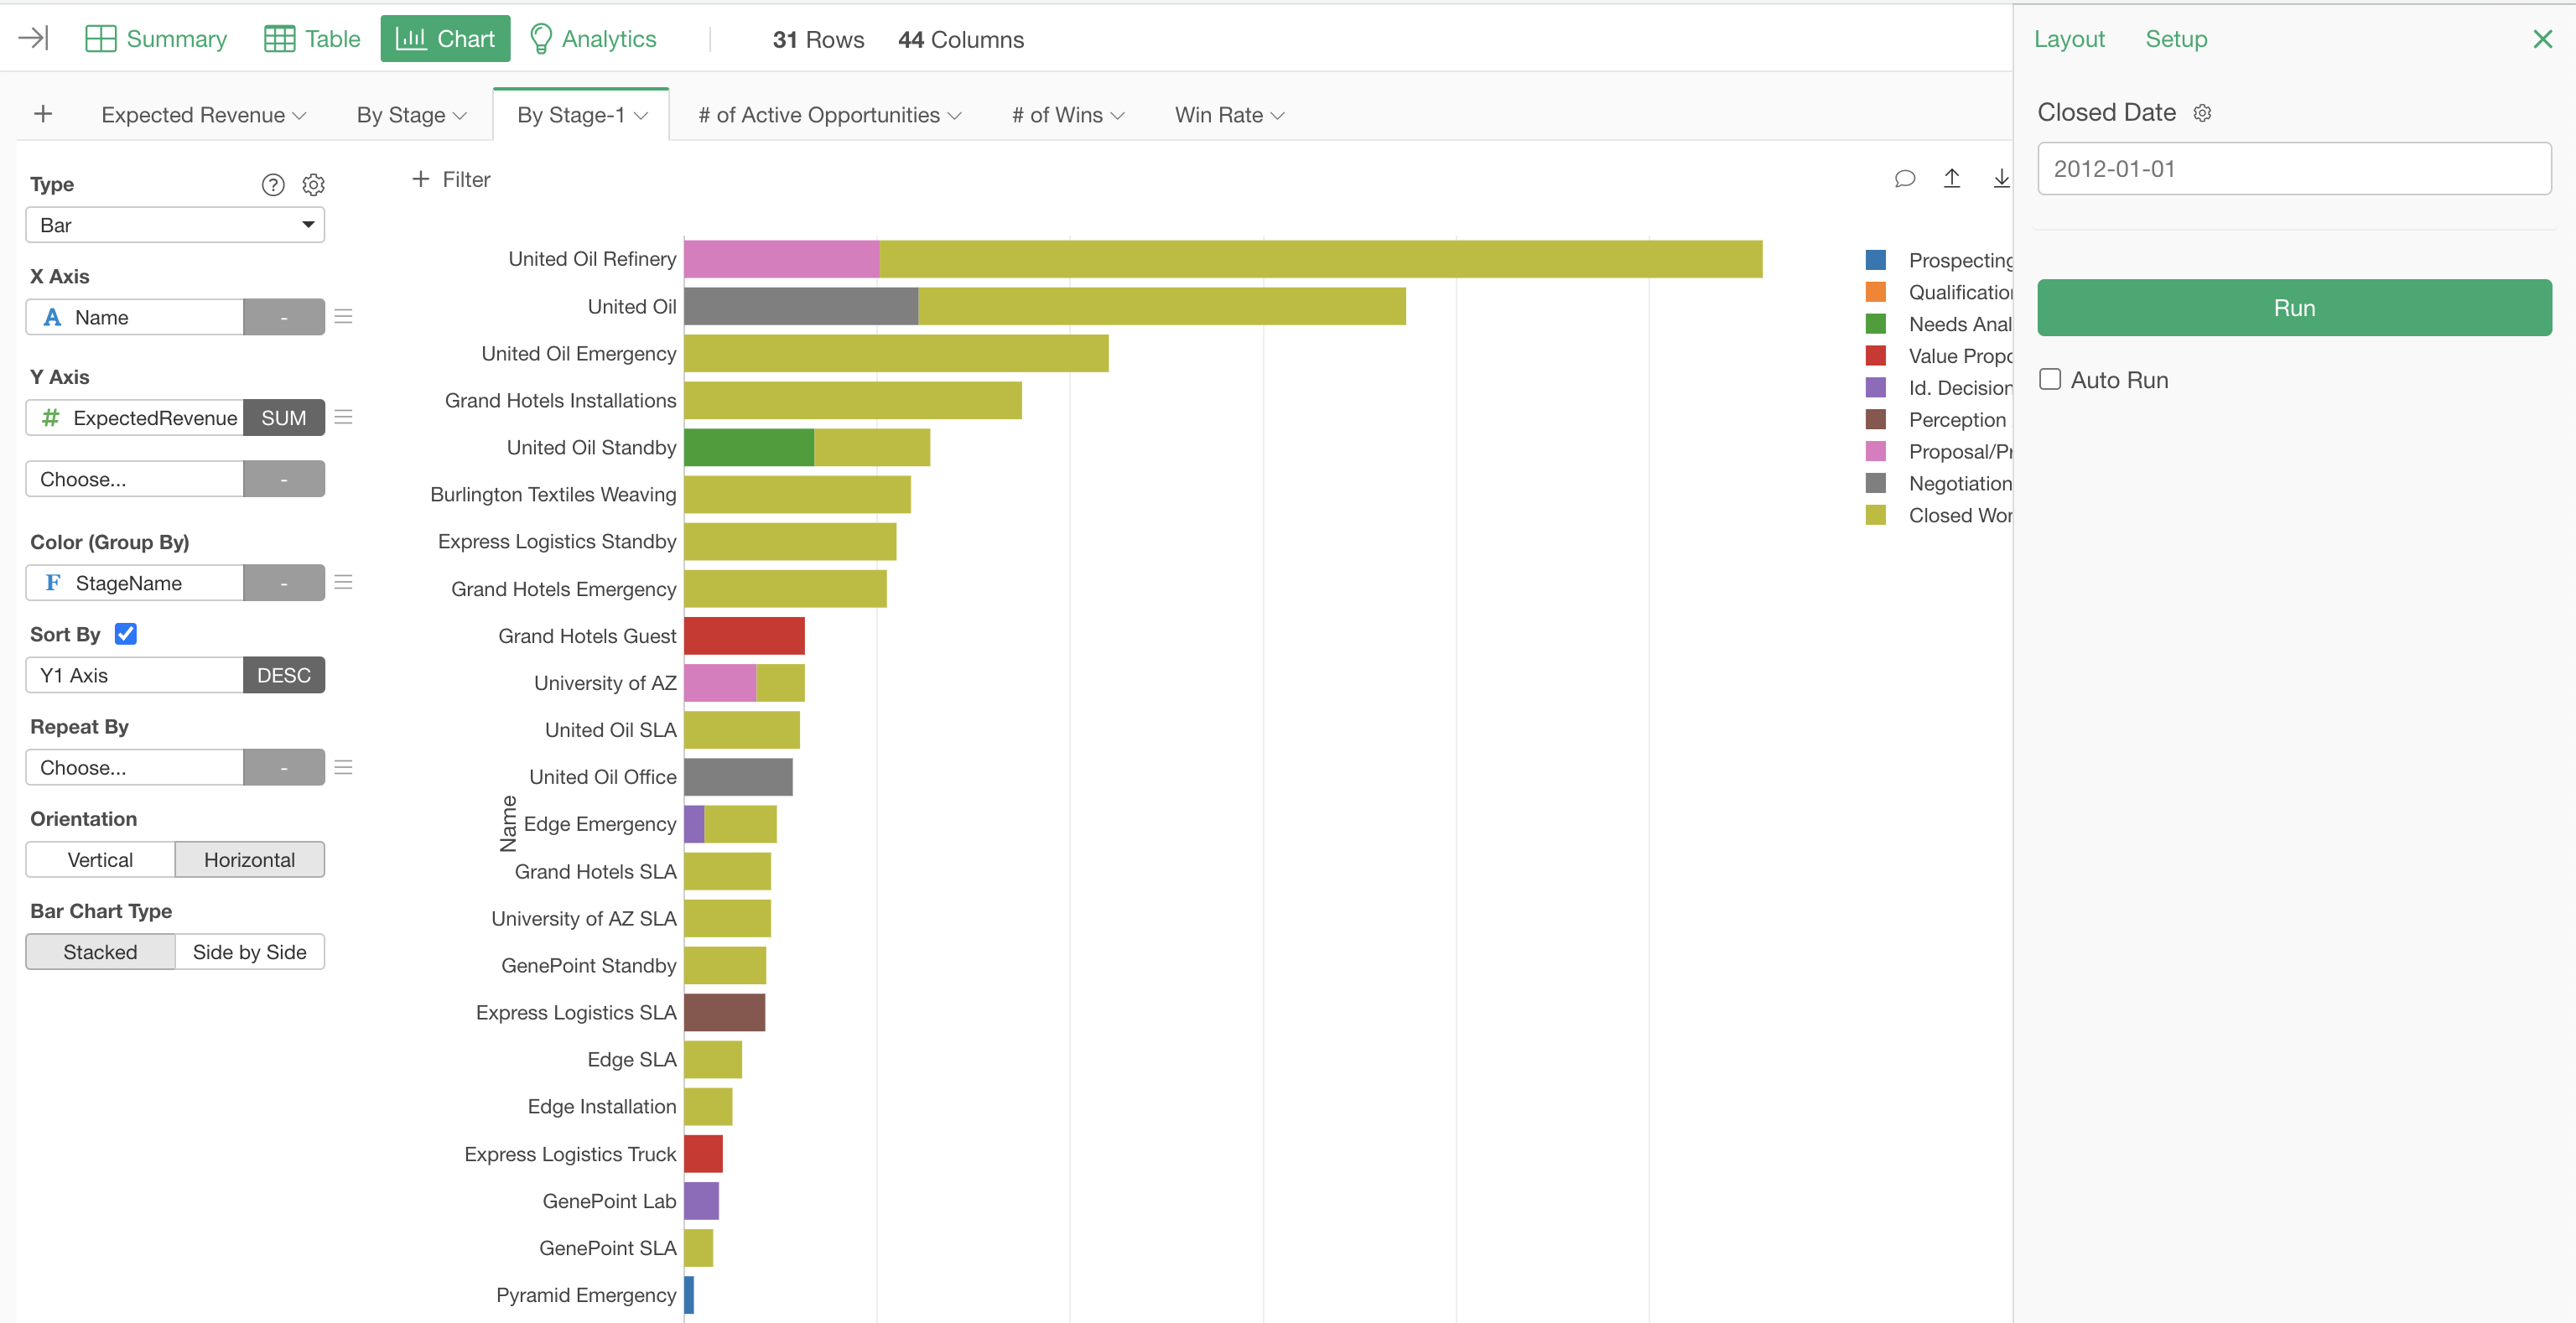
But now, let’s take a look at another chart in the same data frame.

This chart is getting the data from the 5th step - Filter - at the right hand side of the data wrangling pipeline.

And this Filter step has 4 tokens (boxes) and all of them use the Parameters. This means that when we open the Parameter Pane by clicking on the Parameter button it will show all the Parameters that are used in the data wrangling steps including the one that is used in the Data Source step.

So, you don’t need to add the Parameters to particular charts. Exploratory detects what parameters are used in the data wrangling steps to generate the data and show the required parameters in the Parameter Pane automatically.
Dashboard / Note
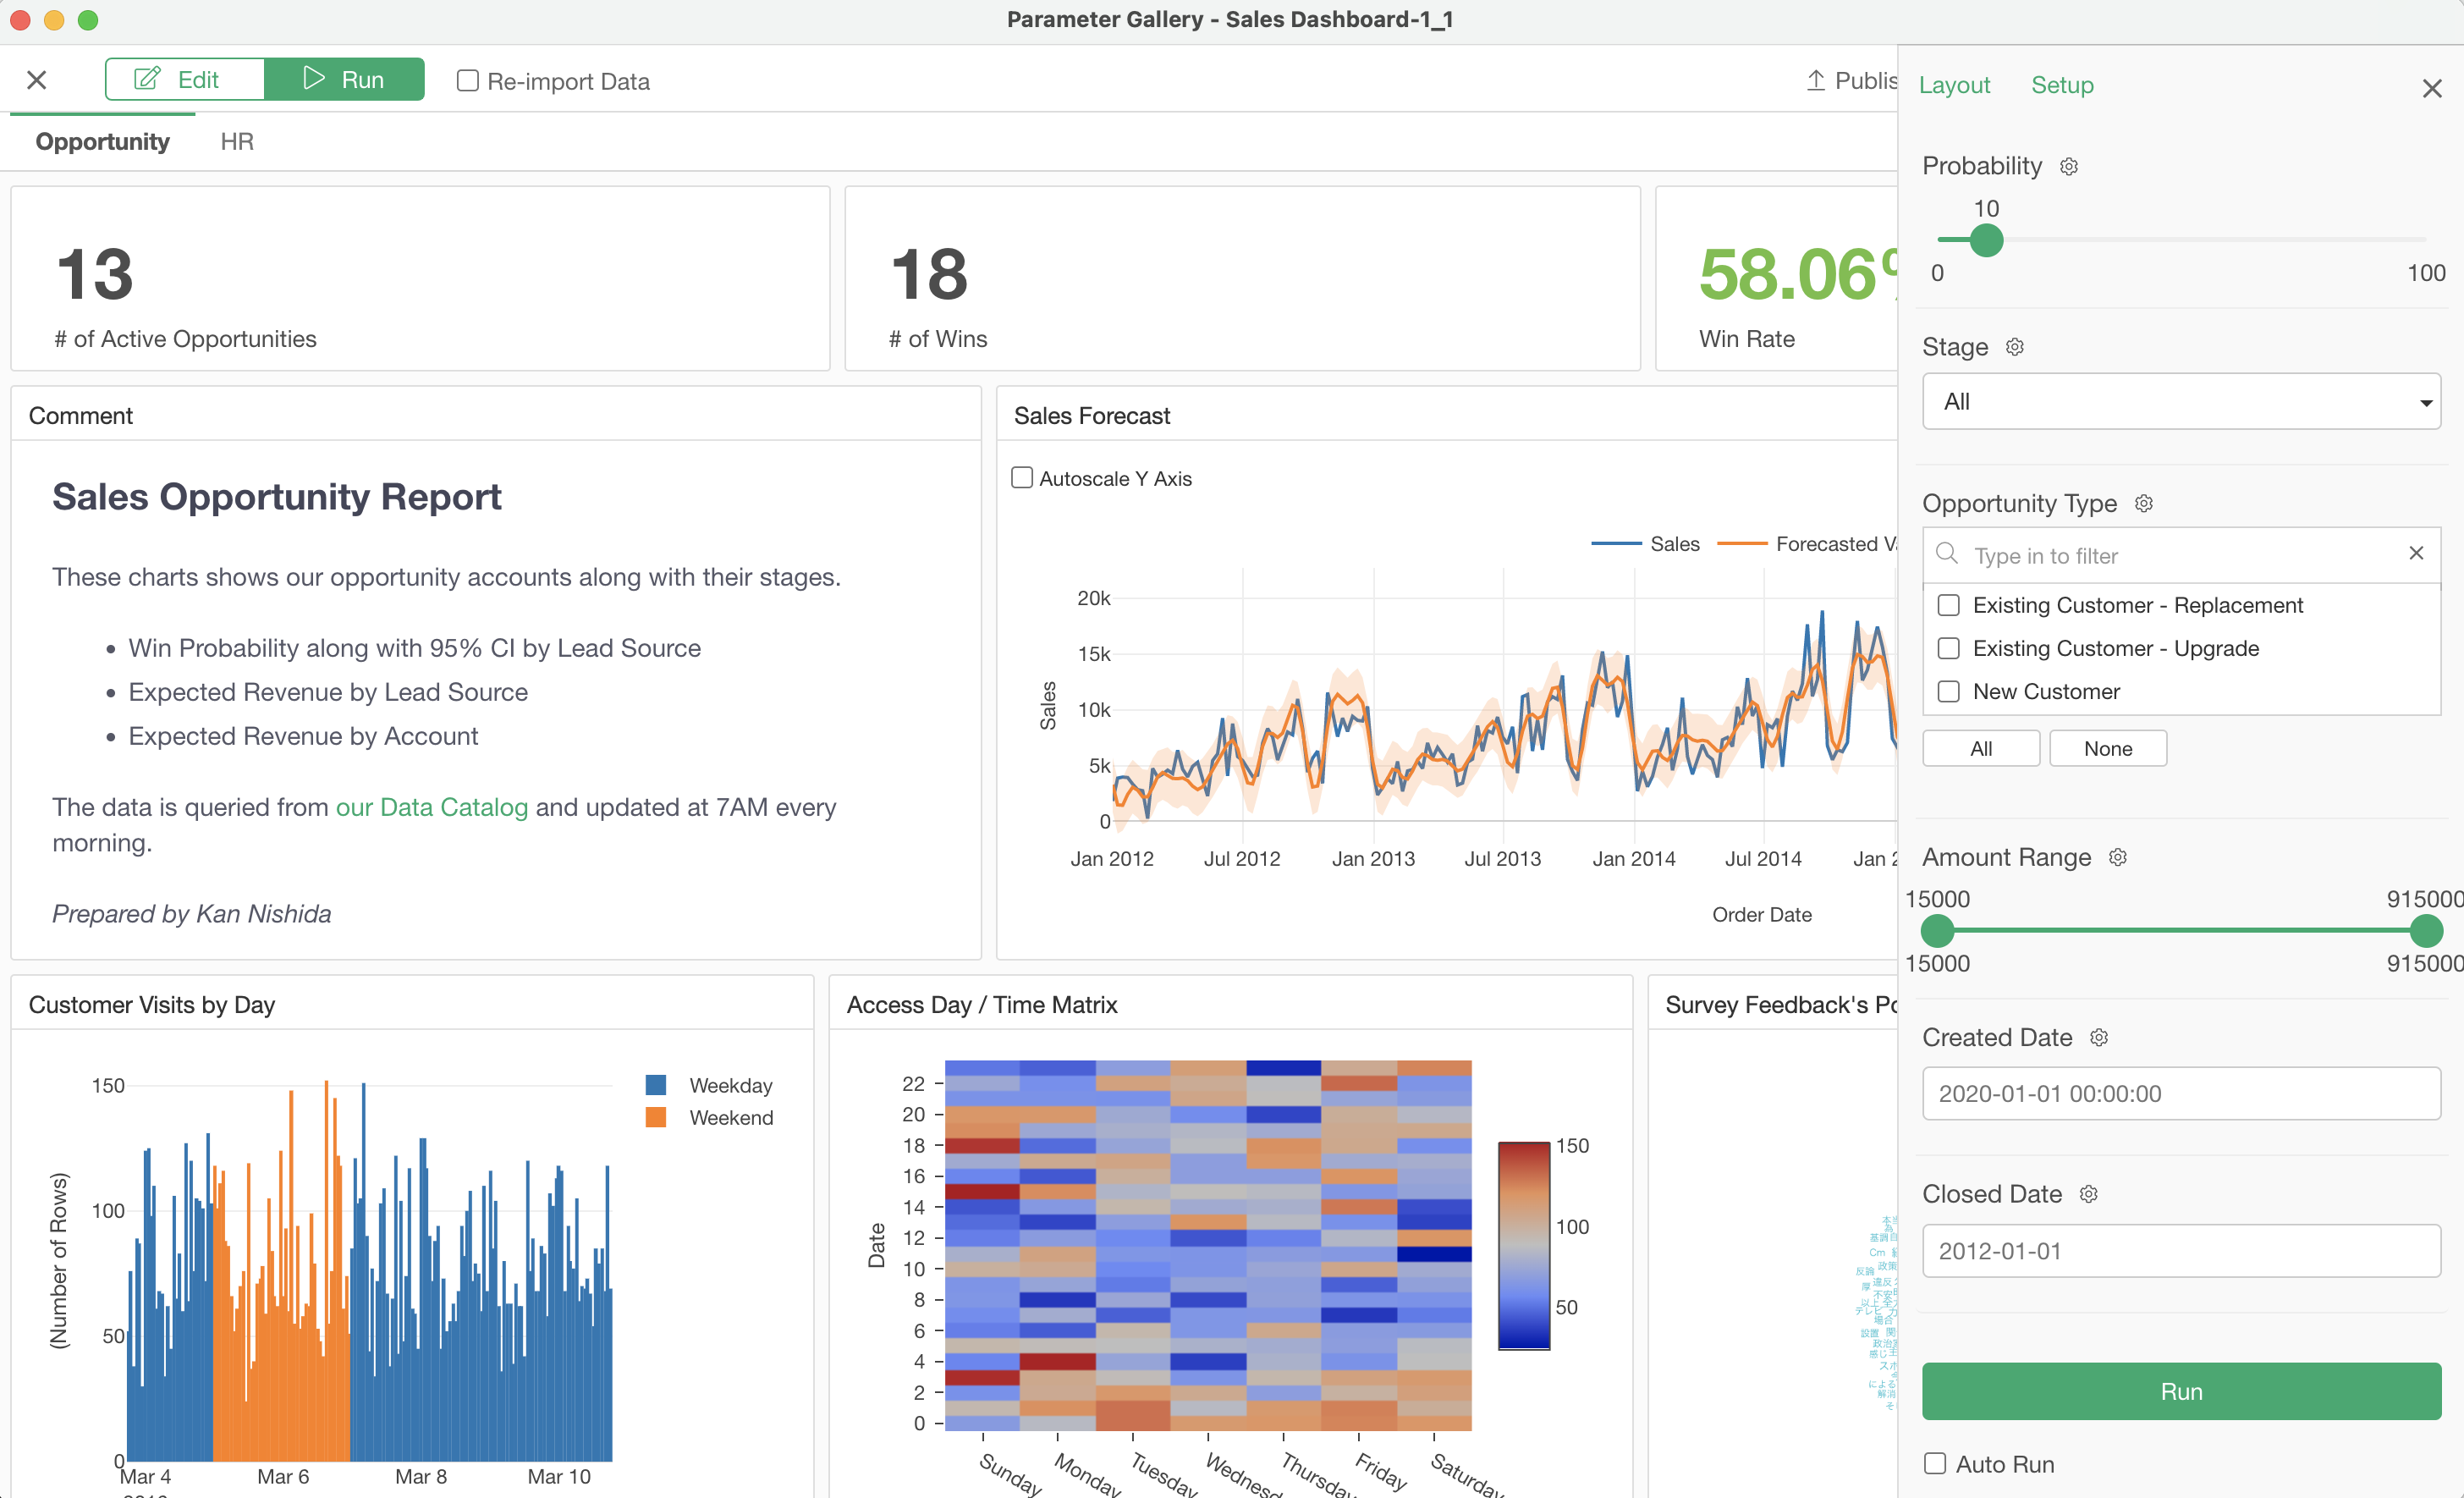
And this is the same for Dashboards and Notes where you can add a set of charts. Exploratory detects what parameters are used in the underlying data generation for the charts that are inside a given Dashboard or Note, and automatically show the related Parameters when you open the Parameter Pane.
How to Setup Parameter Pane?
Though which Parameters to be shown in the Parameter Pane is automatically determined by Exploratory, you can configure how you want them to be ordered by clicking on the Layout button in the Pane.
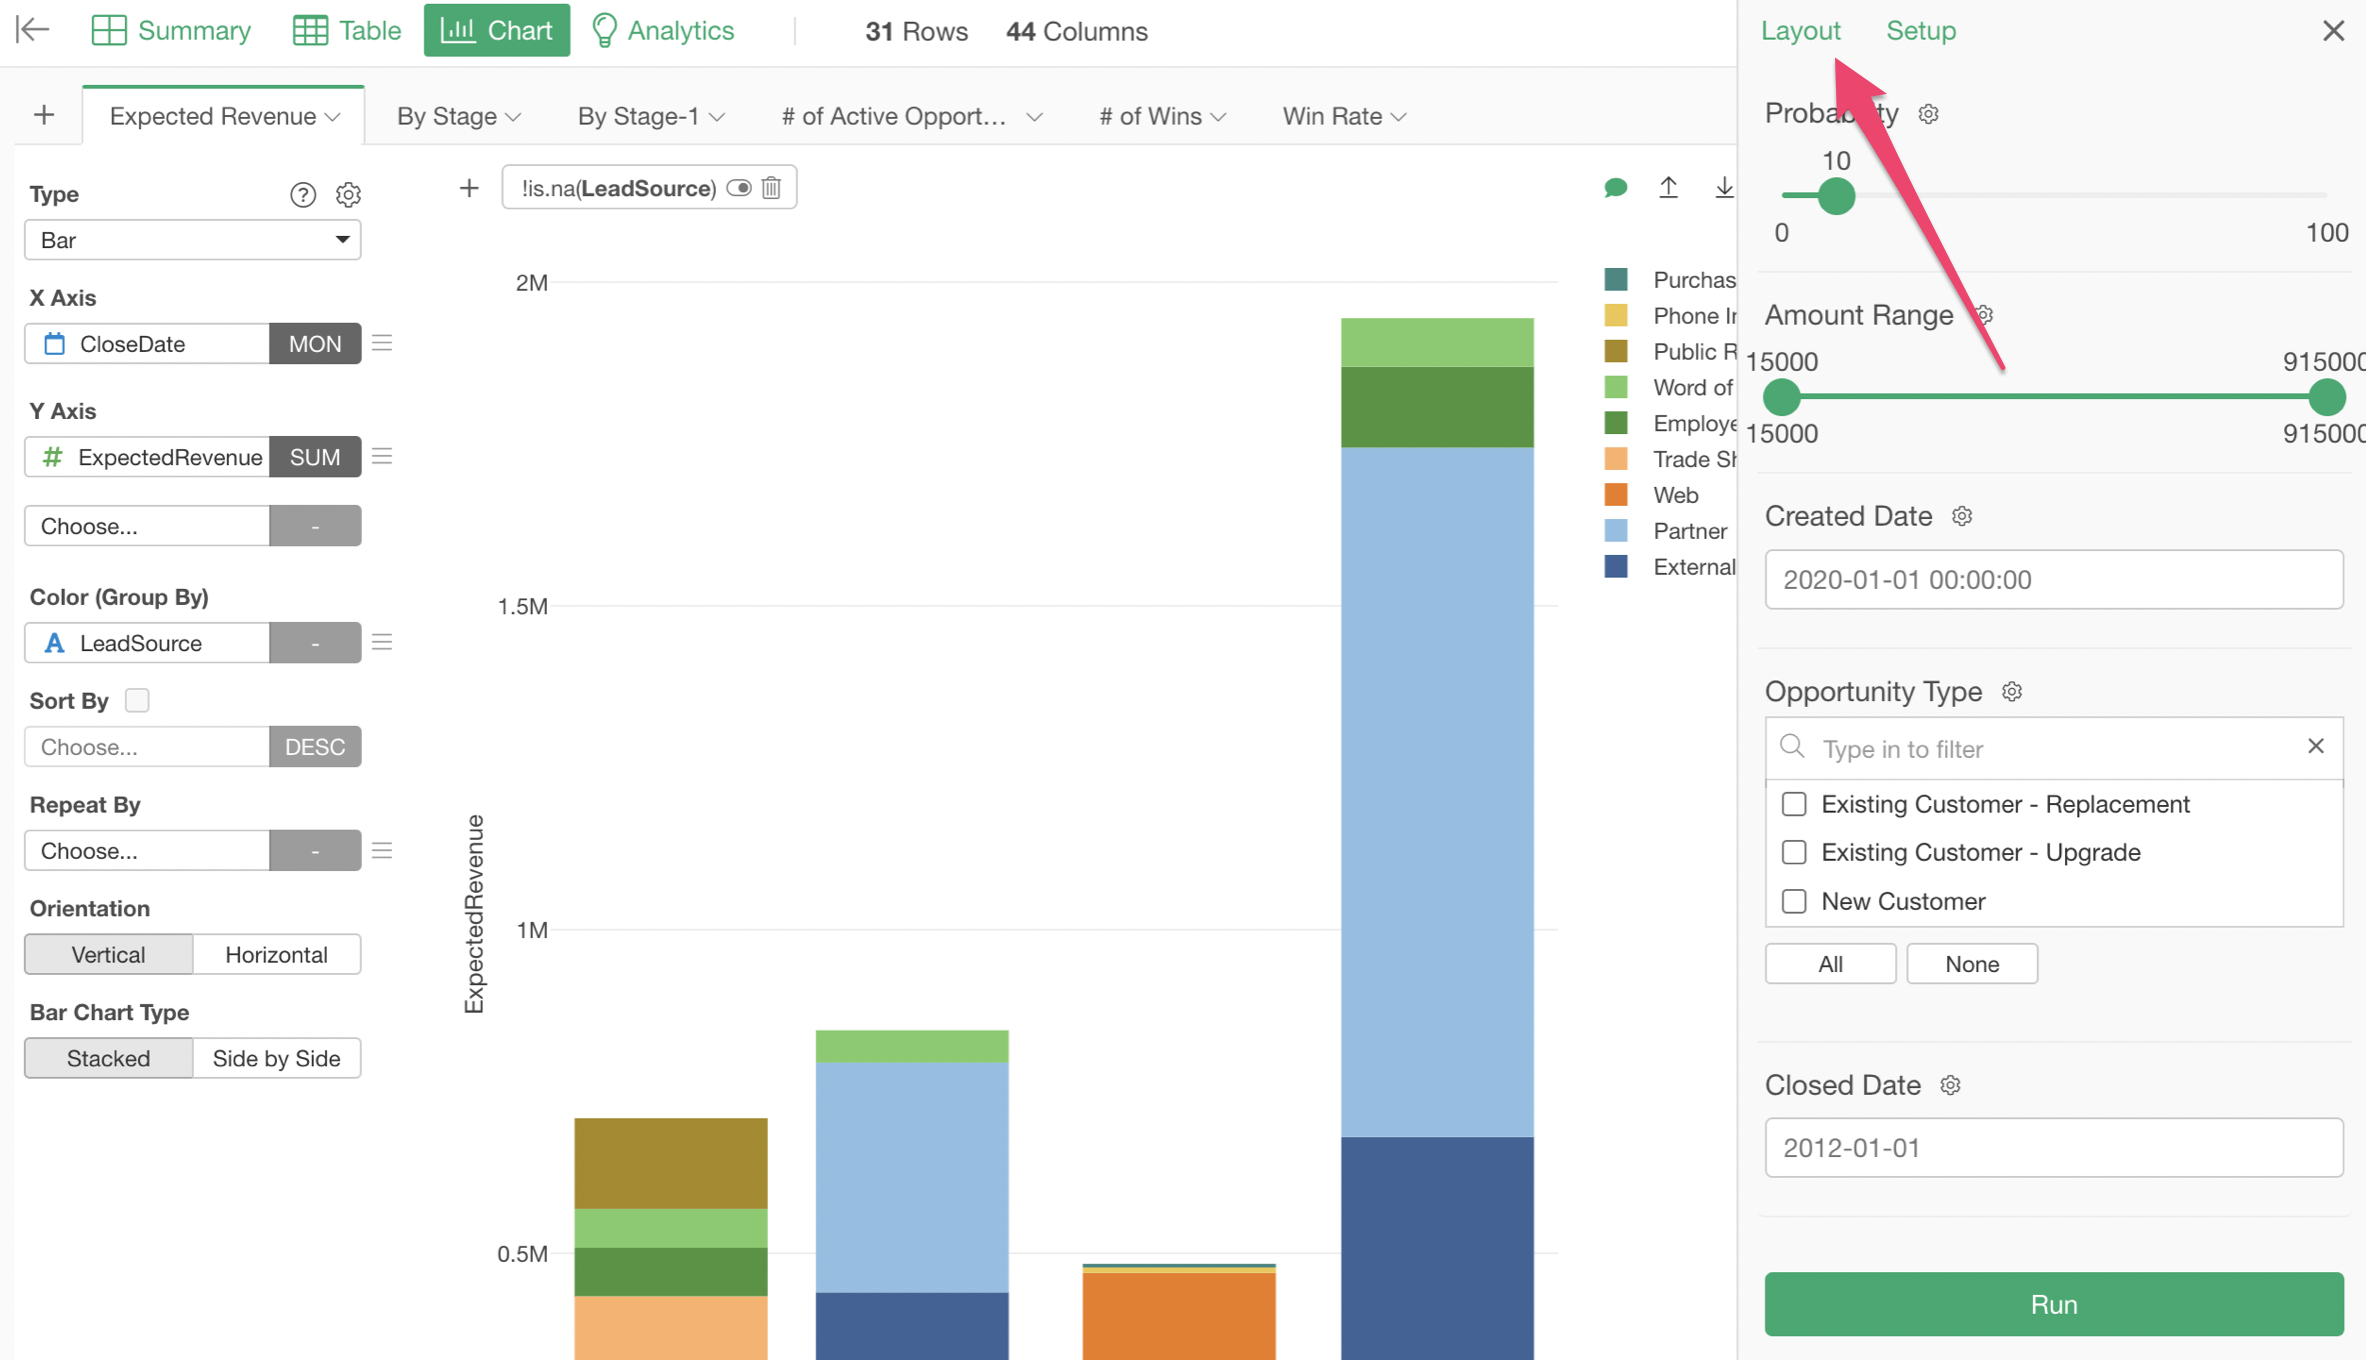
You can drag-and-drop the Parameters to change the display order.
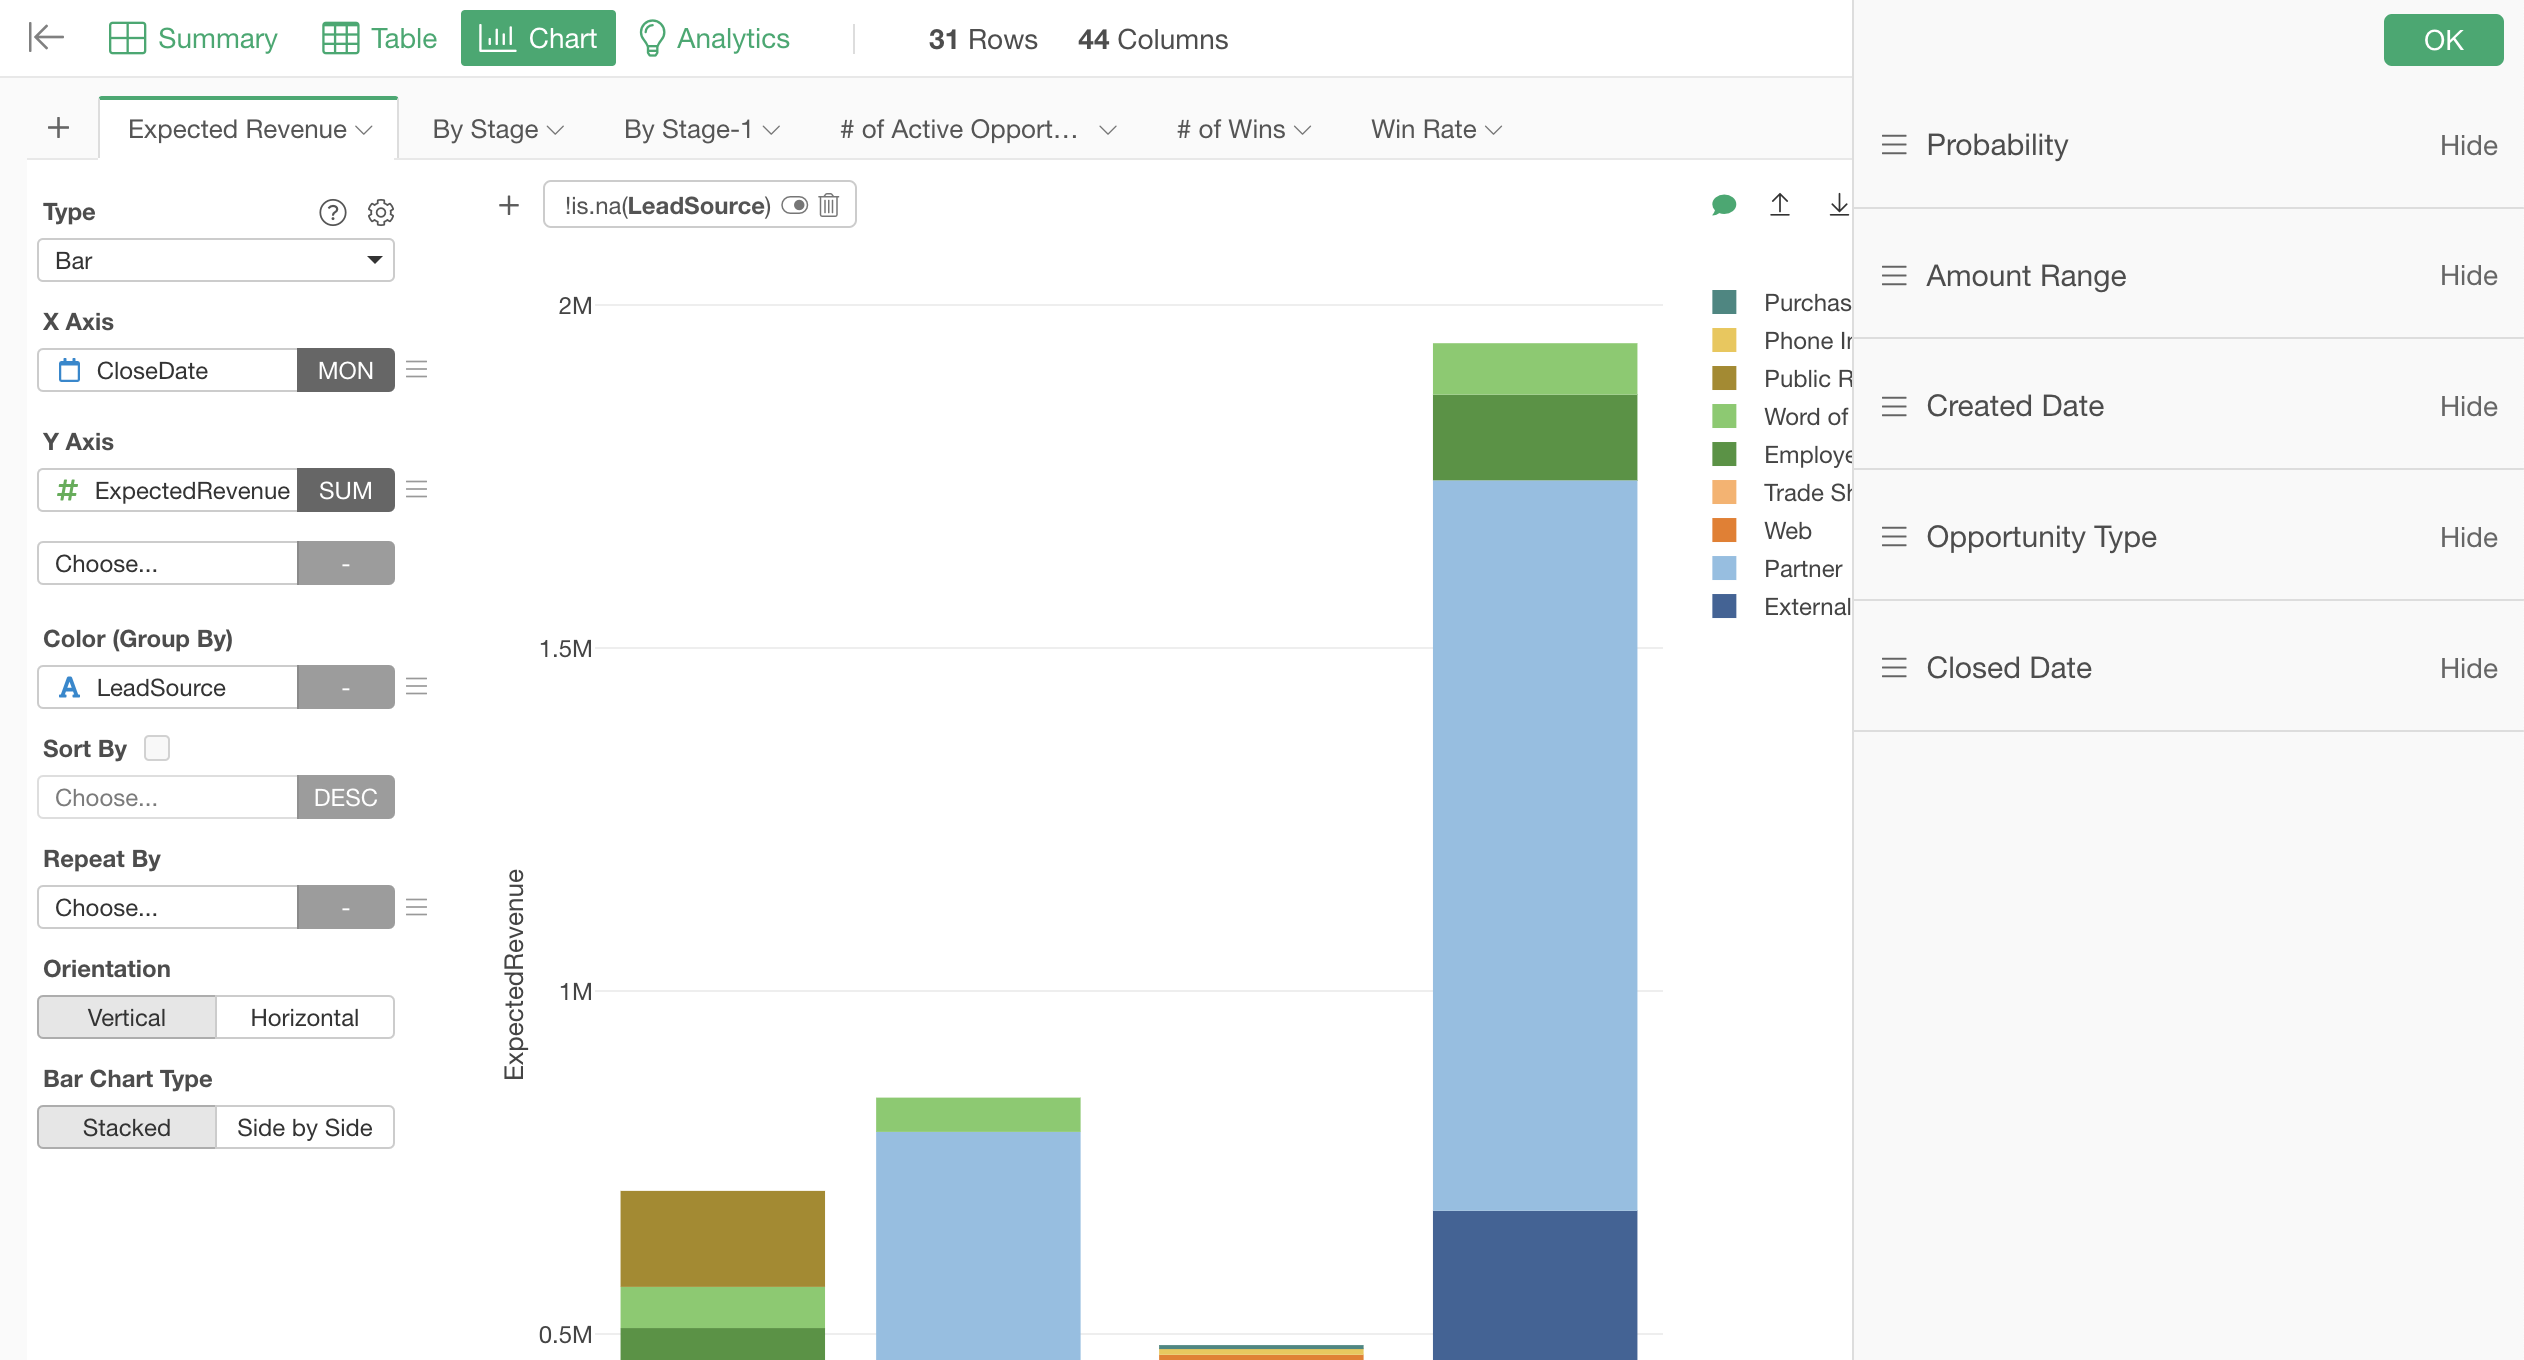
If you have some Parameters that have fixed values and you don’t want to expose them to others then you can click on the Hide button for such Parameters to hide them.
Use Parameter at Exploratory Server
When you publish a Dashboard, Note, Chart, or Data that uses the Parameters it will publish along with the Parameters. This means that you can expect to see the same set of the Parameters inside the web browser when you open the published page.
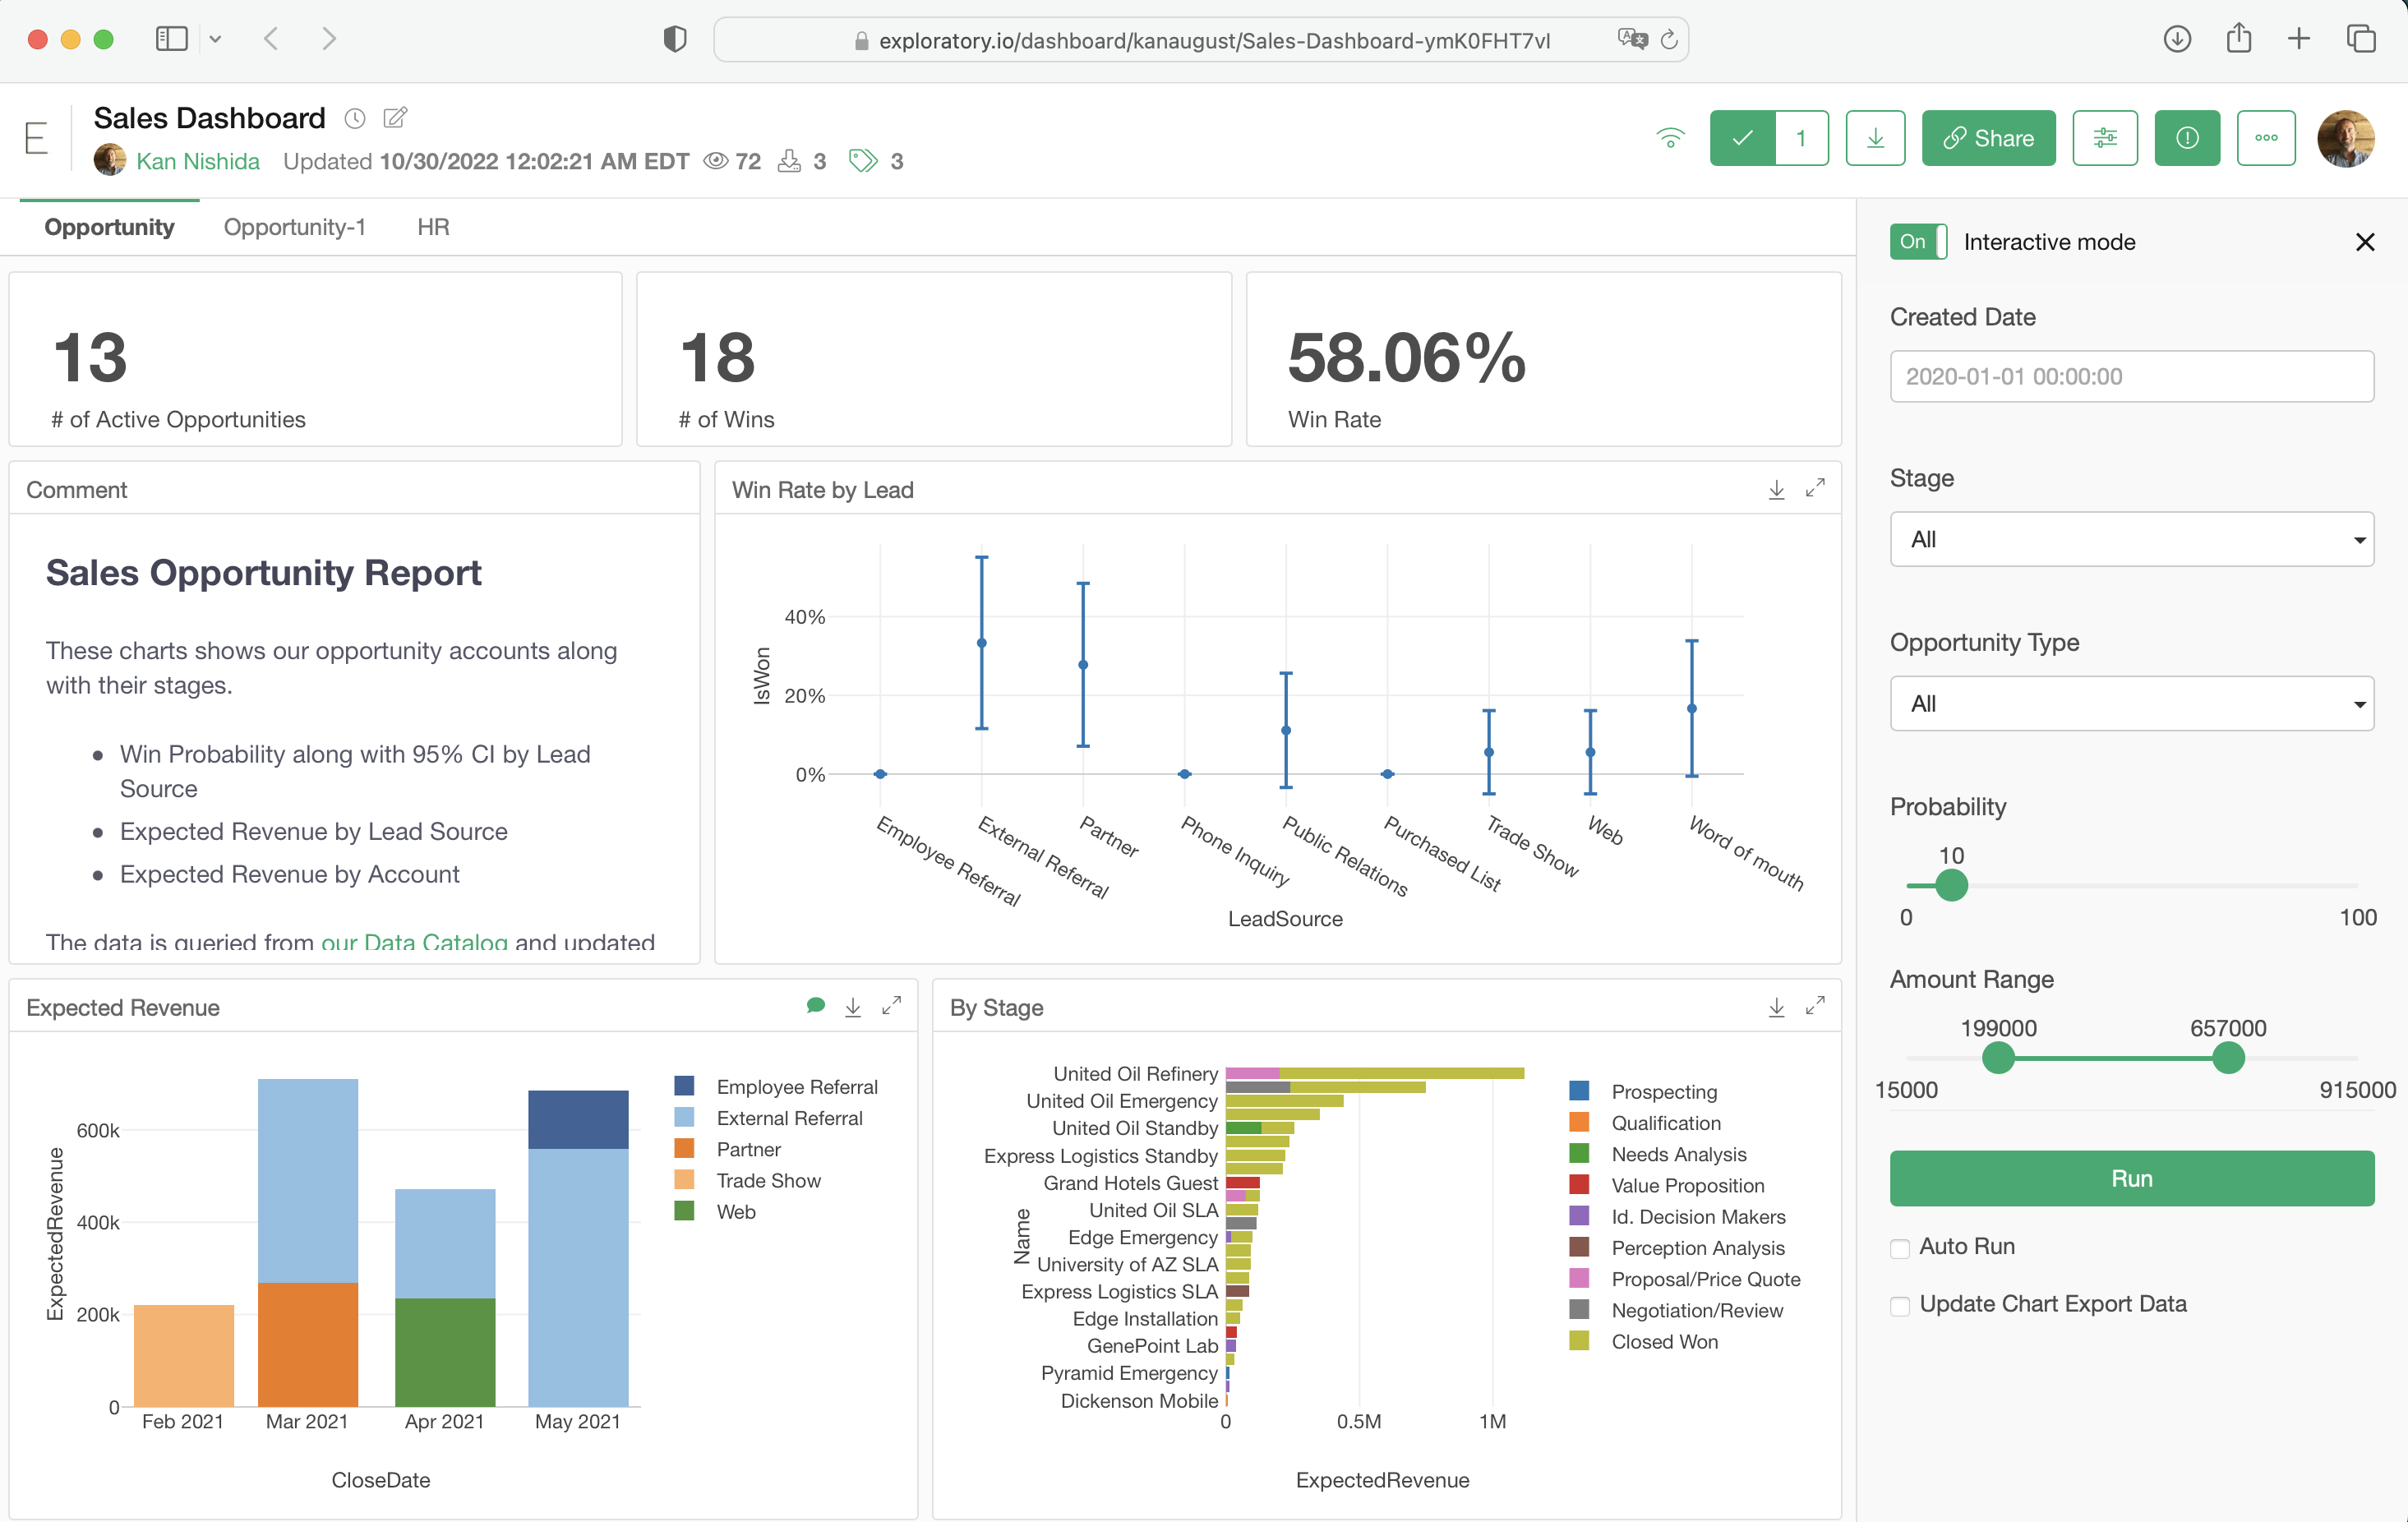
You want to click on the ‘Interactive Mode’ button to enable the Parameter interaction first.
How to Create Cascading Parameters?
Cascading Parameters let you create dynamic, dependent filters—so when you select a value in a “parent” parameter (like Product Category), the available options in its “child” parameter (like Product Subcategory) automatically update based on that selection.
This makes it much easier to work with related datasets interactively on dashboards.
Learn how to set them up step-by-step in our guide:
- How to Create Cascading Parameters - Link